3-8 Lexmark™ E260, E260d, E260dn
4513-200, -220, -230
Diagnostics mode selections
To enter the Diagnostics mode:
1. Turn off the printer.
2. Open the front access door.
3. Turn on the printer while pressing and holding Cancel .
4. Close the front access door once the Error light displays.
Print the menu page by pressing and holding Continue until all of the lights flash. Follow the instructions on
the menu page to access the menu items shown in the table below.
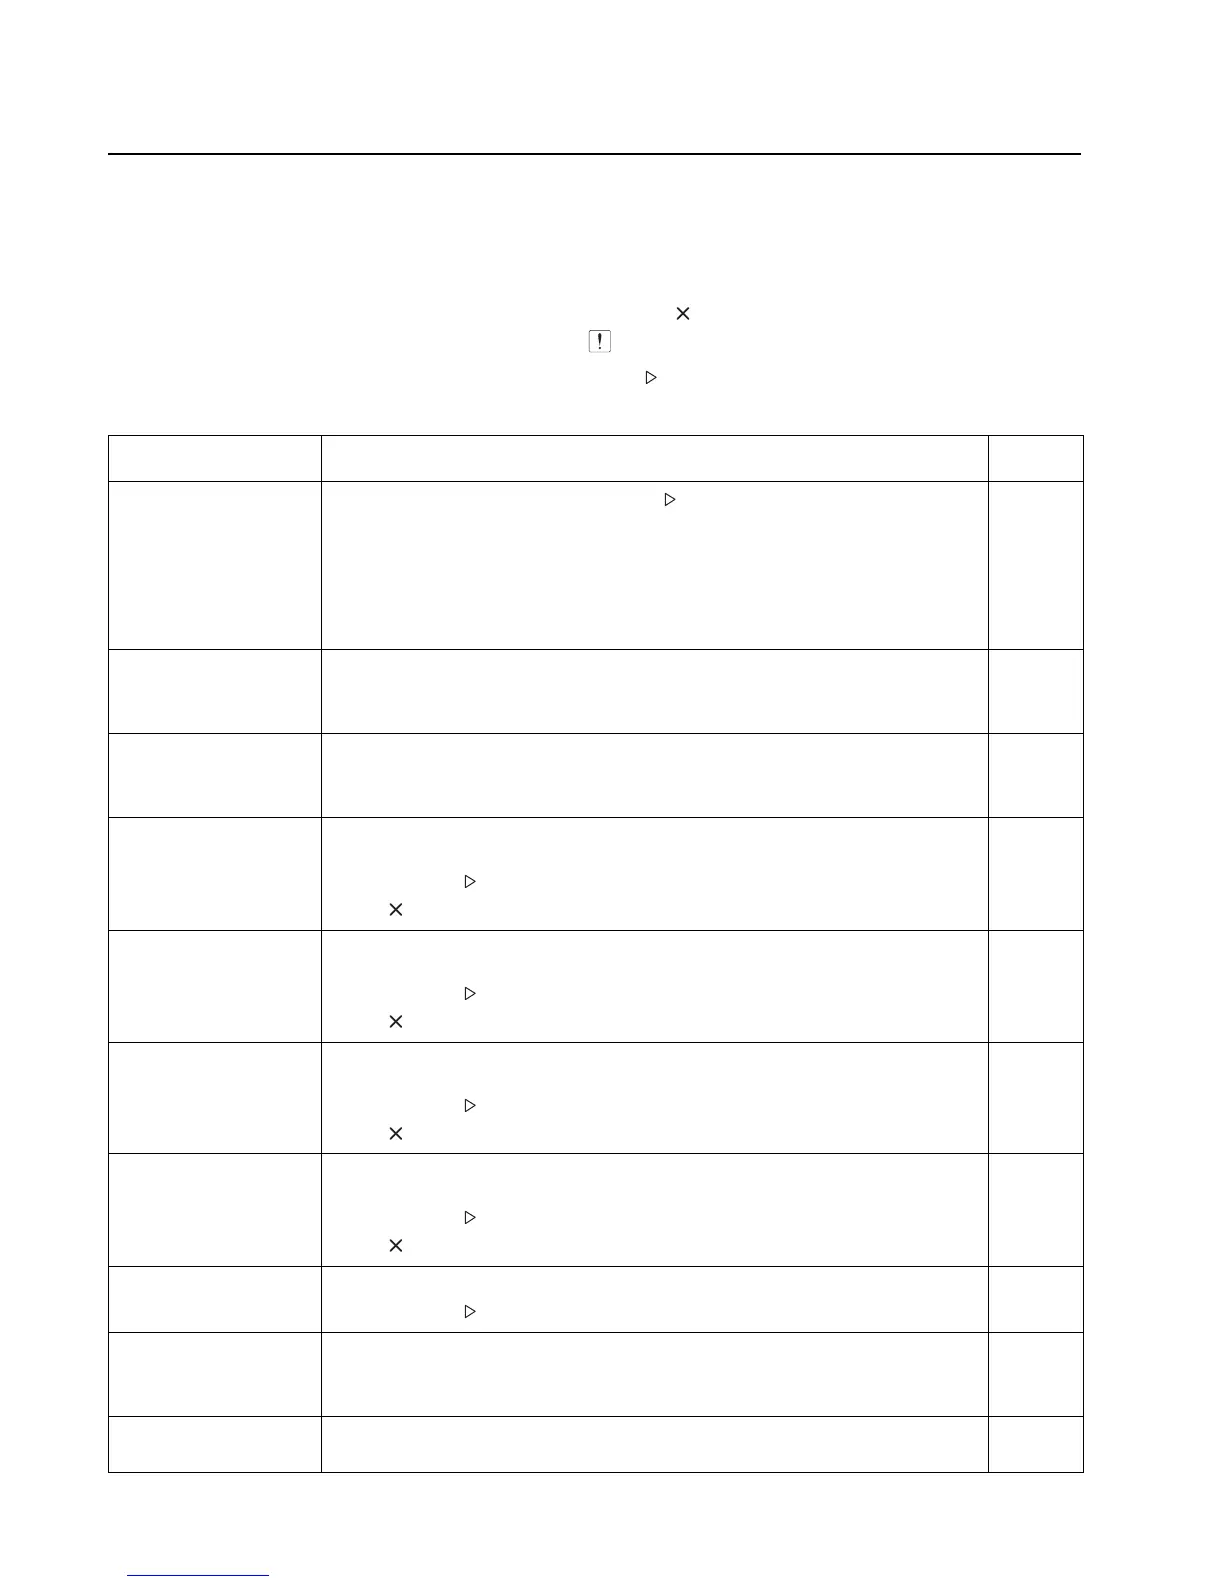
Menu item Use setting to Value
Prt Quality Pgs Print test pages by pressing and holding until the lights flash.
Help isolate print quality problems, such as streaking. Four pages print:
A text page with printer information, cartridge information, current margin settings,
and a graphic.
Three pages all gray, all black, and the last one blank.
Cartridge lockout function is disabled.
None
Edge to Edge Allow a shift of all four margins (top, bottom, right, and left) to the physical edge of
the page (printable area of supported paper).
Setting is ignored by PPDS interpreter.
Off
(default)
On
Defaults Change sizes and designations to metric. U.S.
(default)
Non-U.S.
Cont Prt Simplex Tray 1 Continuously print pages containing cross lines, printer information, and margin
settings.
Press and hold until the lights flash to begin.
Press to stop.
None
Cont Prt Duplex Tray 1 Continuously print pages containing cross lines, printer information, and margin
settings.
Press and hold until the lights flash to begin.
Press to stop.
None
Cont Prt Simplex Tray 2 Continuously print pages containing cross lines, printer information, and margin
settings.
Press and hold until the lights flash to begin.
Press to stop.
None
Cont Prt Duplex Tray 2 Continuously print pages containing cross lines, printer information, and margin
settings.
Press and hold until the lights flash to begin.
Press to stop.
None
Print History Print history of errors.
Press and hold until the lights flash to print.
None
Configuration ID Allow the printer ID to match the label ID after the controller board is replaced. 000101
(default)
000189
Printer alignment Align a new printhead. See “Printhead assembly mechanical adjustment” on
page 3-9 for more information.
None