EasyManuals Logo

Lexmark E450DN - E 450dn B/W Laser Printer User Manual

Lexmark E450DN - E 450dn B/W Laser Printer
158 pages
To Next Page IconTo Next Page
To Previous Page IconTo Previous Page
Page #103 background imageLoading...
Page #103 background image
Repair information 4-15
4512-630
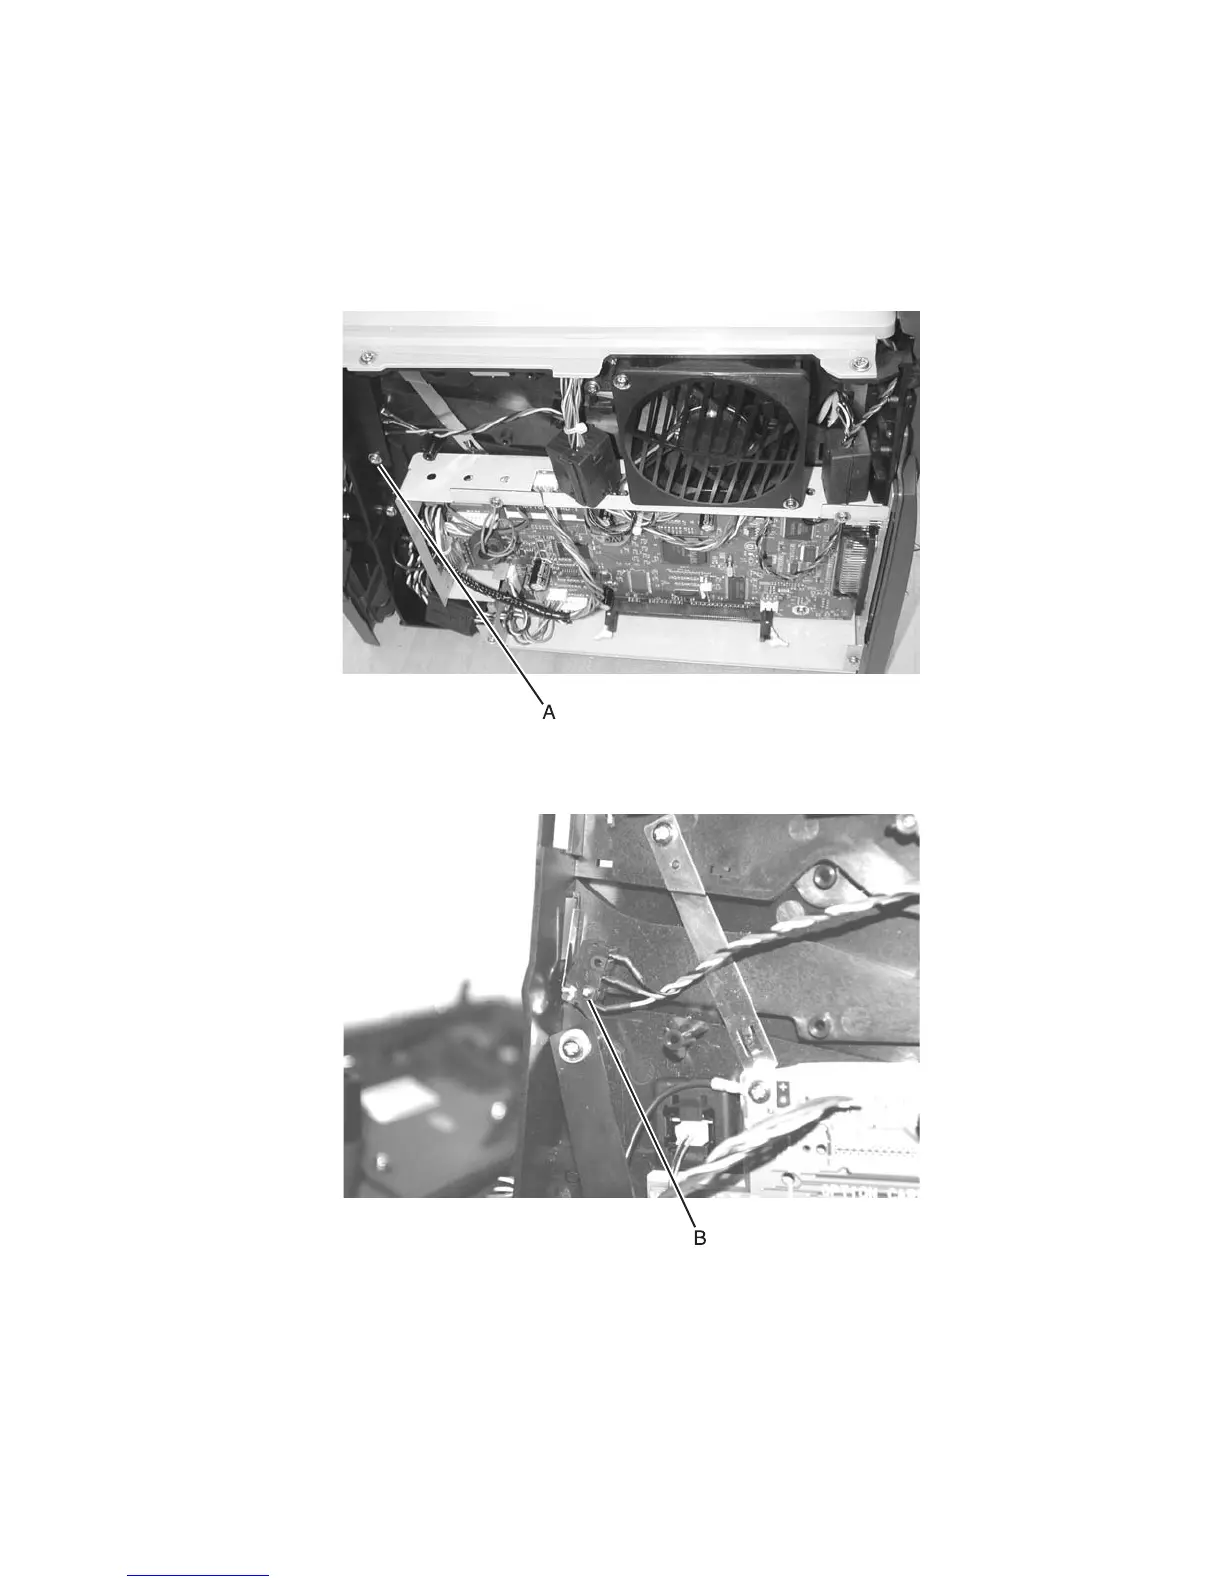
Cover open sensor removal
1.
Remove Tray 1.
2. Open the front cover.
3. Open the right side cover. See steps 1 and 2 of “Right side cover removal” on page 3-5.
4. Remove the controller card cover.
5. Loosen the one screw (A) from the shield that protects the sensor.
6. Disconnect the cable from J6 on the controller card.
Note: The cable has a toroid. Be sure to remove the toroid before removing the cable.
7. Use a small Phillips screwdriver to remove the screw (B) holding the sensor.
8. Remove the sensor.
Reinstallation note:
Be sure to re-route the cable back through its retainer.
Be sure to place the toroid back over the cable.

Table of Contents

Questions and Answers:

Question and Answer IconNeed help?

Do you have a question about the Lexmark E450DN - E 450dn B/W Laser Printer and is the answer not in the manual?

Lexmark E450DN - E 450dn B/W Laser Printer Specifications

General IconGeneral
BrandLexmark
ModelE450DN - E 450dn B/W Laser Printer
CategoryPrinter
LanguageEnglish

Related product manuals