4-22 Lexmark™ E450dn
4512-630
Fuser removal
1.
Remove the left side cover. See “Left side cover removal” on page 4-4.
2. Remove the right side cover. See “Right side cover removal” on page 4-5.
3. Remove the rear cover. See “Rear cover removal” on page 4-6.
4. Loosen the top cover by removing the one rear screw above the reverse solenoid. Release the side
latches, and lift the rear of the top cover.
5. Remove the paper exit guide assembly. The gears of the exit guide must clear the fuser bracket without
touching it. See “Paper exit guide assembly removal” on page 4-37 for more information.
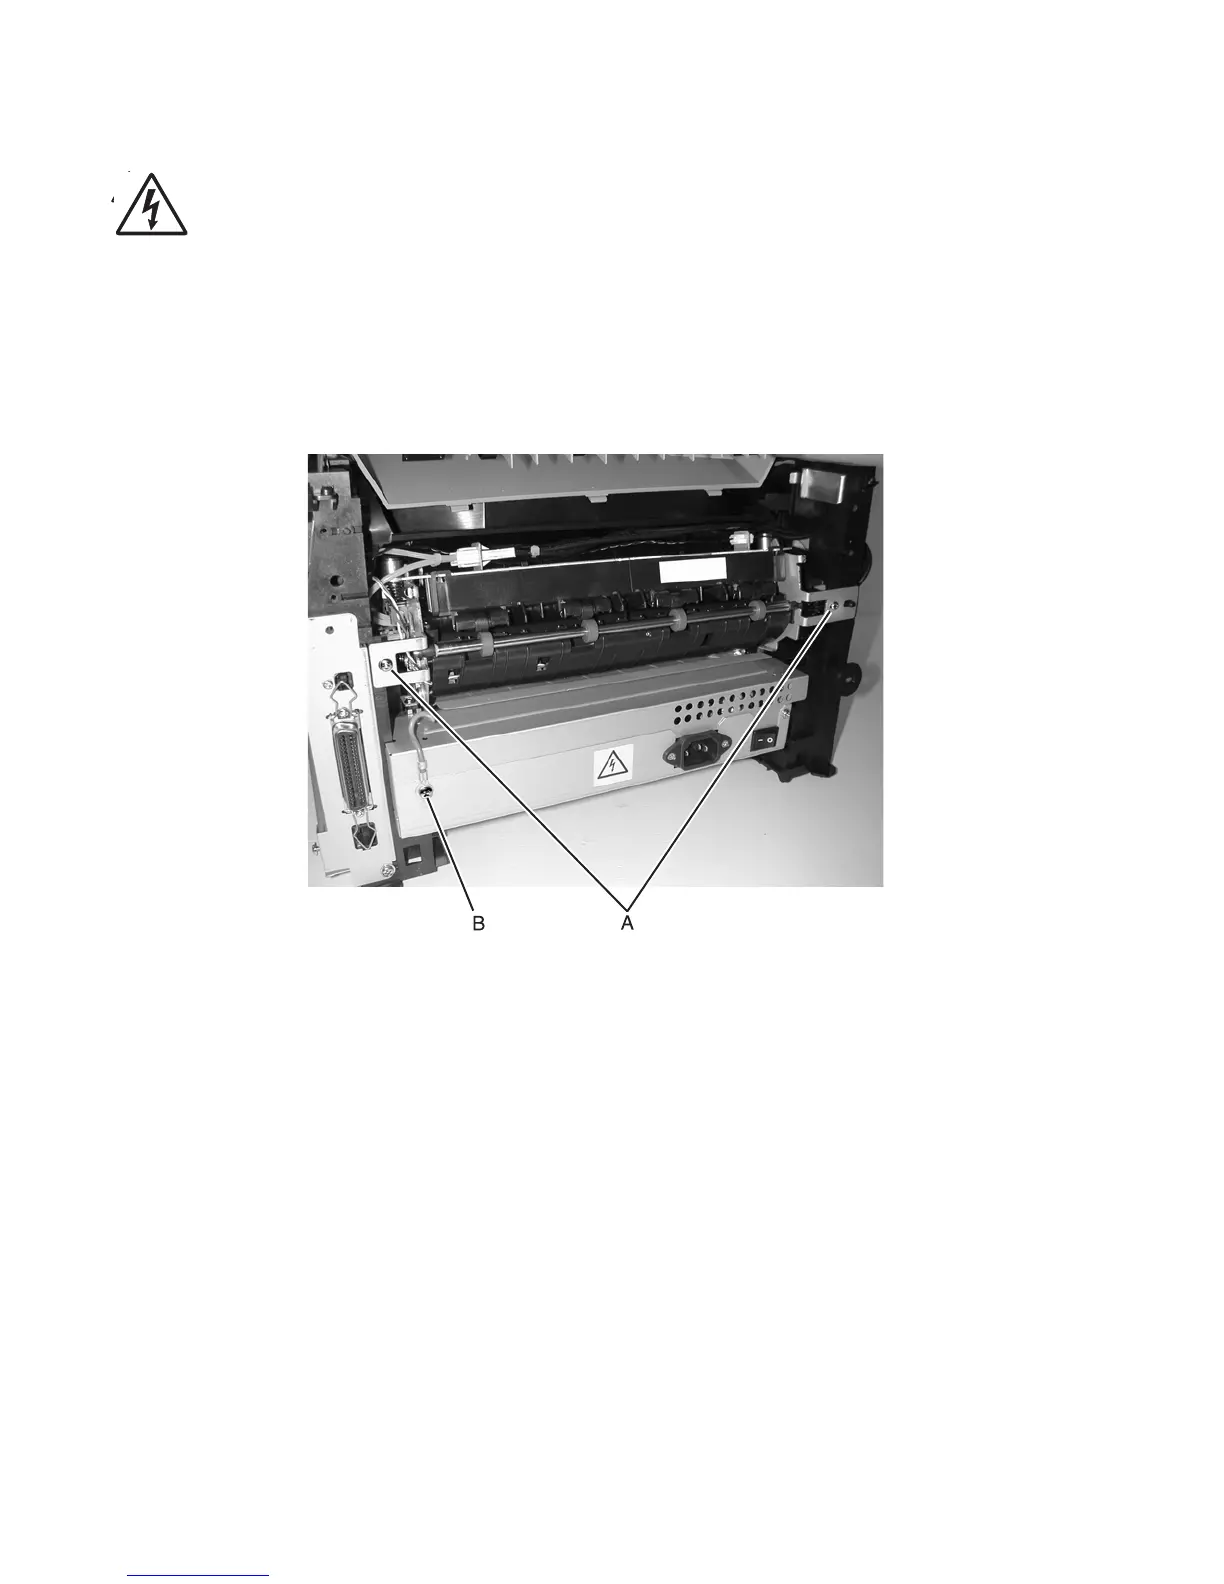
6. Remove the two screws (A) and the one machine screw (B) that secures the ground cable.
7. Disconnect the thermistor cable above the fuser.
8. Remove the controller card cover.
9. Disconnect the exit sensor cable from J11 on the controller card.
10. Disconnect the fuser power cable above the fuser.