LinMot
Configuration Software
User Manual V1.01 5-31
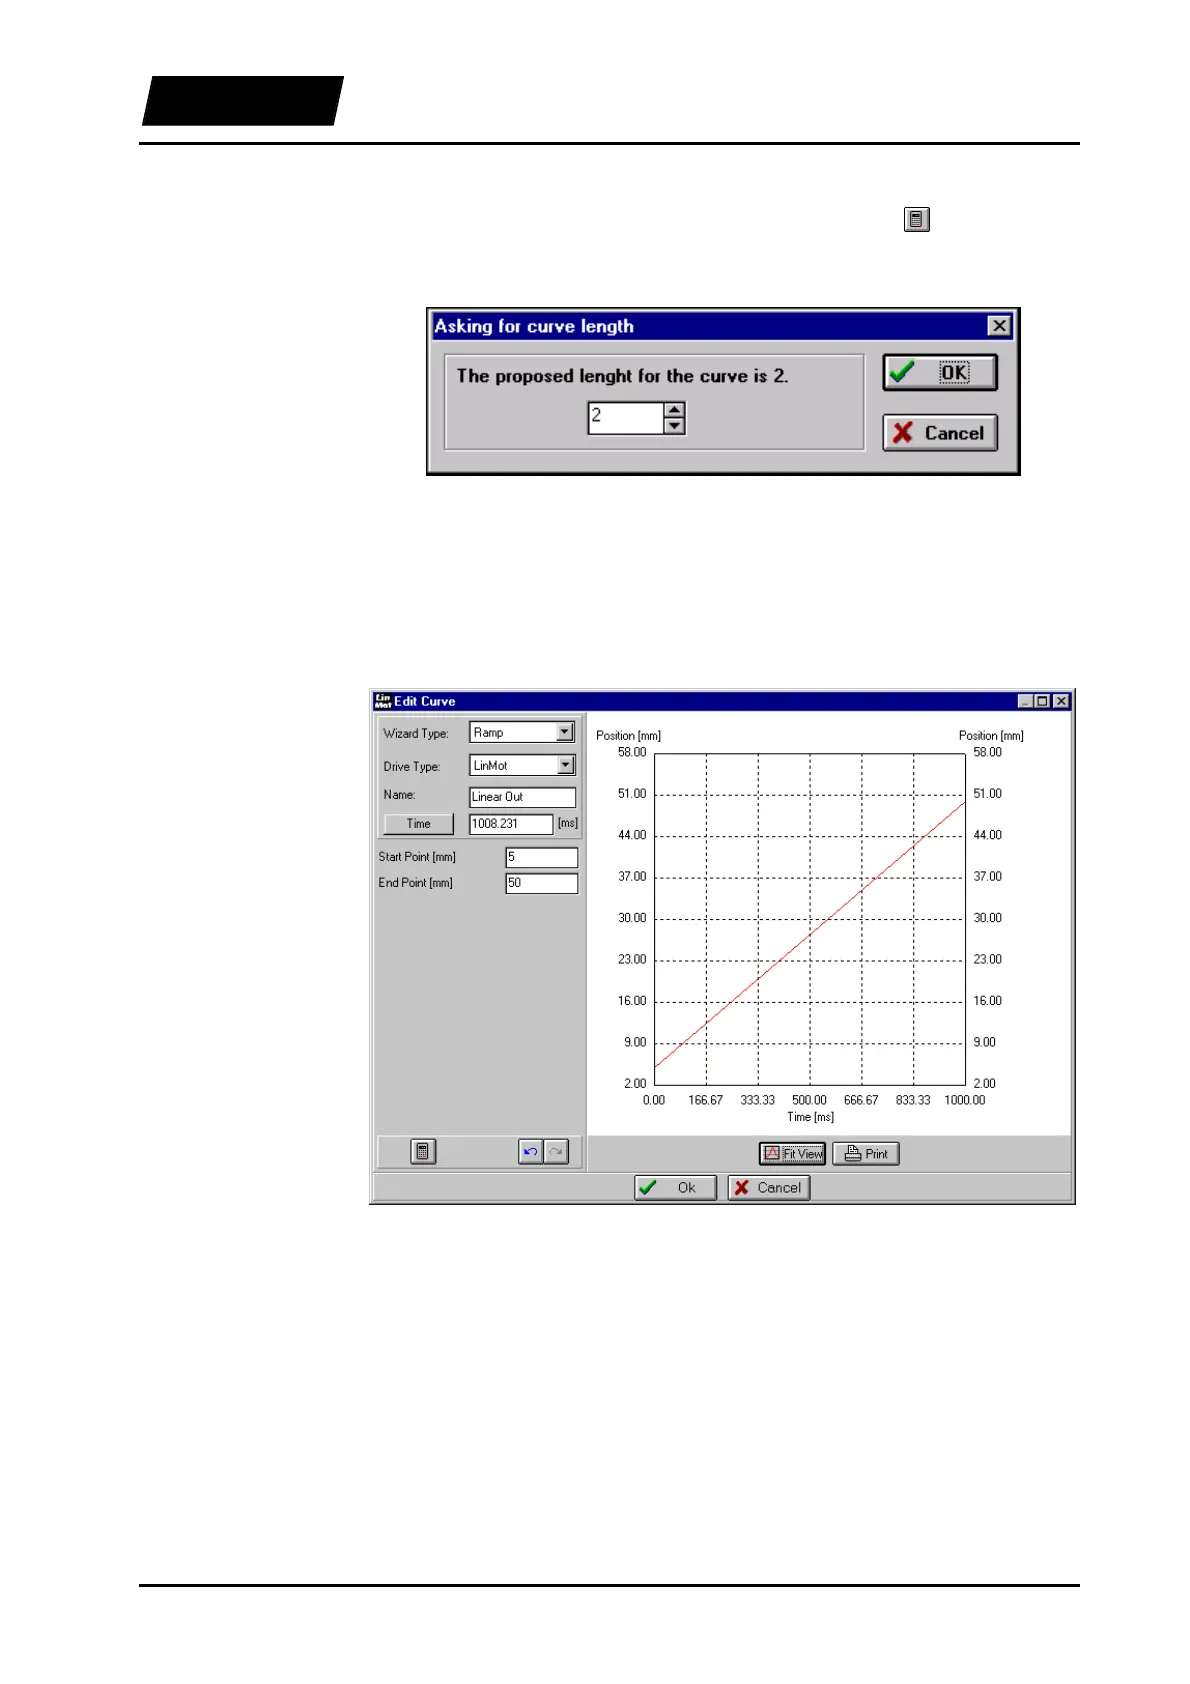
We enter 5 [mm] for the “Start Position” and 50 [mm] for the “End Position”. The curve
is now completely defined and we can click the “Calculate” button
.
The following dialog box appears:
Figure 5-23: Dialog box for the number of points
The number of points can be increased at this stage in case the accuracy of the “Time”
entry is insufficient for the application. We make do with two points and click on the
“OK” button.
The defined curve should look like this:
Figure 5-24: "Linear Out" curve
With the “OK” button we close the Curve Editor and see the curve “Linear Out” in the
curve window of the Curve Inspector.