74
5 Operation
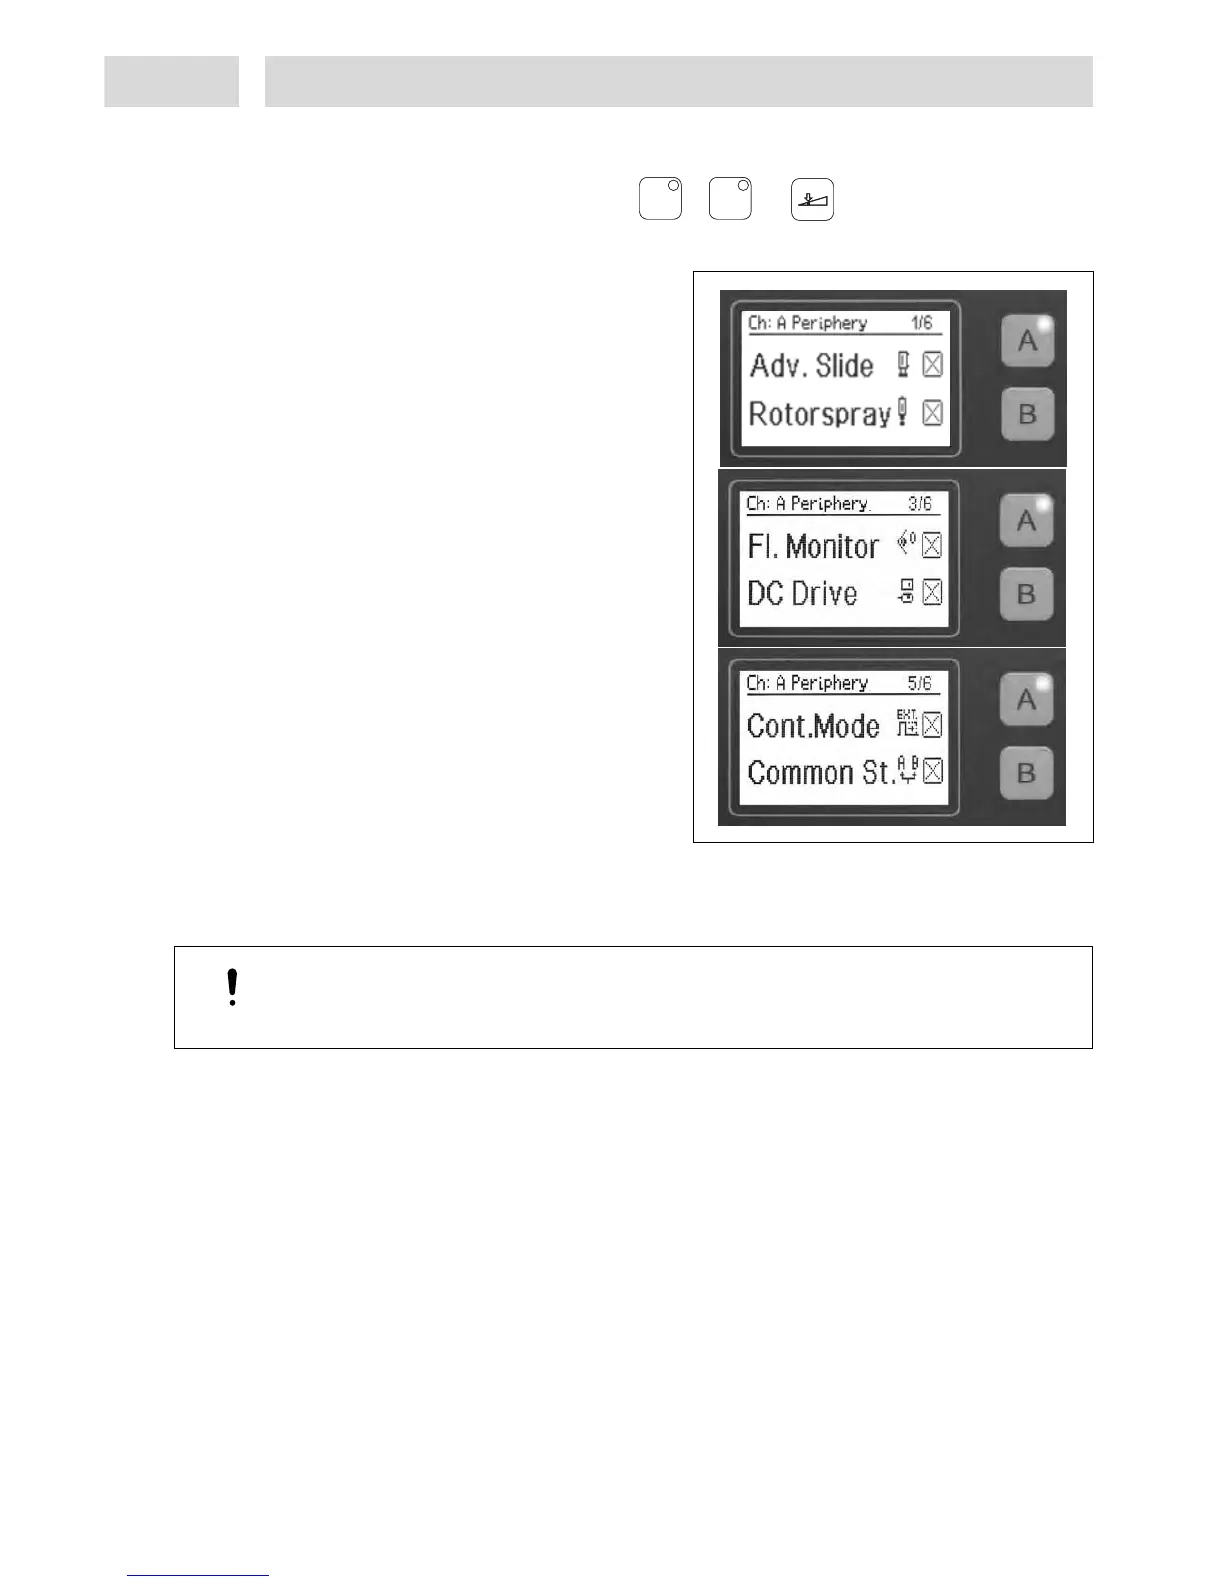
5.4 Menu "Dispense channel setup"
This menu is activated by pressing the keys or and .
If the menu is activated without preselecting a channel, Channel A will be automatically switched
to active mode. Setup options are the same for both channels.
This is the menu where dispense channels A
and B can be configured.
The channel keys for dispense channels A and
B are defined as switches. The relevant keys
are used to switch the peripherals and
functions On () or Off (X).
Any unit that has been connected to the
system but has not been activated will not be
actuated.
Activation options per dispense channel:
– 1 advancing slide (double acting), with 2
proximity switches for end position
detection.
– 1 electric rotor unit 97115 or 97144
– 1 Online Flow Monitor.
For applications requiring monitoring of
Channel B, the flow monitor can be
connected to connector XS 3 using splitter
cable 97529/order no. 945063.
– 1 DC motor
– Function “Continuous Mode“ for external
actuation of a dispense channel. The start
signal must be present as long as dispensing
is to continue.
– Common start of both dispense channels with one start signal (internal or external). This
function can only be activated in the channel system menu for channel B; the menu for channel
A will only display the function. May also be activated as “Continuous Mode“.
Caution!
Different dispense, pre-delay and post-delay times will result in different dispense cycle
durations.
AA
BB