81
5 Operation
5.11 Programming of Online Flow Monitor
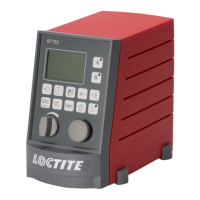
The integrated flow monitoring function of controller 97152 is used for monitoring the quality of
adhesive applied to the parts. This means that the flow monitor detects and evaluates the
following dispensing malfunctions:
– Air bubbles in the dispensing system
– Pressure changes in the dispensing system
– Lost or clogged dispense needle
– Touch-down of dispense needle on the part.
The pressure based flow monitor measures the dispense pressure profile via a sensor and saves
this value. As a rule, the sensor is integrated in the dispense valve. The duration of measurement
corresponds to the duration of dispensing. In time controlled mode, the controller compares the
pressure profile that has been measured to a previously stored reference measurement, based on
3 different factors:
– Integral of pressure profile (equals the amount of product dispensed)
– Length of envelope curve for the pressure profile
– Maximum dispensing value (measured curve) to detect pressure peaks.
In continuous mode, only the pressure level during the dispensing step is compared to the
reference limit.
The calorimetric system is similar with respect to system integration and signal processing but is
based on a different measuring method. A miniaturized heating element placed in the product
flow gets slightly heated, and the temperature difference in the flowing product is analyzed. This
system is recommended in particular for flow monitoring of miniature dispensed amounts and
low pressure settings, irrespective of delivery pressure, product viscosity and dispense needle
diameter. The signal strength delivered by the pressure based method is too low for such
applications and cannot be reliably processed.
As long as the measured values are within a pre-defined tolerance range, the dispense cycle is
found to be OK, and the "Ready" signal is delivered to the controller. If the deviation is outside
the tolerance range, this dispense cycle is recognized and signaled as an error. It will also be
supplied as a fault signal to connector XS 10. The fault signal must be reset.
The system measures the previous dispense cycle and compares it to a reference measurement
which was stored previously and found to be OK. Tolerance can be fine adjusted within the range
from 10 to 400 % to determine the optimum between a false alarm and a reliable error
recognition. By setting a tolerance value the user specifies the degree of accuracy to be
maintained between any one measurement and the reference value. Air bubbles, clogged needles
or a needle touchdown may have a very strong effect on the envelope curve length. Therefore this
is generally the governing parameter for dispense monitoring.
All dispense curves are displayed in a window with x=120 pts. (points).
In time controlled mode, complete measurement curves are recorded automatically and
independent of the length of dispense time. If the time of measurement is to be significantly
longer than the time of dispensing, e.g. for visual inspection, the measuring time can be extended
by an adjustable factor (1-10).
In continuous mode, the complete dispensing step is measured and analyzed, but it is possible
that the measurement curve is not displayed completely. Only the first 1.2 s to 12 s after the start
of measurement are displayed. The length of measurement curve indication is dependent on the
selected factor. As the length of dispensing is not fixed in continuous mode, it may be impossible
to display the complete measurement curve if dispense processes are very long.
If several reference measurements are recorded in succession while the system is in time
controlled mode, the controller averages 8 measurements to get optimum reference values. For
this purpose, the tolerances for each reading are adjusted automatically for optimum results. This
is why 8 reference measurements should always be recorded.
Exception: Only one reference measurement can be made when the system is in continuous
mode.
