40
make sure there is enough room behind the unit to attach the power,
transducer and GPS antenna/receiver module cables. (A drawing on the
next page shows the dimensions of a gimbal-mounted unit.)
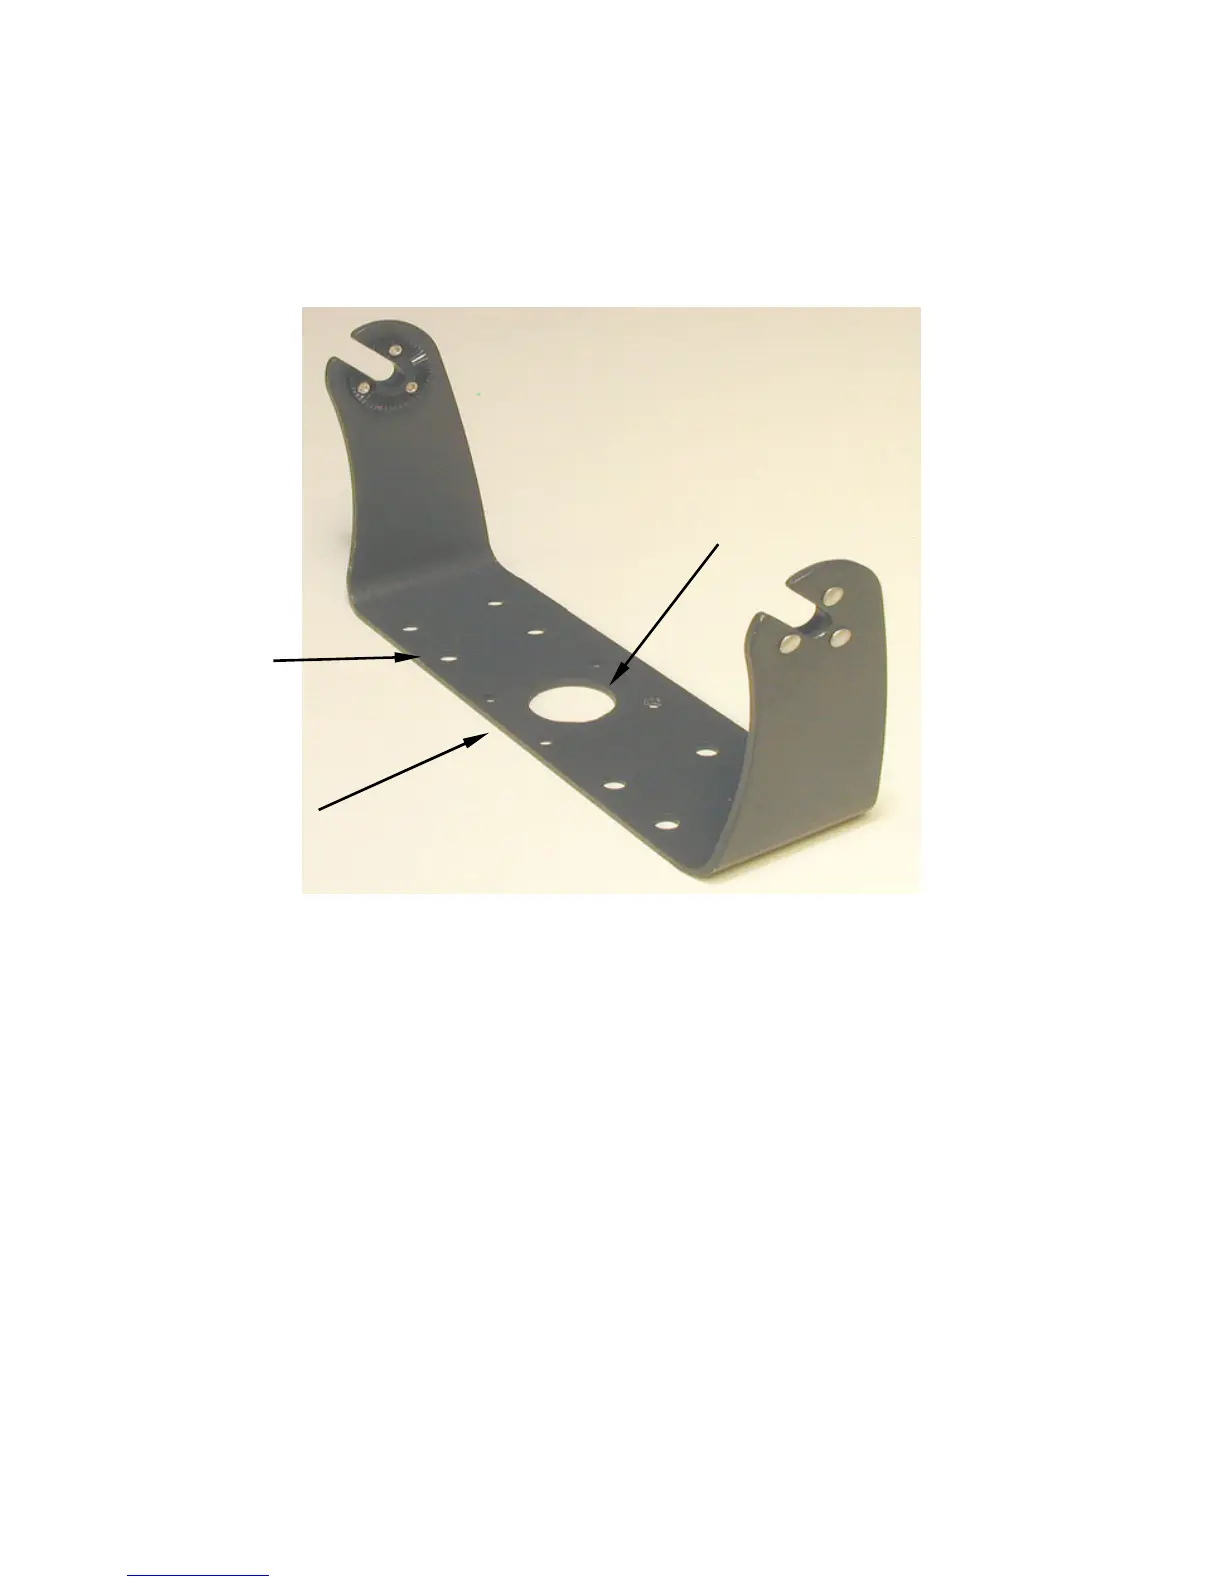
Holes in the bracket's base allow wood screw or through-bolt mounting.
You may need to place a piece of plywood on the backside of thin fiberglass
panels to reinforce the panel and secure the mounting hardware.
Install the gimbal bracket. Place the bracket so the arms slope toward the
front of your unit.
Once a location is determined, use the bracket as a template and mark the
mounting holes and the hole for the cables. Drill a 1-inch (25.4 mm) hole in
the dash for the power, transducer and antenna cables. Screw the bracket
to the mounting surface.
Front
Screw
mounting
hole
Cable hole
 Loading...