MAINTENANCE PROCEDURES
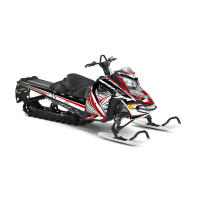
2. Unscrew tensioner lock nut several
turns.
mmr2009-085-002_a
1. Tensioner adjustment screw
2. Lock nut
3. Seal washer
3. Unscrew tensioner adjustment
screw a few turns.
4. Pull seal washer back.
5. Clean adjustment screw threads if
necessary.
NOTICE
Adjustment screw
threads must be clean to obtain an
accurate adjustment.
6. Tighten tensioner adjustment
screw by hand.
NOTE: Turn adjustment screw until
resistance is strong enough that it can
not be turned by hand.
7. Hold tensioner adjustment
screw and tighten lock
nut to 36 N•m ± 3 N•m
(27lbf•ft± 2lbf•ft).
8. Install muffler.
Drive Belt
Drive Belt Inspection
Inspect drive belt for cracks, fraying
or abnormal wear (uneven wear, wear
on one side, missing cogs, cracked
fabric). If a bnormal wea r is noted,
probable cause could be pulley mis-
alignment, excessive RPM with frozen
track, fast starts without warm-up pe-
riod, burred or rusty sheave, oil on drive
belt or distorted spare drive belt. Con-
tact a n authorized Lynx dealer.
Drive Be lt Replacement
Drive Belt Removal
1. Remove tether cord cap from en-
gine cut-off switch.
2. Remove drive belt guard, refer to
CONTROLS, INSTRUMENTS AND
EQUIPMENT
.
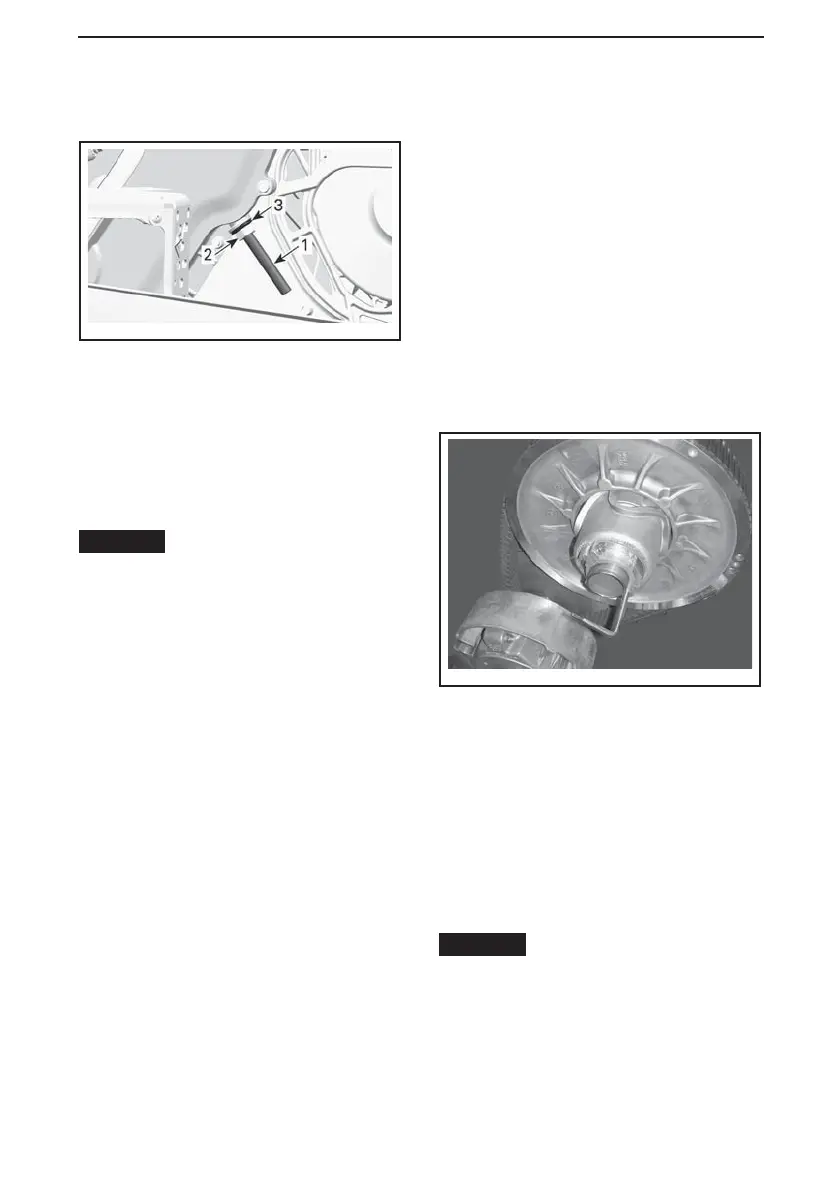
3. Insert the driven pulley expander
provided in the tool kit in the
threaded hole on the adjuster hub
as shown.
mmo2012-005-980
PULLEY EXPANDER INSTALLED ON
ADJUSTER HUB
4. Open the driv en pulley by screwing
the tool in.
5. Remove the belt b y slipping it over
the top of the driven pulley, then
over the drive pulley.
Drive Belt Installation
1. Slip the drive belt over the drive pul-
ley, then over the driven pulley.
NOTICE
Do not force or use tools
to pry the drive belt into place, as
this could c ut or break the cords in
the drive belt.
______________
111
 Loading...