MAINTENANCE PROCEDURES
FICATIONS
at the end of this guide. If
the track tension is too loose, track will
have a tendency to thump.
mmr2009-133-003_b
DEFLECTION SETTING
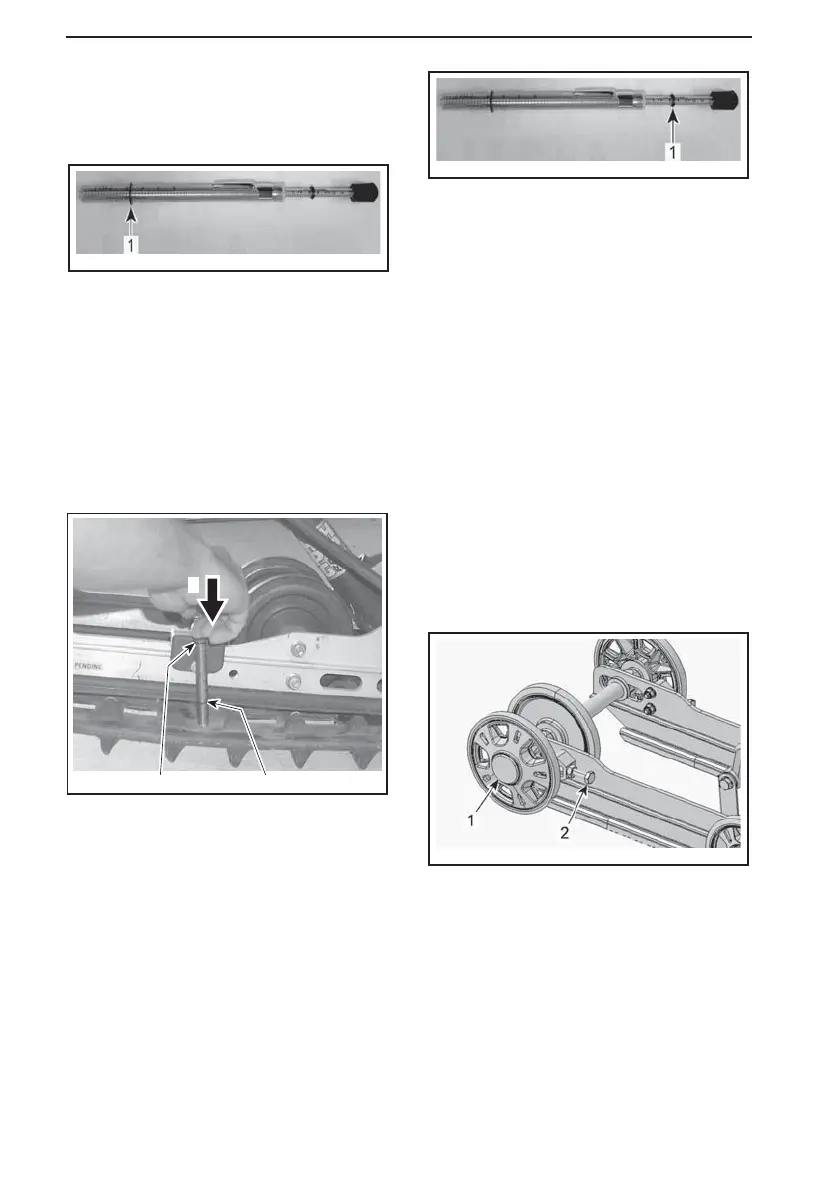
1. Bo ttom O-ring set to specification
6. Place upper O-ring to 0 kgf (0 lbf).
7. Position the tensiometer on track,
halfway between front and rear idler
wheels.
8. Push the tensiometer downwards
until bottom O-ring (deflection set
earlier) be aligned with the bottom
of slider shoe.
3
A32F39A
2
1
TYPICAL
1. Top tool O-ring positioned at 7.3
kg (16 lb)
2. P ush on top portion of tool until it contacts
the to p O-ring
3. Measured track deflection (See
specifications section to find your
model track deflection)
9. Read load recorded by the upper
O-ring on the tensiometer.
mmr2009-133-003_a
LOAD READING
1. U pper O-ring
10. Load reading must be as per the
following table / see
SPECIFICA-
TIONS
at the end of this guide.
11. If load reading is not in accordance
with the specification, adjust track
tension. Refer to
TRACK TEN-
SION ADJUSTM ENT
.
Track Tension Adjustment
1. Remove tether cord cap from en-
gine cut-off switch.
2. Remove rear wheel caps (if so
equipped).
3. Loosen the rear idler wheel retain-
ing screws.
4. Tighten or loosen both adjustment
screws to increase or decrease
track tension.
fmo2015-004-006_a
ADVENTURE LX
1. RH rear wheel cap
2. RH adjustment screw
116
______________
 Loading...