1
2
3
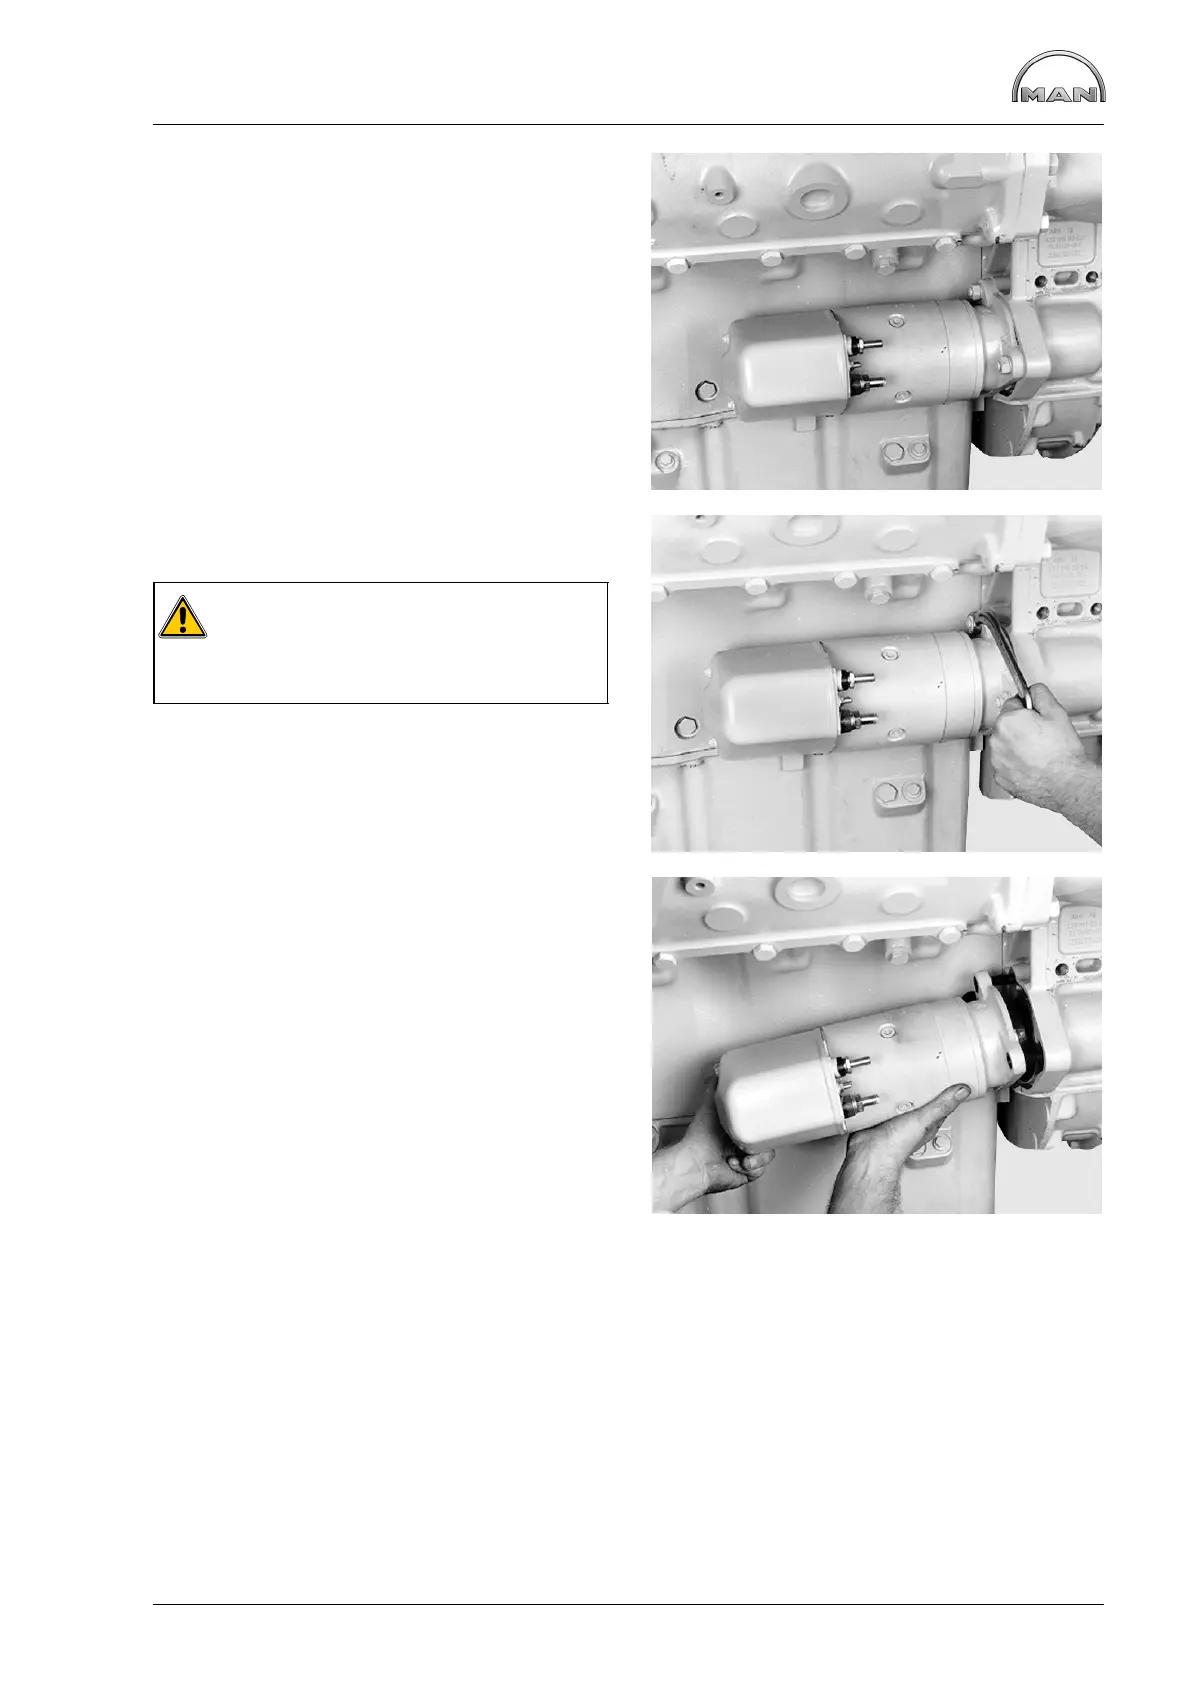
Removing and installing starter motor
133
Fig. 1
Disconnect the negative lead from the battery or, if
fitted, switch off the battery master switch.
Disconnect the connecting cable at terminal 31
(negative terminal, thick cable), connecting cable
at terminal 30 (positive terminal, thick cable) and at
terminal 50 from the starter motor.
Fig. 2
Remove mounting nuts.
Caution:
An angle spanner is an advantage for
accessing the inner screws (see illustra-
tion).
Fig. 3
Remove the starter motor.
Check the starter pinion for wear and whether it
can move freely. If necessary, clean piston using a
brush dipped in fuel and regrease it.
Check the flywheel ring gear for wear and damage.
Turn over engine by hand once, paying particular attention to the positions at which the engine finally stops;
i. e. when the engine is switched off it always stops in certain positions.
The starter pinion engages in these positions when the engine is started.
Replacing the starter ring gear, see page 78.
The starter motor is installed in reverse order to its removal; when doing so, connect the cables correctly
and tighten the bolts as specified.
Connect the battery or turn on the battery master switch.
Check the function of the starter motor after installation.
 Loading...