NetPerformer Hardware Installation Guide
4-20 Memotec Inc.
TIP: The unit can be more easily mounted if support screws are installed halfway
just below
the bottom of the unit's final resting position in the rack. The mounting
brackets now have a place to rest during the installation process.
6. Once the unit is in position, tighten all the rack mounting screws.
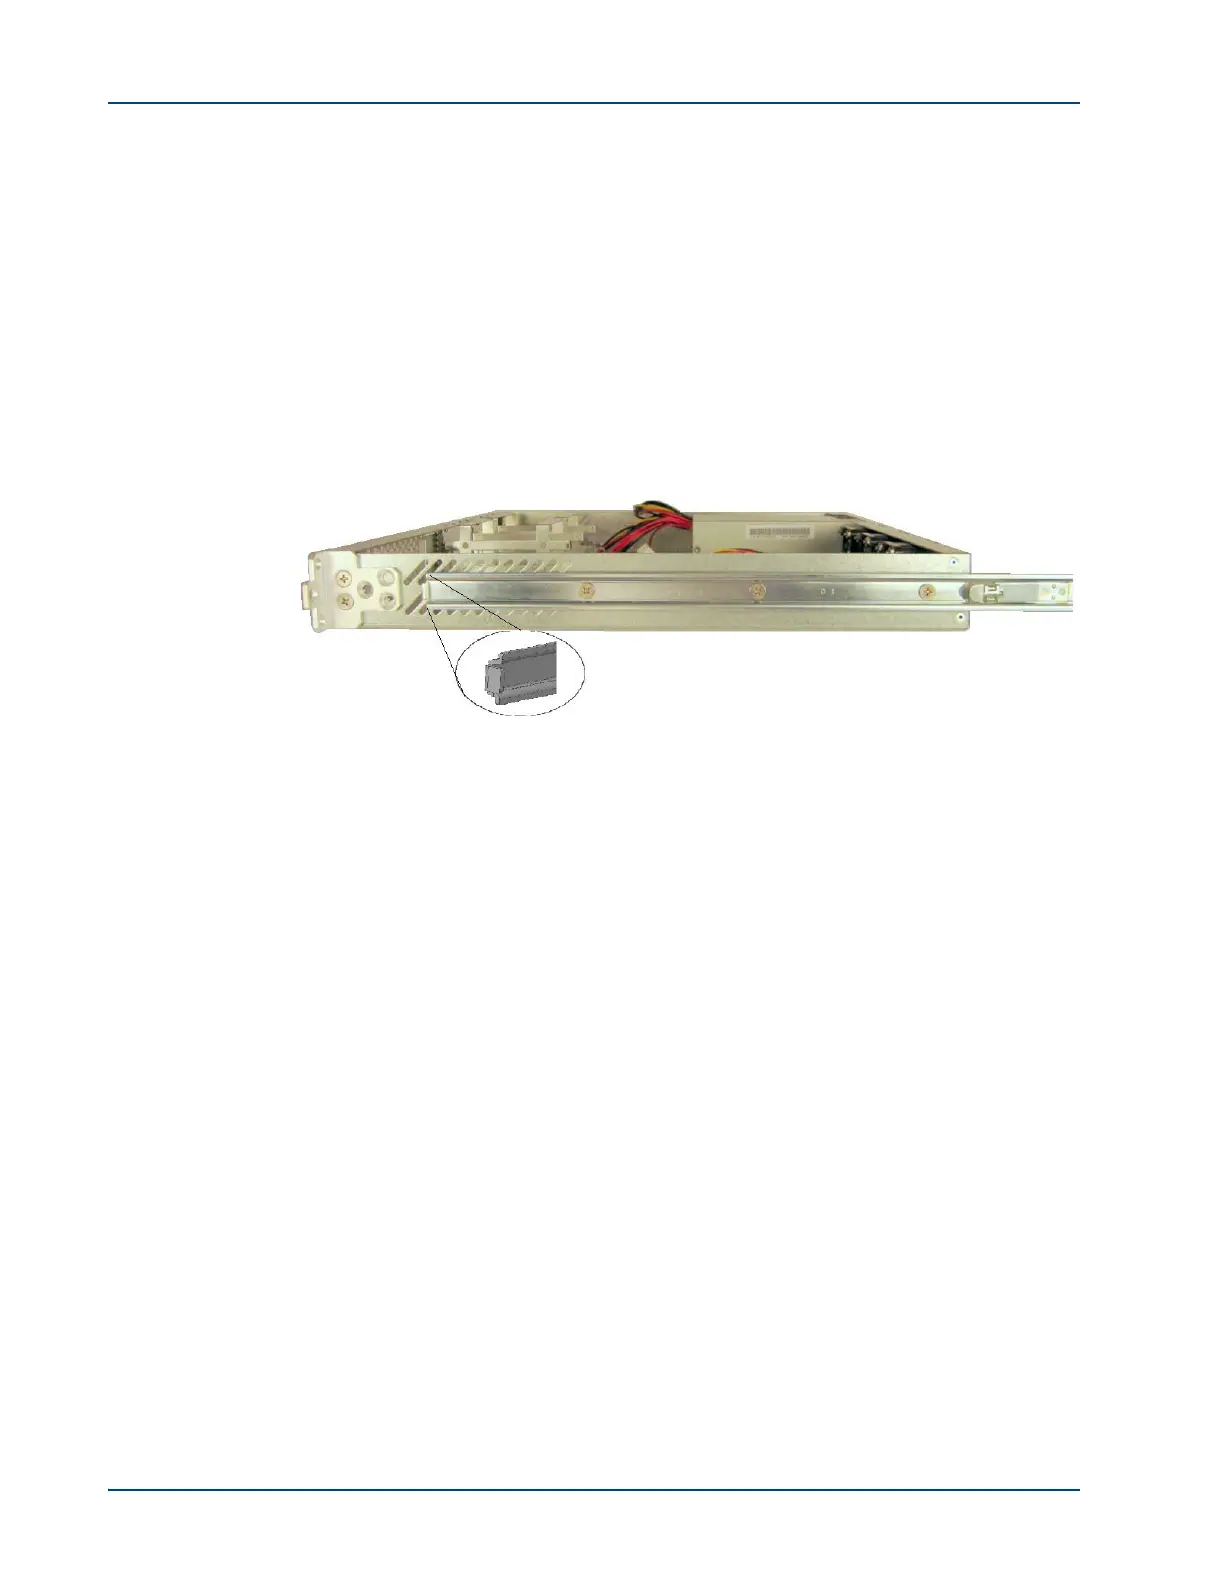
► To install the inner rails, do as follows:
1. Take the rails (Ordering part number: PP-0020642) from the box, and take them apart
to extract the inner rail.
2. Attach to the right side of the device, as seen in the image below. Place the inner rail
as in the image and secure with three screws.
3. Repeat for the left side.
Figure 4-14: Side View of Rails
► To install the outer rails, do as follows:
1. Take the right side outer rail and front/rear bracket from the box.
2. Attach the rear bracket to the rear side of the outer rail flat side, with provided screws.
Do not righten the screws as it will have to be adjusted to the correct rack size.
3. Attach the front bracket to the front side of the outer rail flat side, with provided
screws.
4. Insert the outer rail inside the rack, adjusting the rear bracket if needed. When done,
tighten the rear bracket screws.
5. Secure the front and rear of the right side outer rail to the rack.
6. Repeat for the left side outer rail.
► To slide the device into the rack, do as follows:
1. Make sure inner and outer rails are firmly in place.
2. Align the inner rails on the unit with outer rails on the rack.
3. Slide the device into the rails, pushing evenly on each side, until you hear a ‘click’
from the locking mechanism.
4. Secure the front bracket to the rack, to prevent the unit from sliding out.