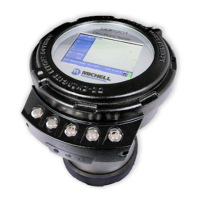
CDP301 Dew-Point Tester User’s Manual
Michell Instruments 31
SYSTEM START-UP
4 SYSTEM START-UP AND MEASUREMENT PROCEDURE
This procedure must be carried out on initial start-up and at any time following service
or maintenance periods.
Proceed as follows:
1. Check all CDP301 gas inlet and outlet connections for leak tightness
2. Ensure pressure and ow is at zero
3. Switch on the CDP301
4. Adjust sample pressure to required values
5. Set sample ow – 0.5Nl/m (0.03 Nm3/hr)
6. CDP301 is now ready to use
4.1 Taking a measurement
The actual detailed process of taking a dew-point measurement using the CDP301
will vary depending on local regulations and conditions such as weather, temperature,
sample tapping location and many others. The following is a basic method of carrying
out a measurement and assumes that the CDP301 Dew-Point Tester:
• Is properly mounted and secured
• Is correctly connected to the sample tapping point and vent lines
• Has enough battery charge for the length of time required for the
measurements to be taken. A full charge will last up to 8 hours.
Tips:
Set the display to an adequate brightness for the conditions. For instance, a display
brightness setting of around 30% is suitable for indoor use under internal lighting.
If the expected dew-point temperature is known, set the start temperature to about
10°C (18°F) warmer than the expected dew point. If it isn’t known, set this temperature
to the ambient temperature.
Method for Dew-Point determination:
1. Set the instrument to Manual Mode and Dew-Point type (HCdp or Wdp) in
the Measurement Conguration screen.
2. Set the mirror to cleaning temperature and leave for 2 minutes (or until
the mirror is clean).
3. Set the mirror to start temperature and wait until stabilized.
4. If using a comparison mode (recommendations are split screen for HCdp
or live-ref for Wdp) take a reference image (see Section 3.2.4.4, Display
Modes).
5. In manual mode set the step size to 5°C (9°F).