VetPro DC Installation/Service Manual, 00-02-1606, Revision R01
35
Installing VetPro DC X-ray to Midmark Chase (8010 & 8011) Unit
Figure 19
Control Unit – Two
Stud Mount
All support, adjusting, and mounting bolts of the Midmark Chase Unit must be
securely fastened before attaching the VetPro DC X-ray. The Midmark Chase
Unit and mounting hardware for the VetPro DC X-ray must withstand a 45.4 kg
(100 lb.) shear load and a 182 kg (400 lb.) withdrawal force at each of the
mounting bolts. The Chase Unit fabrication and attachments to the building
structure must be capable of withstanding a load moment of 118 kg-m (850 lb-
ft).
The Chase Unit must be properly leveled and fastened to prevent drifting
of the VetPro DC X-ray Articulating Arm and Tubehead.
Review the following VetPro DC X-ray Installation and Service Manual
Procedures before continuing;
•
•
•
Checking System Functions
•
Optional Installation Procedures
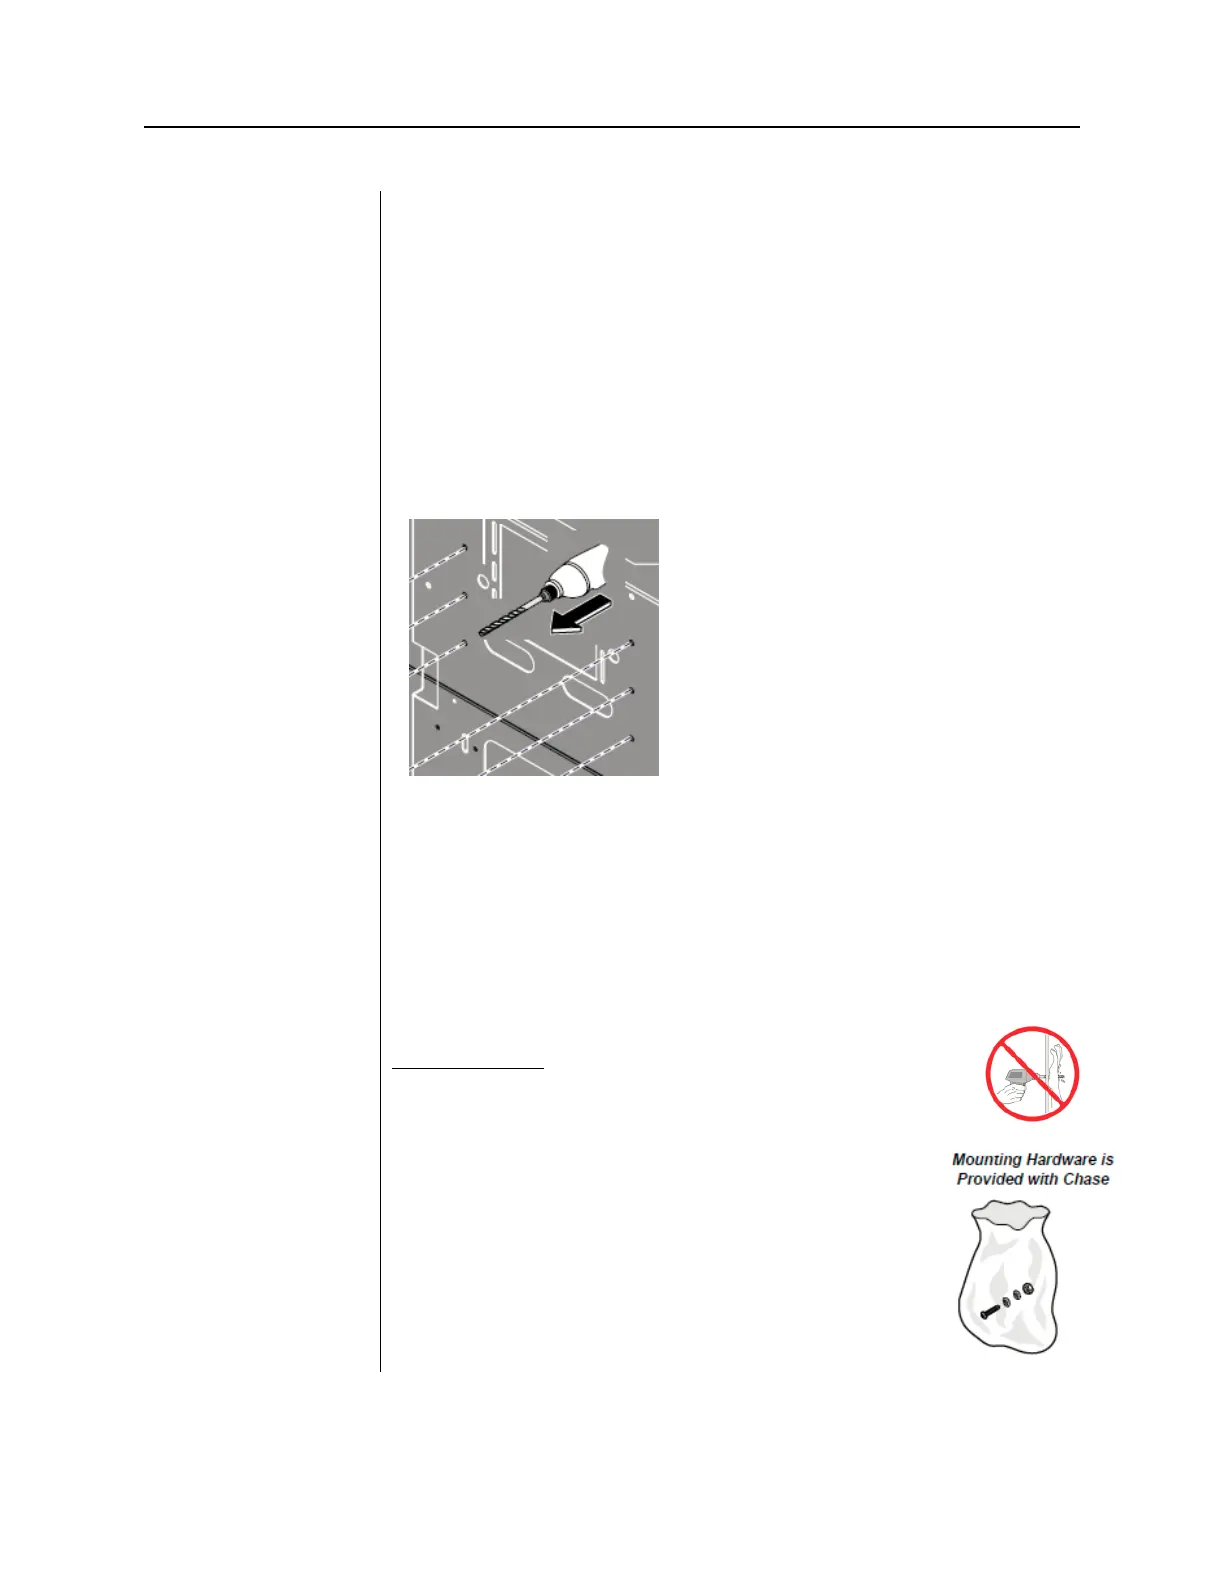
Using the Midmark Chase Installation Manual [003-2443-00] locate the six
predrilled mounting holes in the sheet metal inner frame assembly of the Chase
Unit. These predrilled mounting holes can be found on both the fixed and
removable sides of the Chase Unit. Once the predrilled mounting holes have
been determined use a 13/32’’ drill bit to finish drilling the mounting hole through
the wooden panel of the Chase Unit.
Keep hands clear from front Wooden panels
while drilling mounting holes or serious injury could occur.
Included with the Midmark Chase is a Hardware Mounting
Kit specific for mounting the Two Stud Wall Plate (PN: 30-
A2042) to the Midmark Chase Unit. The contents of the
mounting hardware kit are:
Quantity: 6, 3/8”-16 x 1-3/4 Hex Head Bolts
Quantity: 6, 3/8” type “A” Plain Washers
Quantity: 6, 3/8”-16 Hex Flange “Whiz Lock” Nuts