18 TS571W Installation Instructions
!
● Disconnect the operator arm from
the gate bracket.
● While supporting the operator,
swing the gate and operator to the
closed position.
● Check for recommended
clearances and binding as shown.
● Ensure that the necessary arm
stroke does not exceed 20 inches.
● Make adjustments to the
mounting brackets to achieve the
recommended clearances.
TIP: Turning the pivot bracket over
gives more hole alignment options
for the gate post pivot bracket
assembly.
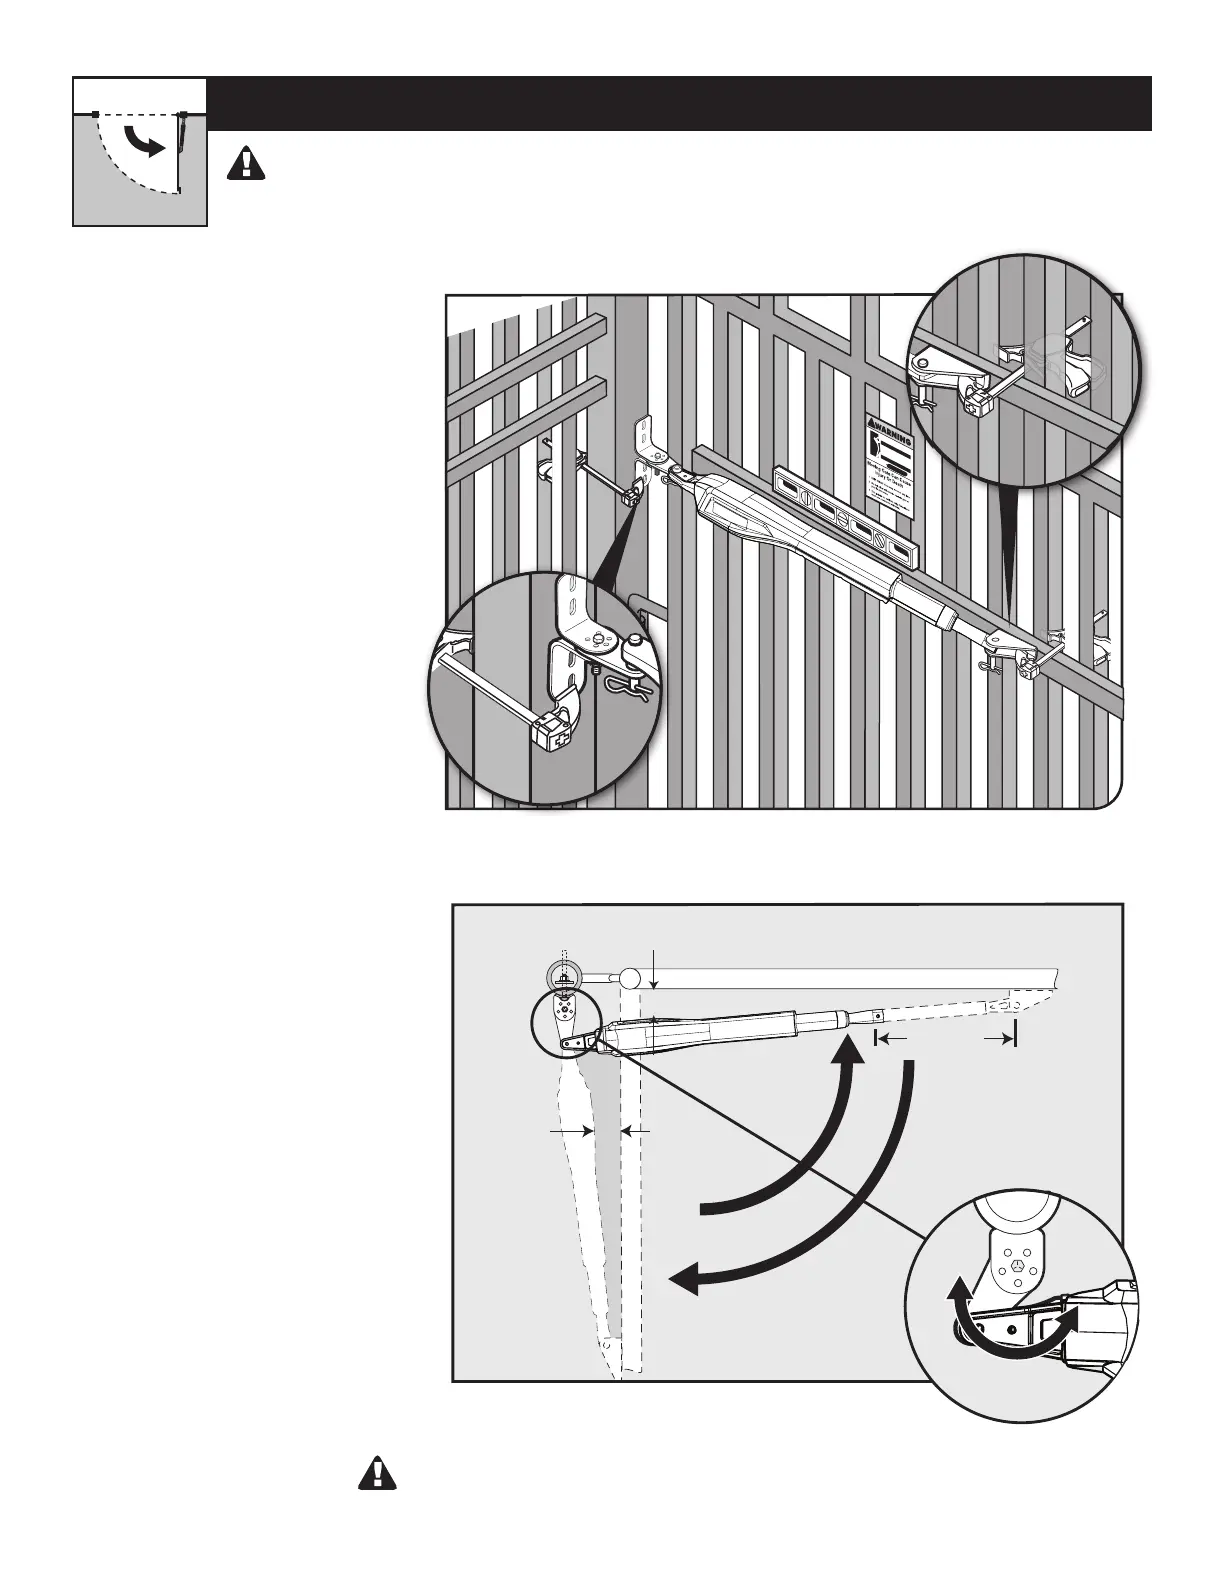
● With the gate in the OPEN
position, use clamps to secure
the operator to the gate post and
center cross member of the gate.
● Ensure that the operator is level.
● With the operator arm temporarily
secured to the gate, check
to ensure there is at least 2
inches of clearance between
the operator arm and gate. (See
illustration in Step 4 below).
2" Min. - Pinch-Point Clearance
Top View
2" Min.
17" MAX.
2
1
Closed
Position
Open
Position
Step 3
Step 4
PULL-TO-OPEN OPERATOR MOUNTING
Your Property
THE OPERATOR MUST BE INSTALLED WHILE FULLY RETRACTED, WITH THE GATE IN THE OPEN POSITION.
WARNING: ENSURE THE REAR MOUNT DOES NOT MAKE CONTACT WITH THE POST-BRACKET
ASSEMBLY DURING ANY POINT OF THE GATE TRAVEL.