OM-277115 Page 57
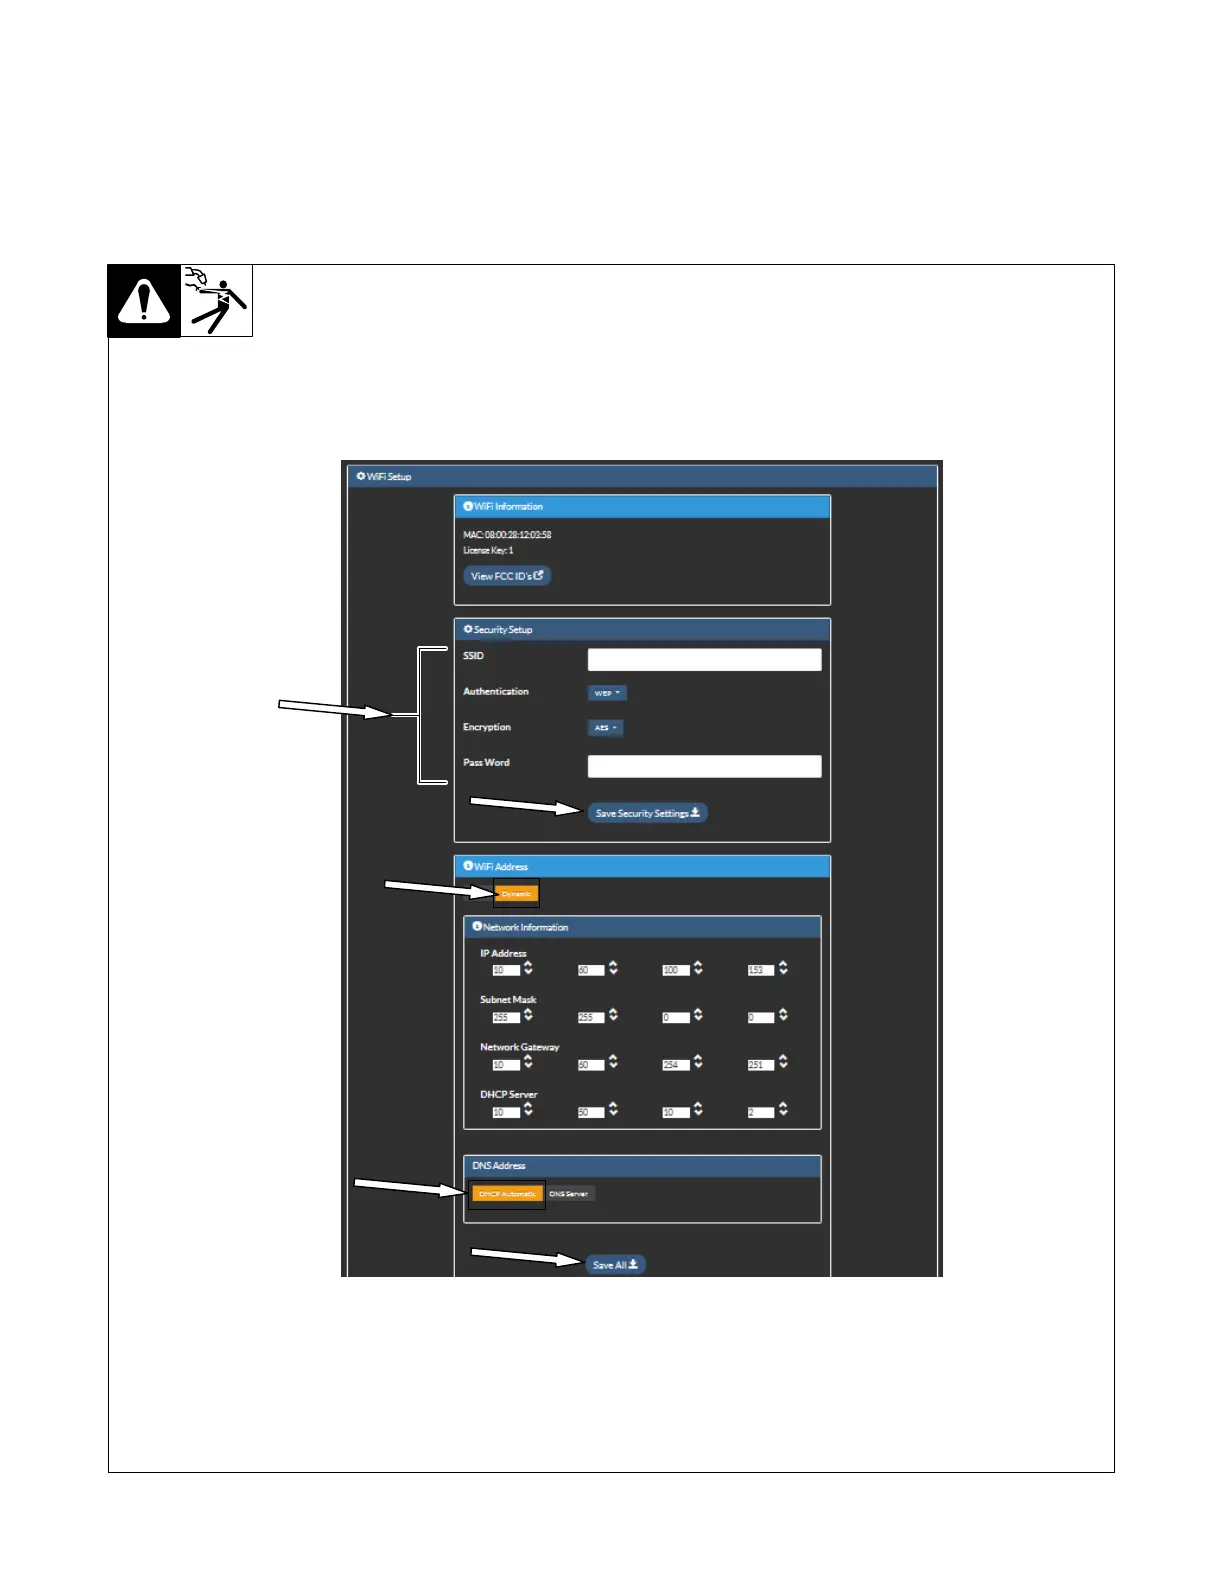
2. On the screen that appears, under Security Setup, enter your network name (SSID), security type, and security key. This information is found on
the Network Connectivity Survey completed by your IT Department (see Section 10-2).
3. Click Save Security Settings to save your wireless network settings.
4. Under WiFi Address, select Dynamic.
5. Under DNS Address, select DHCP Automatic.
6. When finished, click Save All.
7. Cycle the machine power by turning the machine off, waiting until the Power On light goes off, and turning power on again.
Figure 10-7. Configuring WiFi Connection Using DHCP
 Loading...