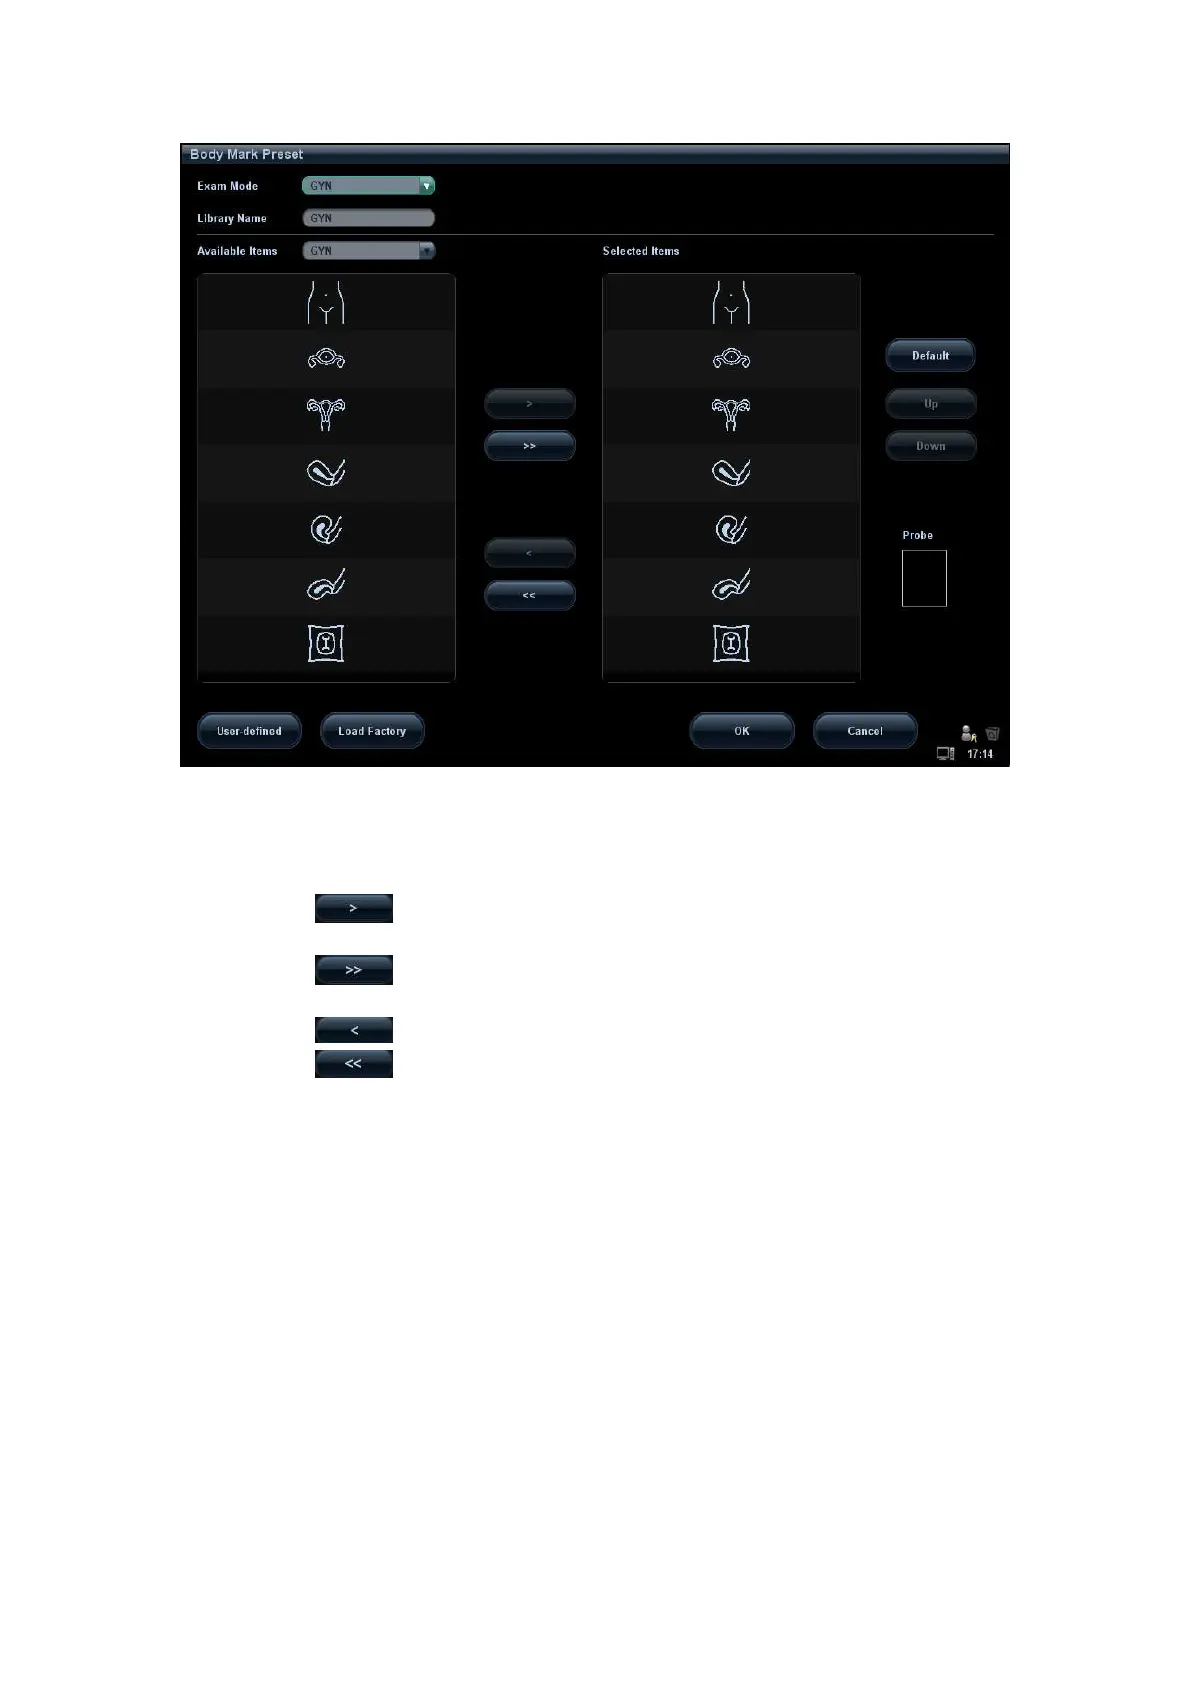
15-14 Setup
2. Select the body mark applied exam mode: select the exam mode in the drop-down list,
the current exam mode is by default.
3. Set library: enter the library name of custom body marks.
4. Add or delete body mark(s)
Click to add the item in Available Items on the left into Selected Items
on the right.
Click to add all items in Available Items on the left into Selected Items
on the right.
Click to delete the selected item in Selected Items.
Click to clear the content in Selected Item.
5. Click [Up] and [Down] to adjust the sequence of the items in Selected Items.
6. Preset the probe mark of the selected body mark in Selected Items.
Move the cursor onto the probe mark of the body mark in Probe area and press <Set>
to make the cursor turn green. Roll the trackball to change the position of the probe,
rotate the multifunctional knob to change the angle, and press <Set> to confirm the
orientation of the probe.
7. Select the body mark in Selected Items and click [Default], and then the body mark
will be prior to be displayed.
8. Click [OK] to complete the body mark setting.
15.5.2 User-defined Body Marks
If there is no body mark pictogram from the body mark library, you can create a graphic of
your own.