– 54 –
IMAGE CORRECTION
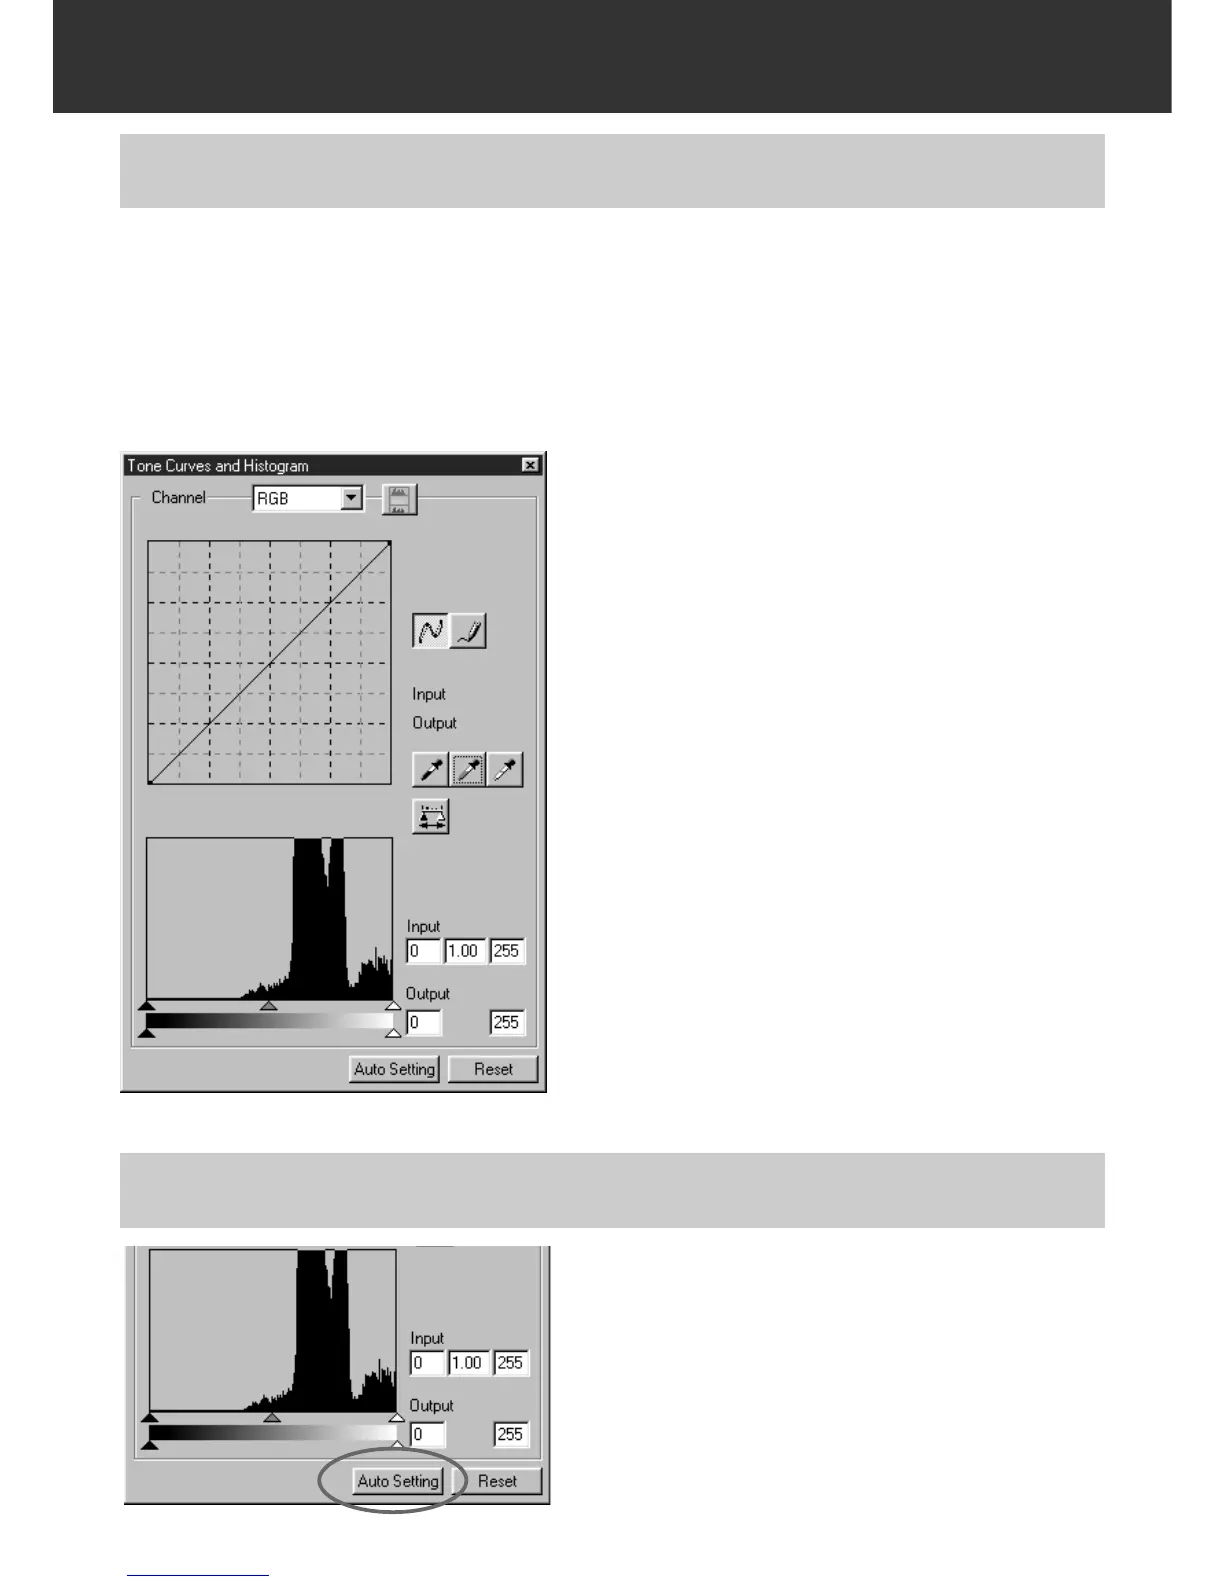
The input slide bar and the output slider are under
the Histogram window.
The input slider has the Highlight slider (right),
gamma slider (middle) and shadow slider (left).
The output slider has the Highlight slider (right)
and Shadow slider (left).
The Histogram can be corrected by dragging each
slider or inputting the value directly in each Input or
Output level box.
For example, if you use the input Highlight slider
and input shadow slider to remove areas which
contain no pixels (flat line at left or right) the
original colour will be better represented.
Although the output slider does not normally need
to be adjusted, use it according to the
characteristics of the output equipment. For
example, use the output slider when the black part
is not printed clearly with the 0 setting in the black
level. (In this case, adjust the Output level by
moving the Output Shadow slider to the right
slightly while checking the correction result).
The Histogram part allows you to correct images by specifying the input and output area from the
information including in a film. Also, this window displays the histogram of the image area inside
the cropping frame in each RGB colour. The level is indicated in 256 colour steps (0 to 255) from
left to right side.
The tone curves and histogram are linked each other. When the tone curve is corrected, the
histogram is automatically corrected and vice versa.
CORRECTING THE HISTOGRAM
Click on the Auto setting button.
• The image is corrected automatically by remov-
ing no information (pixels) parts from the his-
togram and using all tone steps from 0 to 255.
• The change will be reflected in the prescan
image displayed in the Image Correction display
area.
CORRECTING THE HISTOGRAM – AUTO SETTING
 Loading...