– 85 –
SCAN SETTINGS WINDOW
EXAMPLE OF THE SCAN SETTING –
WHEN PRINTING A SCANNED IMAGE
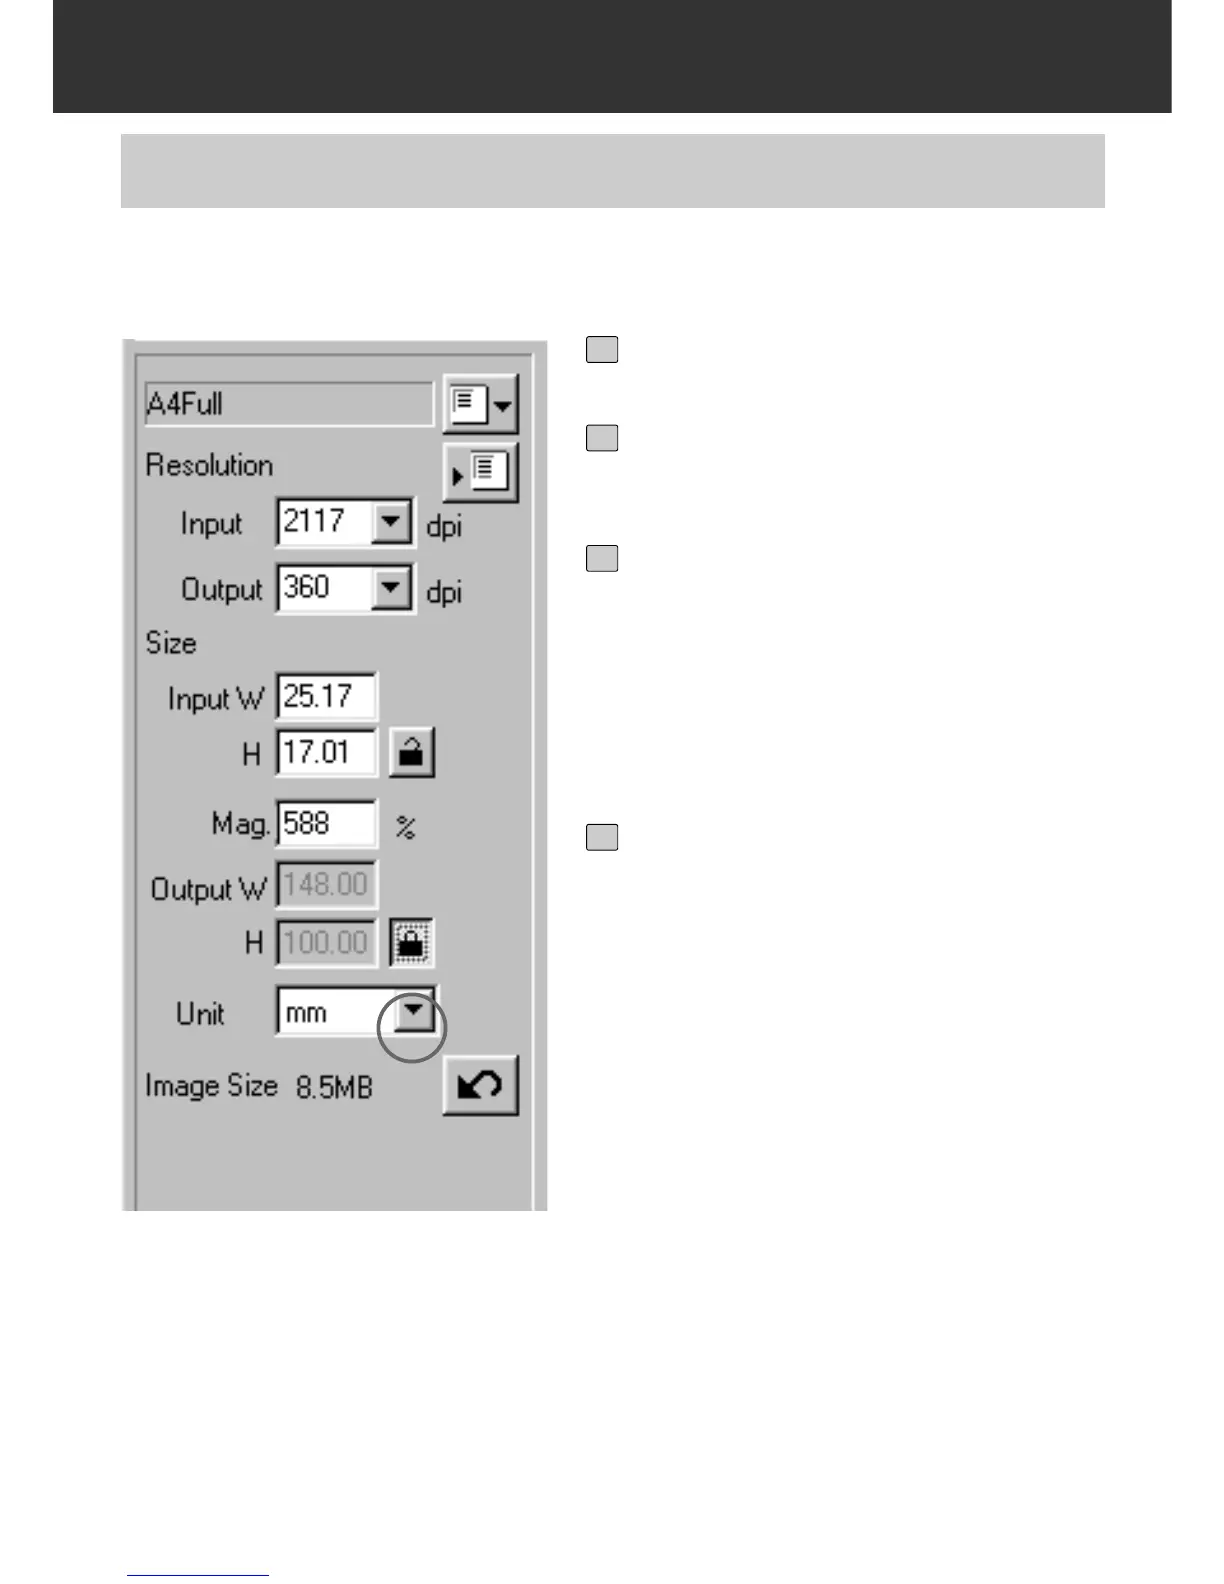
Select “mm” from the Unit list box.
1
Select “360” from the Output resolu-
tion list box.
2
Input 148 and 100 in the Output W
and H size text boxes respectively
and click on the Output size lock but-
ton.
• The Output size is locked so that the size
cannot be changed.
3
Drag the cropping frame to determine
the cropping area.
• While the cropping area is changed, the
input resolution is also changed accordingly.
• As the output size is locked, the ratio of
length and breadth of the cropping frame is
not changed. To change that ratio, click on
the Output size lock button again to cancel
the lock mode. In this case, however, the
image size is changed according to the crop-
ping area.
*The scan settings are complete.
4
This explains how to print in a post card of 148 x 100 mm (width x height) with the resolution of
360 dpi printer as an example.
 Loading...