– 58 –
IMAGE CORRECTION
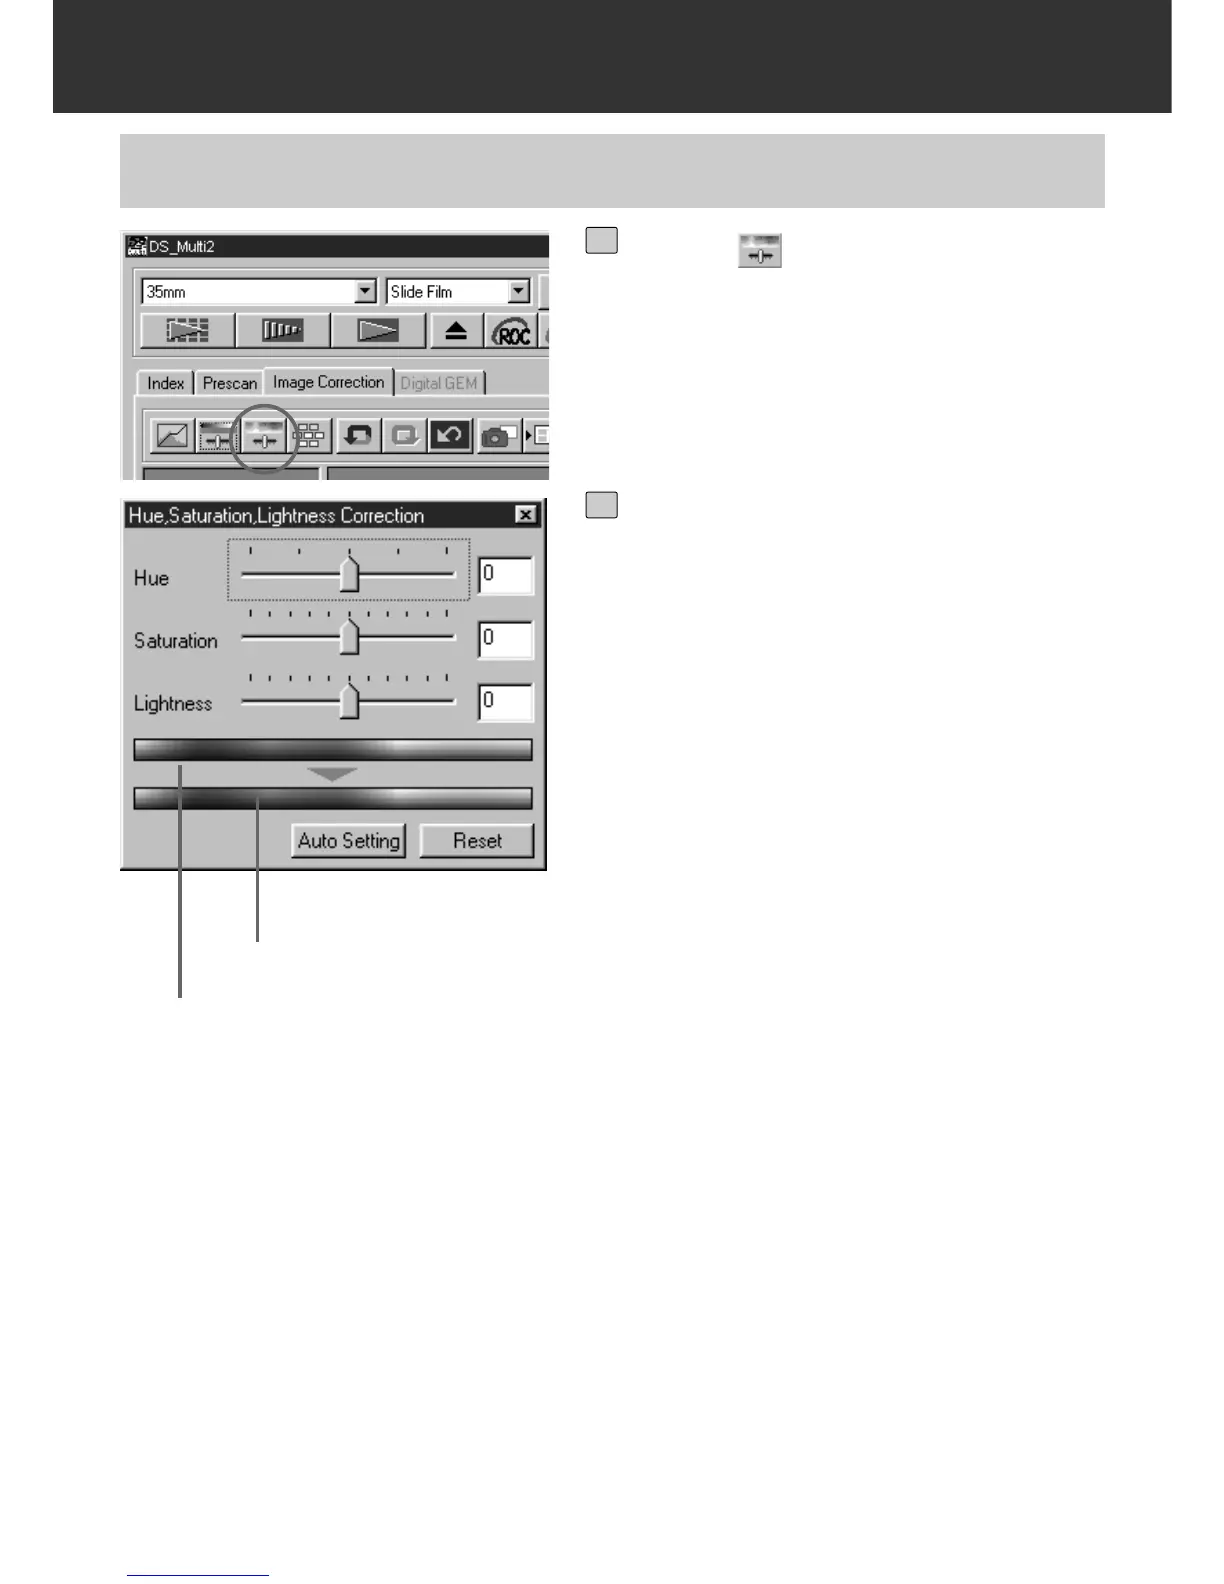
Hue correction: By dragging the Hue slider, the colour of the image displayed in Pre-
Correction Colour Sample is changed as shown in Post-Correction Colour
Sample. When the Hue slider is dragged to the rightmost or leftmost side,
the hue of the image is reversed.
Saturation correction: By dragging the Saturation slider to the right (or inputting a big plus
number in the text box), the colours become more saturated. By dragging
the Saturation slider to the left (or inputting a big minus number in the
text box), the saturation of the image is reduced.
Lightness correction: By dragging the Lightness slider to the right (or inputting a big plus
number in the text box), the lightness of the image is raised.
Post-Correction Colour Sample
Pre-Correction Colour Sample
CORRECTING HUE/SATURATION/LIGHTNESS
Click on .
• The Hue, Saturation, Lightness Correction
dialog box will appear.
1
Drag each Hue, Saturation or
Lightness slider or input each value
directly in each text box.
• Values from –180 to +180 or –100 to +100
can be input in the Hue or the Saturation and
Lightness respectively.
• The change will be reflected in the prescan
image displayed in the Image Correction dis-
play area.
2
 Loading...