© MOBATIME 16 / 52 800693.16
3.2.3 Submenu for network services configuration
Choose the value 2 or 3 in the item P19 (network work mode selection) in the
clock menu, then enter the submenu by pushing the PB1L pushbutton for
configuring the network services (Multicast support in unicast work mode, SNMP
service, Telnet service). The item to be set is blinking.
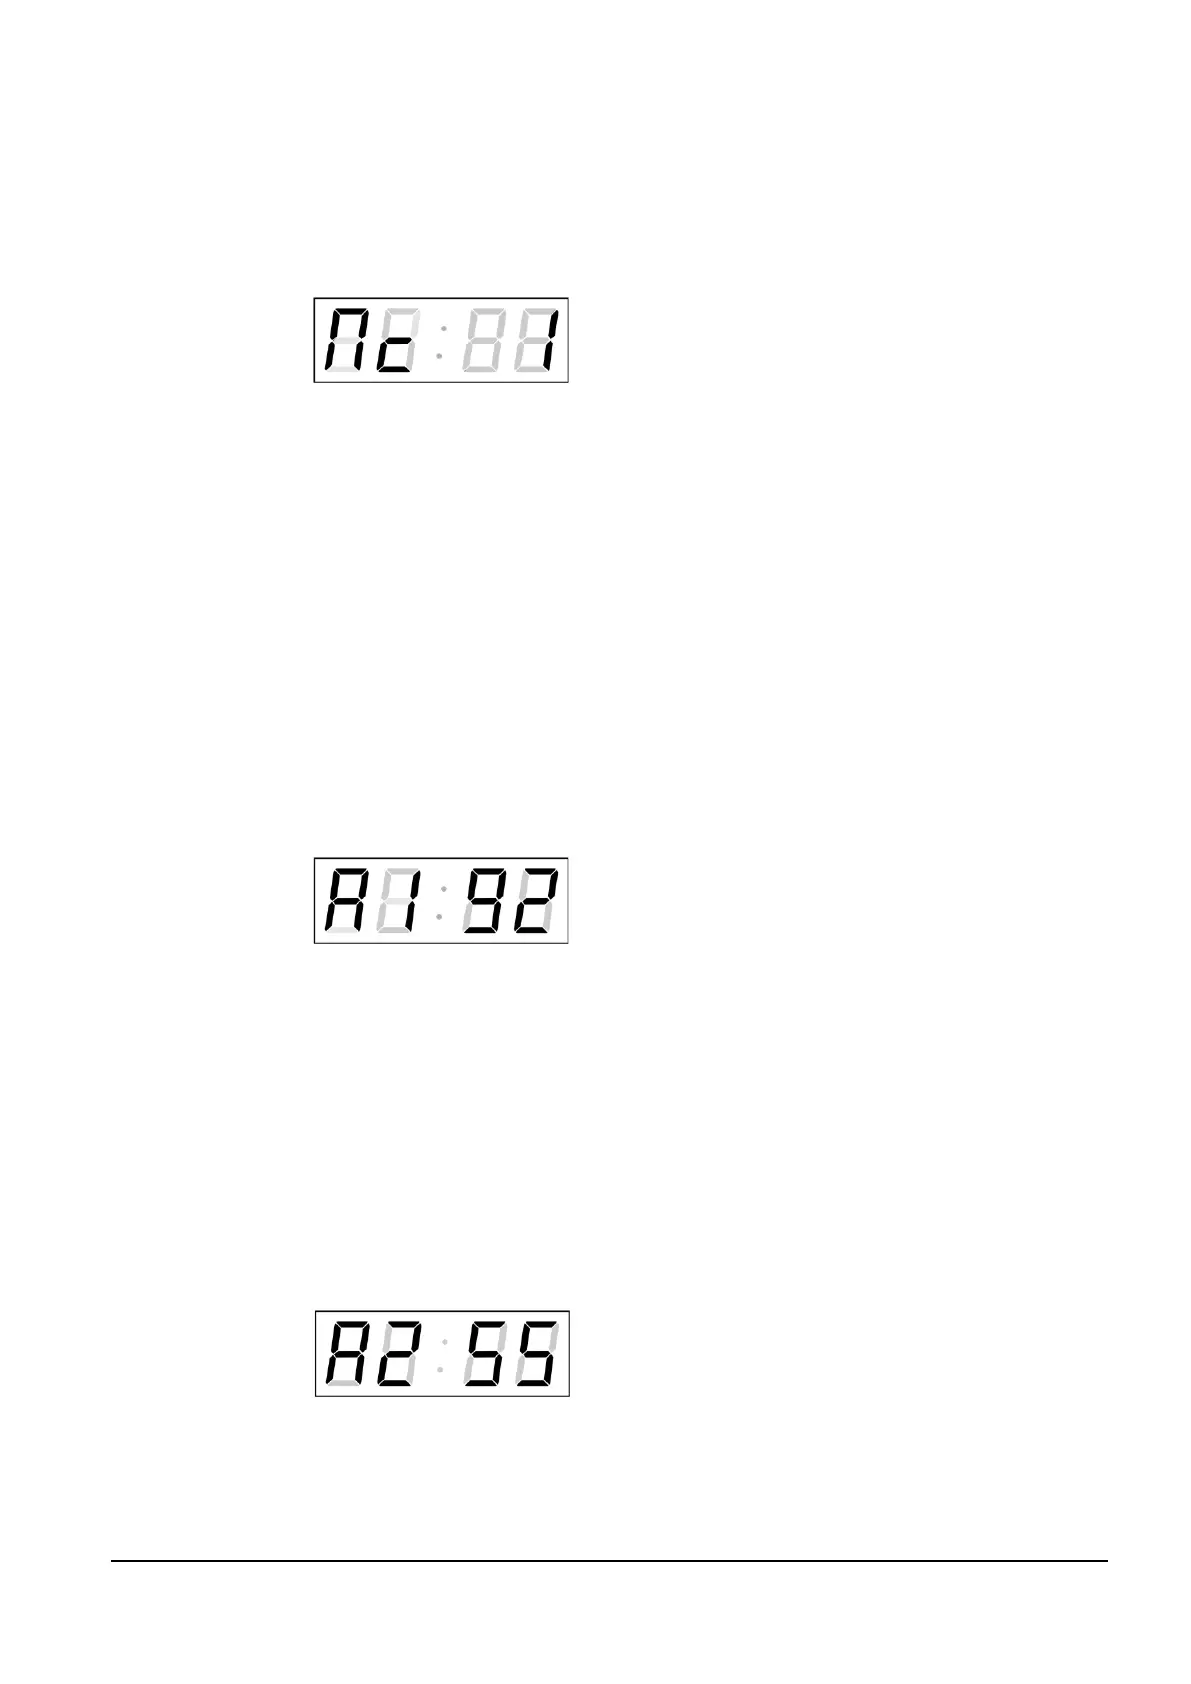
The display shows the following:
Set value 1 for enabling the multicast
support in the unicast work mode or
value 0 for disabling it by pushing the
PB2S.
Switch to the next parameter – SNMP communication support by pushing the
PB1S. The display shows the Sn: 1. Set value 1 for enabling the SNMP support
or value 0 for disabling it by pushing the PB2S.
Switch to the next parameter – Telnet support by pushing the PB1S. The display
shows the tn: 1. Set value 1 for enabling the telnet support or value 0 for
disabling it by pushing the PB2S.
By pushing PB1L save the setting and return to item P19.
3.2.4 Manual setting of the IP address of the clock
Choose the item P20 in the main menu and push the PB1L button to enter the
submenu for setting the IP address. The item to be set is blinking.
By pushing PB2S, the adjusted digit value is increased in steps of 1, by pushing
the PB2L button, the value will be continuously increased.
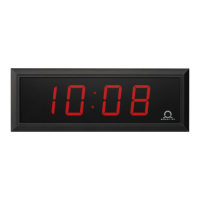
The display shows the following:
Enter the four octets of the IP address
step by step. Switch to next digit or octet
respectively by pushing the PB1S.
Octets are marked by letters A, b, C
and
d.
By pushing the PB1L button, the entered values are stored and the clock returns
to the menu item P20.
3.2.5 Manual setting of the subnet mask
Choose the item P21 in the main menu and push the PB1L button to enter the
submenu for setting the subnet mask. The item to be set is blinking.
By pushing PB2S, the adjusted value is increased in steps of 1, by pushing the
PB2L button, the value will be continuously increased.
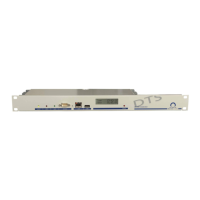
The display shows the following:
Enter the four octets of the subnet mask
step by step. Switch to the next octet by
pushing the PB1S button. Octets are
marked by letters A, b, C and d.
By pushing the PB1L button, the entered values are stored and the clock returns
to the menu item P21.