© MOBATIME 34 / 52 800693.16
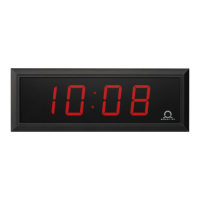
10 Non-network clock operation
Configure the jumper JP11 according to table (chapter 2.8) if the source of synchronization is
a DCF signal, Mobatime serial code, polarized impulse line, MOBALine or IRIG-B. Choose the
item P4 in main MENU (chapter 5) and set the type of synchronization. The auto detection
mode (P4:A), when the type of synchronization signal is set automatically, is applicable for
DCF signal, Mobatime serial code, MOBALine, IRIG-B, WTD. The permanently lit colon during
the time display signalizes the clock is synchronized by the synchronization source.
10.1 Autonomous clock synchronized by DCF 77 receiver
• Set value A in items P3, P4 and P7 in the main MENU (chapter 5).
• Connect the DCF 77 receiver to the clock terminal board placed on the anchoring
plate (LINE IN terminals) using a twin-wire cable.
• The maximum wire length depends on its diameter (app.100 - 300 m).
• In case the connection is correct and the input signal is at high level, the LED on
the receiver is flashing periodically once a second, with 1 pulse left out at the 59th
second.
• If the polarity is incorrect, the LED does not flash. In such a case, interchange the
two wires.
• Install the receiver at a place with a high-level radio signal. Don’t install the
receiver near sources of interfering signals, such as the personal computers, TV
sets or other types of power consumers (the digital clock itself generates
interfering signals too).
• Position the receiver with its transparent cover (DCF 450) or the arrow on the
cover (DCF 4500) facing the transmitter (located in Frankfurt, Germany).
Presuming the good quality DCF 77 signal the synchronization takes place in
approx. 3 to 4 minutes. In case of poor quality of the signal (mainly during the day
time) the first time setting is to be done manually. The red LED of the receiver
displays a working connection by flashing once a second without flickering.
10.2 Autonomous clock synchronized by GPS receiver
• Set value A in items P3, P4 and the desired time-zone in the P7 item in the main
MENU (chapter 5).
• Using jumper JP17 set the power supply output (DC OUT) on pins 3, 4 of the JP1
connector.
• Connect GPS receiver to the clock terminal board placed on the anchoring plate
(LINE IN and DC OUT/DCF OUT terminals) using a four-wire cable. Please note
the correct polarity of the wires – see the GPS user manual.
• For the correct placing of the receiver please follow the GPS user manual.
• Presuming the good position of the GPS receiver the synchronization takes place
in approx.10 to 20 minutes.
10.3 Slave clock controlled by synchronizing impulses
On digital clock connected in time distribution system controlled by synchronizing
impulses choose the item P4 in the main menu and set it according type impulse lines
(one minute, half minute, second pulses) and in item P5 choose mode of processing
impulse line (polarized / unpolarized impulses, synchronization and time setting /
synchronization only). Set the value A in items P3 and P7.