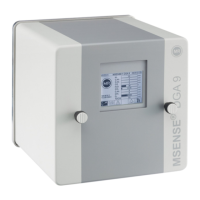
7 Commissioning
Messko GmbH 2020 51BA4001150/10 EN MSENSE
®
DGA 2/3
7 Commissioning
NOTICE
Damage to the device!
Damage to the electronics of the device due to incorrect supply voltage!
► Provide the correct supply voltage in accordance with the nameplate on
an external isolating device.
The device is ready for operation once it has been connected to the supply
voltage and completed a run-in period of at least 24hours. Measured values
displayed during the run-in period do not reflect the true gas or moisture con-
centrations. For this reason, alarms and warnings can be ignored during the
run-in period. The run-in period is to ensure the thermal stabilization of the
measuring system and is indicated on devices with a display by an "!" in the
display of the gases H2 and CO (MSENSE® DGA 3).
The device takes measurements four times within 24 hours by default. This
measurement interval can be changed using the MESSKO® MSET parame-
terization software (see corresponding operating instructions).
The device is calibrated at the factory for fresh mineral-based insulating oils
(Standard ASTM D3486-091 or IEC 60422).
Also refer to
2 Safety markings and nameplate [►20]
7.1 Service interface
In order that the extended settings on the MSENSE® DGA 2/3 can be con-
figured via the included MESSKO® MSET parameterization software, the
system is equipped with a service interface.
NOTICE
Damage to the device and PC/laptop
Potential differences can cause the devices to be destroyed.
► Ensure that the device supply voltage and the PC/laptop supply voltage
have the same ground potential (PE).
► Use the outlet in the control cabinet.
► Operate a laptop in battery mode wherever possible.
Proceed as follows:
1. Plug the screw connection of the USB service adapter onto plug connec-
tor 11 in accordance with the figure in chapter "Design" [►Section 4.3,
Page 19] and tighten the screw connection by hand.