57
B. METER MECHANICAL ZERO PROCEDURES
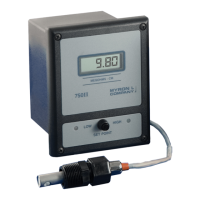
ANALOG METERS ONLY
1. Ensure power is OFF.
2. Note the position of the meter needle. If it has come to
rest pointing at the zero mark on the scale, turn the
MonitorbackONandcontinueontoSectionV.C.
3. Locate the small (approx. 1/4”), black plastic button
directly below the center of the meter. Use a small
screwdriverorangernailtogentlypryitlooseand
removeitfromtheaccesshole.SeegureII.G.9.
4. Insert a small standard screwdriver into the access
hole and carefully locate the slot in the mechanical
adjustment plug.
5. Turn the adjustment plug slightly until the needle rests
on zero.
6. Insert the small plastic button into the access hole.
7. Turn power ON.
C. CALIBRATION PROCEDURES
All Myron L Monitor/controllers are factory calibrated prior to
shipping and are ready to install without further calibration.
Calibration should be checked occasionally with the internal Cal-
ibration/Full Scale Test switch (FS SW) to ensure continued ac-
curacy. The following procedures are provided in the event that
recalibration becomes necessary. The only equipment required
are a tweaker or small screwdriver, and standard solution.
RefertoFigureV.A.1.tolocatethecomponentsdescribedin
this section.
NOTE: When opening instrument, remove front cover with care;
a ribbon cable connects the front panel and main board.
When performing calibration procedures, the technician
must take extreme care to avoid contacting the circuitry
other than the CALibration control. Failure to do so could
result in damage to the equipment, property and/or
personal injury.
1. ELECTRONIC CALIBRATION
(CIRCUIT ONLY)
This method is faster than the following method using standard
solution, but it does not include the sensor. Therefore, it should
be used only in applications where the chance of sensor con-
tamination or damage are slight.
NOTE: The DISplay calibration control has been set and sealed
prior to leaving the factory, and under normal conditions will not
require readjustment. This allows the customer to use the panel
meter/display to easily set the electronic Full Scale value. If the
DISplay calibration control has been adjusted it will be neces-
saryto,rst,verifyoradjusttheFullScaleusingaDVMas
described in “Full Scale Calibration” below, followed by adjusting
the DISplay calibration control to Full Scale on panel
meter/display.
a. Full Scale Calibration
1. Ensure power is OFF.
2. Using a standard slot screwdriver remove the four (4)
screws on the front panel.
3. Carefully wiggle the front panel to loosen and pull
gently toward you. Do not pull more than about
8 inches/20CM or you could damage the wiring harness.
4. Turn the front panel around so that the back side is
facing you and set aside.
5. Turn power ON.
6. Press and hold the Full Scale Test switch. The display
should indicate Full Scale for the particular range
selected, i.e. 0-500 ppm should indicate 500. If not, set
to Full Scale with the CALibration control.
NOTE: When setting digital models with a full scale of 2000
(1999), it is advisable to adjust Full Scale to 1990, otherwise an
overrange condition may occur.
7. Turn power OFF.
8. Re-install front panel as described below in
“REASSEMBLY” or continue.
9. To operate, turn power ON.
b. 0-10VDC Recorder Output Calibration
Foroutputvoltagesotherthan10VDC,substituteasrequired,
i.e.5.00VDCor2.00VDCperSectionII.F.2.
RequiresaDVMsettoDCVolts.
1. Ensure power is OFF.
2. AttachDVMtoRECORDERoutputconnection.
3. Turn power ON.
4. Press and hold the Full Scale Test switch (FS SW).
5. TheDVMshouldindicate10.00VDC.
6. If not, adjust CALibrationcontroluntilDVMindicates
10.00VDC.
7. Verifythepanelmeter/display,itshouldindicateFull
Scale reading as shown on Range Module.
8. If not, adjust DISplay control until a full scale reading is
displayed. When setting digital models with a full scale
of 2000 (1999), it is advisable to adjust Full Scale to
1990, otherwise an overrange condition may occur.
9. Turn power OFF.
10. Re-install front panel as described below in
“REASSEMBLY” or continue.
11. To operate, turn power ON.
2. CALIBRATION USING
STANDARD SOLUTION
The best method of recalibrating your conductivity/TDS
Monitor/controller is with NIST traceable Standard Solution
(available from the Myron L
®
Company). Because it includes the
sensor, the entire system is recalibrated.
NOTE: Since standard solution calibrations are NOT practicable
withresistivitymodels,anothermeansofvericationorcalibra-
tion of resistivity models is to use the transfer standard method,
using a hand-held or portable instrument capable of resistivity
measurements, i.e. the Myron L Ultrameter II™.SeesectionV.C.4
description.
The following procedure describes the easiest method for
standard solution calibration of your Conductivity/TDS Monitor/
controller.
1. Using a standard solution which is 60-90% of full scale
of the instrument, i.e. for 0-2000 µS range use
KCl-1800,rinsethoroughlyandllacleanglassbeaker
with the standard solution.
2. Place sensor in the beaker of standard solution. The
level of standard solution must be high enough to cover
at least 1/2” above cross hole.
CAUTION - READ FOLLOWING CAREFULLY
 Loading...