GEM-P1632 Programming Instructions
NAPCO Security Systems
WI897B 8/98
Page 38
The User Program Mode is covered in detail in the operating instructions for the keypad in use.
Only Keypad #1 may be used for programming, however this keypad may be located in any area.
The Program Mode cannot be accessed while the communicator is transmitting except during the first three minutes after
power-up.
After entering codes or data, press the save
button. Data will not be stored into memory unless this button is pressed.
If the keypad is in the Program Mode and no activity is detected for longer than 4 minutes, a steady tone will sound. Press the
button to silence the sounder and exit the User Program Mode.
If a GEM-RP2ASe2 is used, configure address jumpers as Keypad #1 (see the section of this manual Configuring the GEM-RP2ASe2
Keypad). Use the
button to manually scroll the display at the end of each programming line.
NOTE:
For ease of programming, it is recommended that a GEM-RP1CAe2 be used as Keypad #1. (A new GEM-RP1CAe2 is auto-
matically configured as Keypad #1.)
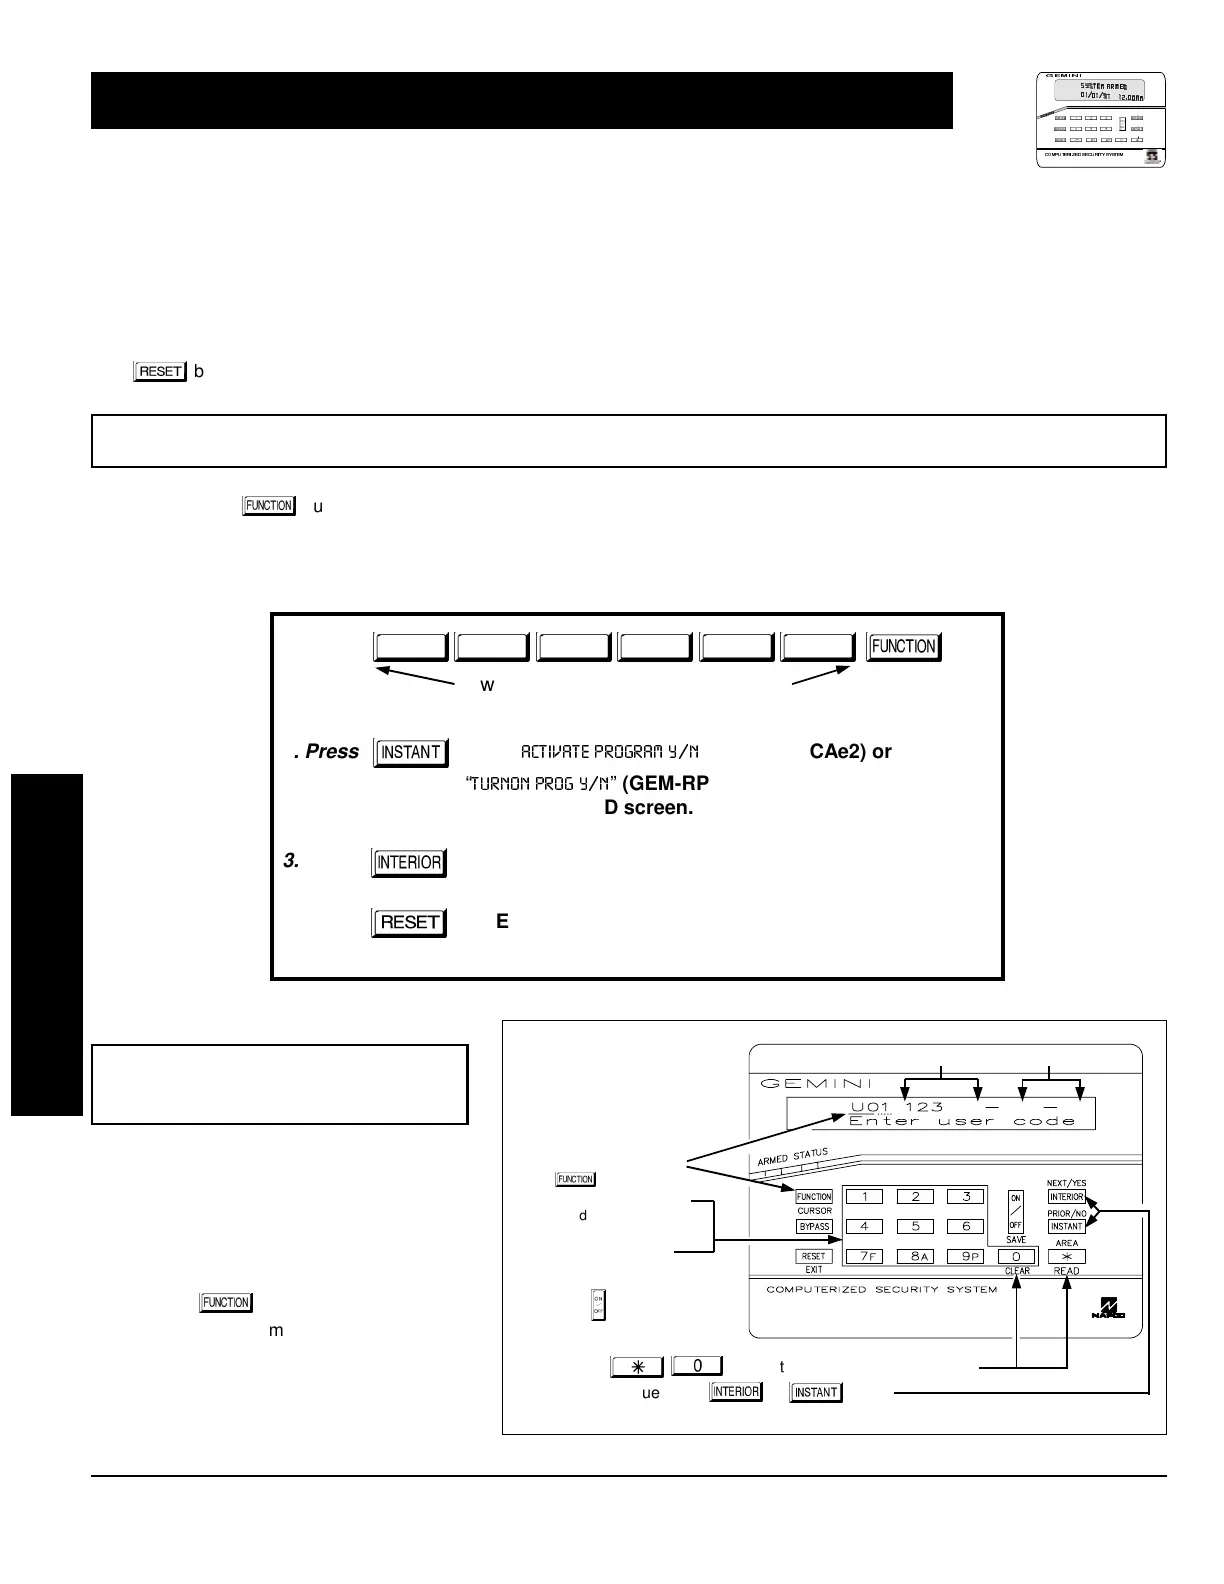
1. Press
2. Press
Until
“
”
(GEM-RP1CAe2) or
“
”
(GEM-RP2ASe2)
appears on LCD screen.
3. Press
To Enter User Program Mode
4. Press
To Exit User Program Mode when finished
New Panel (Default User Code = 123)
Existing Panel (Any Code with User Program Option Enabled)
Up to 32 User Codes may be programmed.
NOTE:
In this mode, only the code is pro-
grammable; the accompanying Area Options
must be programmed in the Dealer Program
Mode (see page 8).
Use the
button to place the cursor
over the User Number.
Enter a User Number (01–32) using the
number buttons. The cursor will then
advance to the User Code and read the
existing code, if any.
GEM-RP1CAe2 Keypad (Direct Entry)
USER PROGRAM MODE
Programming User Codes
User Code NOT USED
To Program User Codes
1. Set Cursor Position using
the
button.
2. Enter 2-digit User Number
(01-32) directly using
number buttons (0-9).
3. Enter Code (1-6 digits)
directly using number
buttons (0-9).
4. Press the
button to save
each code.
NOTE:
Press
button to clear character at cursor.
To continue press
or
button.
R
ARMED
STATUS
NEXT/YES
PRIO R/NO
AREA
 Loading...