44 All technical manuals are available in PDF format at tech.napcosecurity.com Napco iSecure Security System
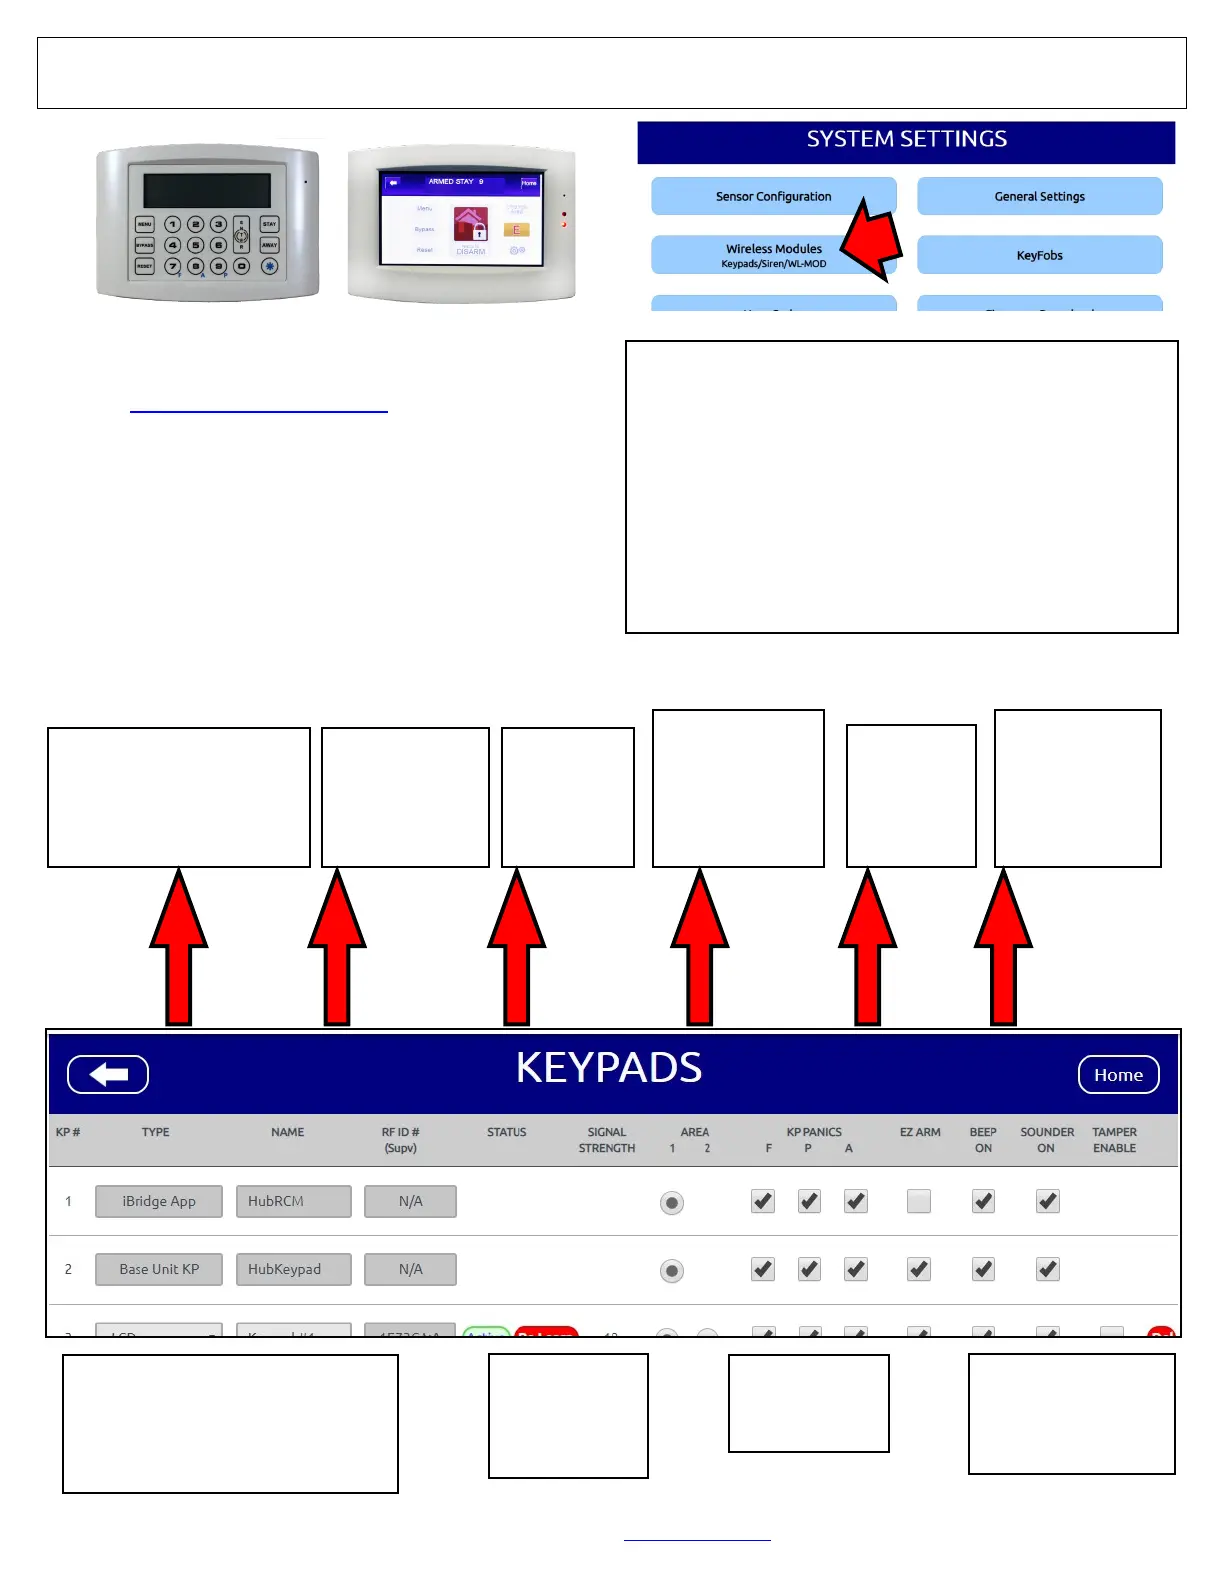
Programming: Keypads / Touchscreens
1. Go to www.iSecureByNapco.com and log into your iSe-
cure account.
2. Click Wireless Modules > Keypads.
3. In the KEYPADS screen (shown below), program the in-
stalled keypads as indicated (when finished, click Save).
ISEC-WL-KEYPAD
Wireless Battery-Operated
Standard Keypad
ISEC-WL-TOUCH
Wireless Touchscreen
What are Emergency Buttons?
Scroll to the bottom of the KEYPAD screen to enable the use of
Emergency Buttons for your security system. Emergency But-
tons are used together with the keypad "Star" button to signal
an emergency. With the ISEC-WL-KEYPAD:
• Press 7 & "Star" simultaneously for Fire Emergency.
• Press 8 & "Star" simultaneously for Auxiliary Emergency.
• Press 9 & "Star" simultaneously for Police Emergency.
(With the ISEC-WL-TOUCH, press and hold the appropriate
FIRE, AUX or PANIC button, respectively; see the User's
Guide for details). By default, Emergency Buttons are ena-
bled for all keypads; to disallow their use, simply uncheck the
selections for the keypad, as desired.
TYPE
• ISEC-WL-TOUCH
(Select "Color Touch")
• ISEC-WL-KEYPAD
(Select "LCD")
NAME
Type the key-
pad location
(for example,
"Front Door").
AREA
Default = 1.
(See the keypad
Operating
Guide for "Area"
definition).
1 2
4
6
KP PANICS
(See above
"What are
Emergency
Buttons?")
RF ID
Type in the
7 digit sen-
sor ID # for
the device
3
EZ ARM
Permits quick
arming by press-
ing and holding
ENTER for 2
seconds.
5
TAMPER ENABLE
Check to enable the
keypad tamper switch
(removal from rear
case or from wall)
9
SOUNDER ON
Check to enable
exit/entry keypad
sounder.
8
BEEP ON
Check to enable
keypad feed-
back (button
presses, etc.)
7
SIGNAL STRENGTH
Relative intensity of the last transmis-
sion, on a scale of 1-10 (10 being the
strongest). Note: A reading of 3 or
less indicates reception may be erratic;
relocate the keypad closer to the Hub.