66 All technical manuals are available in PDF format at tech.napcosecurity.com Napco iSecure Security System
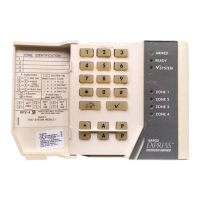
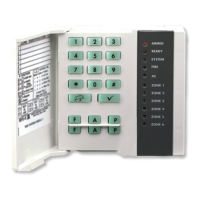
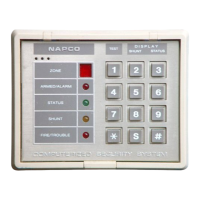
Keypad Dealer Function Menu
The keypad can provide a wide assortment of utility
functions as summarized in the Function Menu. The
functions are displayed in a prompting "YES/NO" for-
mat. The complete Function Menu list is provided here
in its normal displayed sequence. However, since not
all functions are designed for all systems (or intended
for all users), only functions that are applicable and ac-
tive are displayed (e.g. if no zones are bypassed,
"DISPLAY ZN BYPASSED" will not appear). Further-
more, functions that are intended for use by the install-
er or servicer will not be displayed unless a valid Deal-
er Code is entered.
To return to normal keypad operation, press RESET
(the keypad will automatically return to its normal oper-
ating mode if no activity is detected for longer than one
minute). Note: Consult the keypad User Guide to de-
termine which buttons allow for scrolling through the
selections. For the IBR-TOUCH-WL Smart 7" Wireless
IoT Touchscreen, see OI413. For the ISEC-WL-
TOUCH Wireless 4.3" Full Color Security Touchscreen
Keypad, see OI401. For the ISEC-WL-KEYPAD Wire-
less Battery-Powered Standard Keypad, see OI400.
DISPLAY ZN FAULTS
Displays all unsecured zones within the keypad's
Area while disarmed. Zones may be bypassed in
this mode by pressing BYPASS; manually bypassed
zones will be indicated when displaying status.
DISPLAY ZN BYPASSED
Displays zones that have been deactivated
("bypassed").
DISPLAY ZN DIRECTORY
Displays a list of all programmed zone descriptions
in the selected Area. To return to normal system
operation, press RESET at any time.
ACTIVATE BELL (SIREN) TEST
Activates the alarm sounder (while disarmed) for
about 2 seconds and performs a battery test. If the
alarm does not sound, it may be defective. If the
battery is low, "E02-00" will appear in the display
indicating a low battery condition. Allow 24 hours for
the battery to recharge.
DISPLAY SYS TRBL
Displays all system error codes/troubles (LOW BAT-
TERY, AC POWER LOSS, etc.). Wait for the dis-
play to scroll through multiple system troubles.
DISPLAY FIRE ALARM (AFTER PERMISSION TO RE
-ENTER THE PREMISES BY EMERGENCY RE-
SPONDERS)
Displays Fire Zone(s) in alarm. Correct the cause of
the alarm condition, then press RESET to restore
the "SYSTEM READY" condition.
DISPLAY FIRE TRBL
Displays Fire Zone(s) in trouble. Correct the prob-
lem, then press RESET to restore the "SYSTEM
READY" condition.
ACTIVATE CHIME
Sounds a tone at the keypad when the selected
zone is violated (faulted) while disarmed. The dura-
tion of the tone is programmable. To turn off the
Chime Mode, re-enter this Function Menu and select
DEACTIVATE CHIME.
RESET SMOKE
If the unit is in alarm due to a smoke condition, it will
stop sounding when the smoke condition has
cleared. Press RESET to reset the system after a
smoke alarm; "SYSTEM READY" will be displayed.
RESET SYSTEM TRBL
System troubles normally latch and display and
sound at the keypad. Most troubles will auto-restore
without pressing RESET; to silence the sounder,
press RESET and "SYSTEM READY" will be dis-
played. Correcting the trouble will clear most sys-
tem trouble indications.
FAULT FIND
This troubleshooting aid helps you locate
"swingers" (a swinger is a fault on a communicator
zone usually attributed to a malfunctioning device or
relay that ultimately causes a large number of the
same signals to be transmitted to the central station;
i.e. a nuisance alarm).
When this menu selection is accessed, two things
occur:
• The loop response of each zone is set for the
fastest response time.
• Causing or repairing a fault activates the
sounder for about 7 seconds.
Tapping and poking at suspect points, the installer
can easily locate swingers by listening for the beep.
This eliminates the need of returning to the keypad
to visually check after each attempt. Press RESET
to restore normal operation (arming the system auto-