52 All technical manuals are available in PDF format at tech.napcosecurity.com Napco iSecure Security System
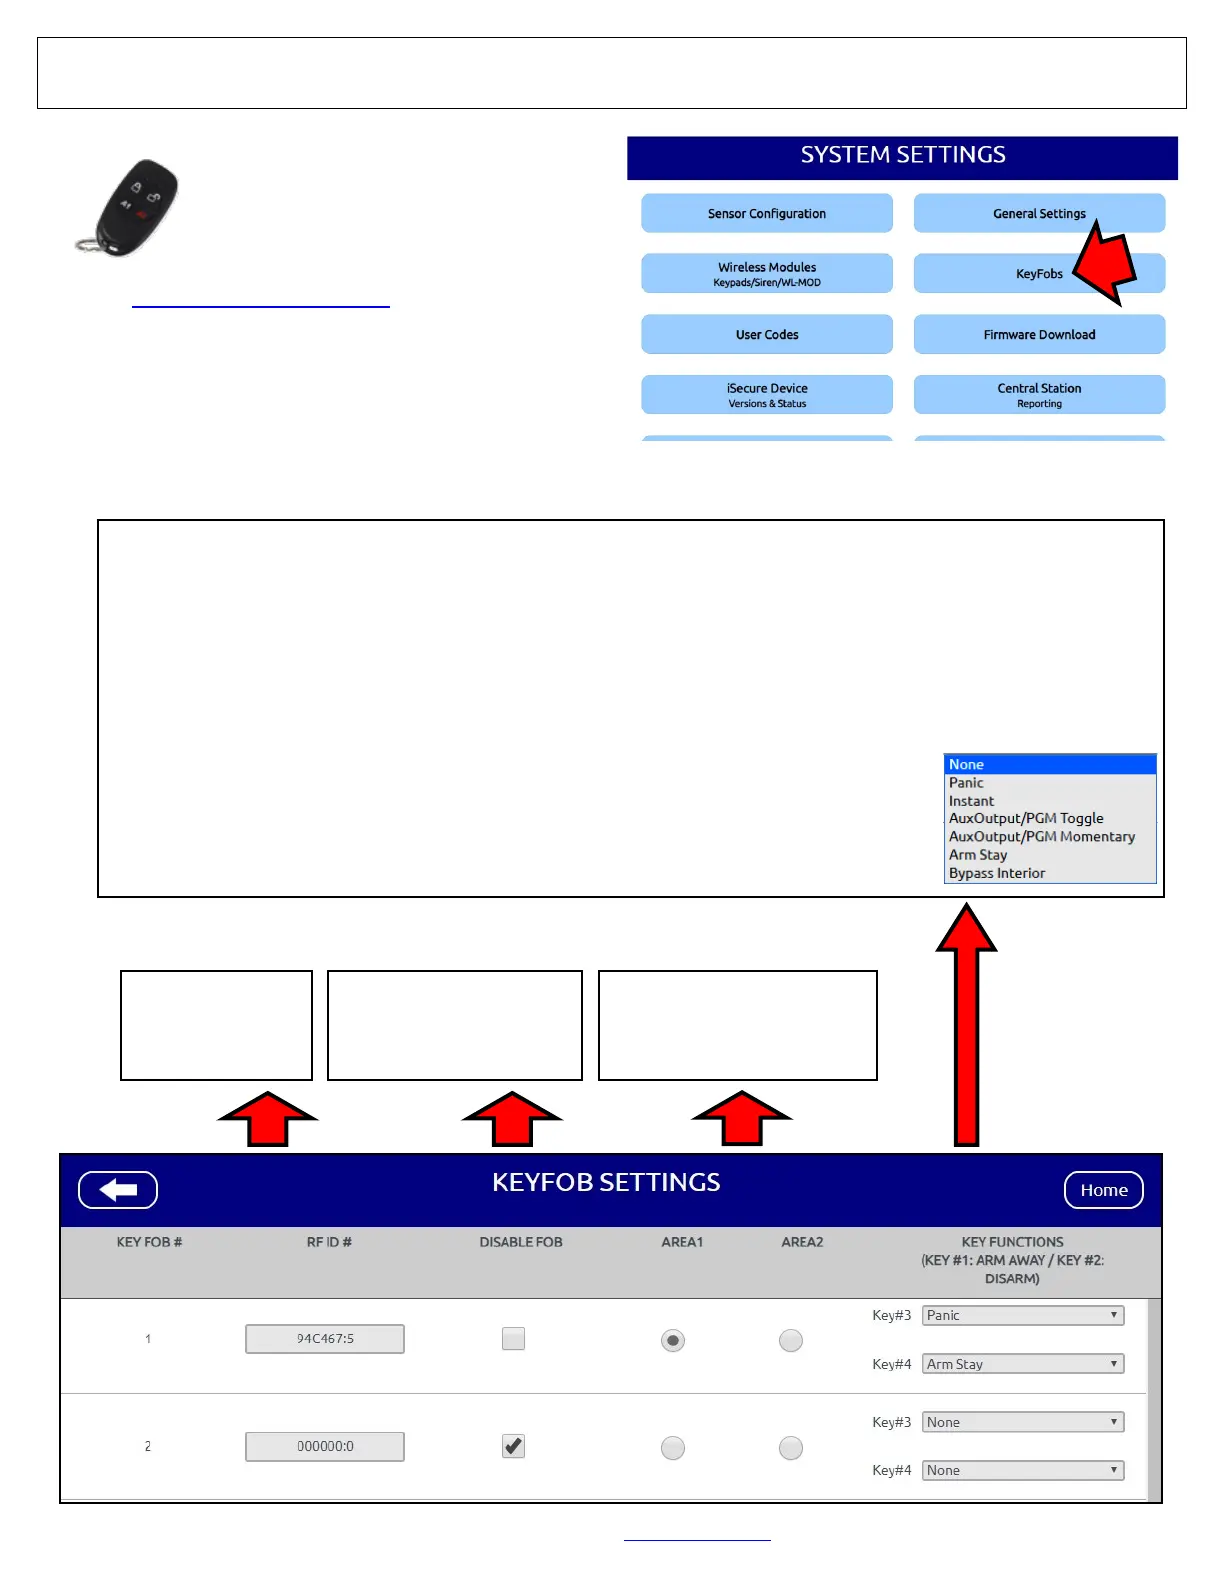
Programming: Keyfobs
1. Go to www.iSecureByNapco.com and log into your iSe-
cure account.
2. Click KeyFobs.
3. In the KEYFOB SETTINGS screen (shown below), pro-
gram each ISEC-KEYFOB as indicated (when finished,
click Save).
ISEC-KEYFOB 4-Button Pendant / Keychain Transmitter
AREA
Default = 1. See the key-
pad Operating Guide for
the definition of "Area".
3
RF ID
Type in the 7 digit
sensor ID # for
the device
1
DISABLE FOB
Keep unchecked unless
you wish to deactivate
your KeyFob
4
KEY FUNCTIONS
The "lock padlock" icon button is always used to arm AWAY (when you leave the premises). The "unlock padlock" button
is always used to disarm the system. "A1" ("Key 3") and "A2" ("Key 4") can be set in any combination, as follows:
• None: Select to disable the designated key ("Key 3" and/or "Key 4").
• Panic: Pressing the designated key causes the siren to sound and sends a panic report to the central station.
• Instant: Pressing the designated key before arming allows for an immediate alarm when the system is armed, provid-
ing instant protection.
• AuxOutput/PGM Toggle: Press the designated button to toggle the Aux. Relay on or off.
• AuxOutput/PGM Momentary: Press the designated button to cycle the Aux. Relay for 4-5 seconds.
• Arm Stay: Press the designated button to arm "STAY" (usually at night when sleeping).
Arming STAY provides partial protection by allowing free movement within the premises,
while still protecting the perimeter zones (Exit/Entry doors are provided with Exit/Entry de-
lays).
• Bypass Interior: Pressing the designated key before arming allows for partial protection
when the system is armed by allowing free movement within the premises, while still pro-
tecting the perimeter zones (Exit/Entry doors are provided with Exit/Entry delays).
2