SCXI Quick Start Guide 6 ni.com
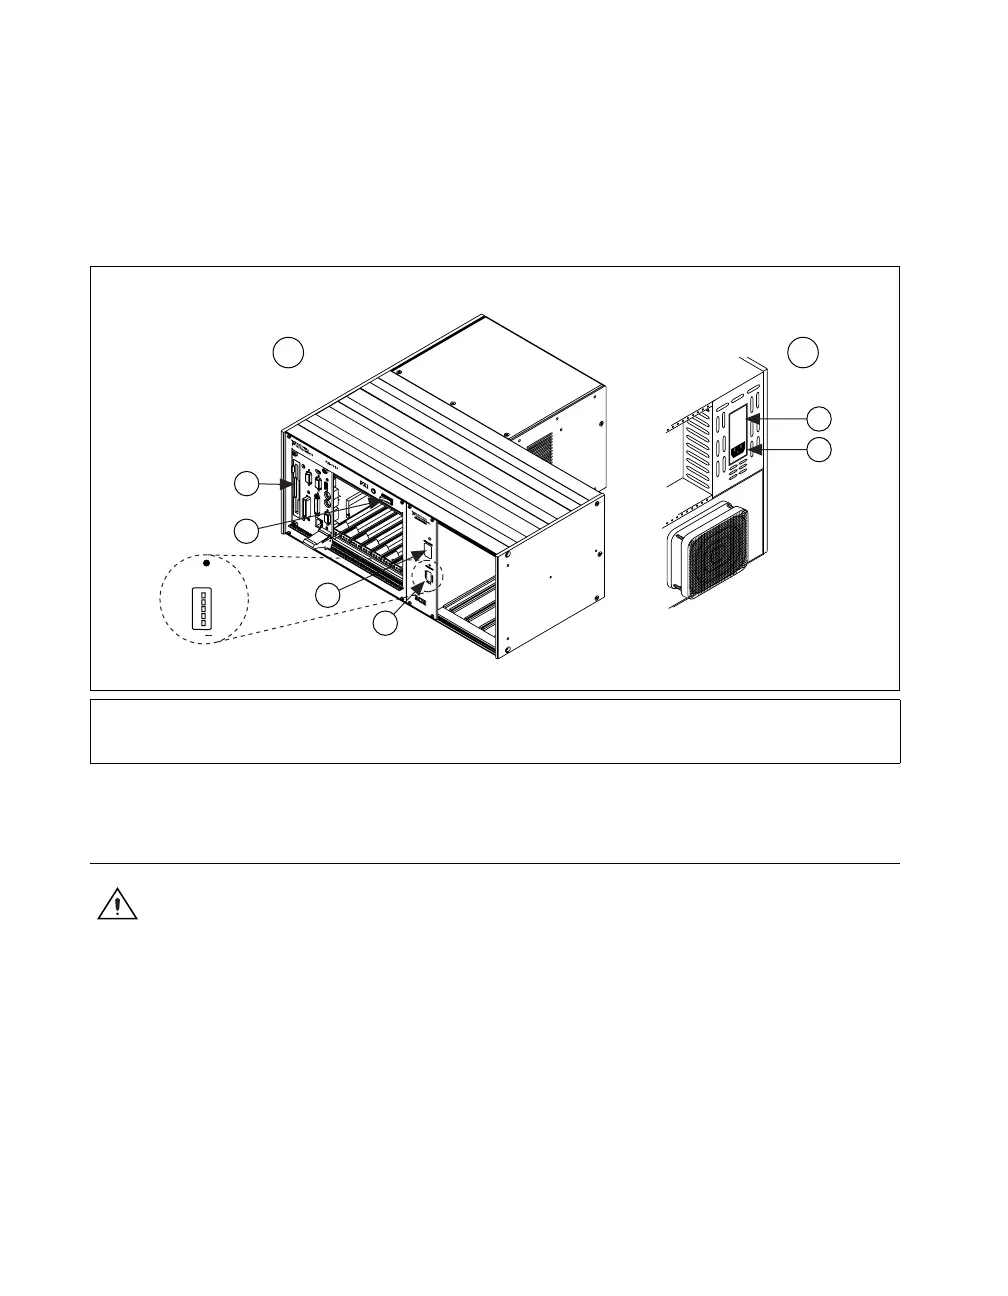
1. Power off both the PXI and SCXI power switches, and unplug the
chassis.
2. Set the SCXI address switches positions to off. In Figure 3, all
switches are shown in the off position.
3. Set the voltage selection tumbler to the correct voltage for your
application. Refer to the chassis documentation for more information.
4. Connect the power cord.
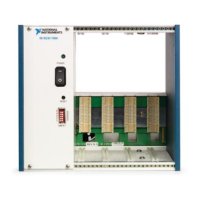
Figure 3. PXI/SCXI Combination Chassis Setup
Step 4. Install the Modules
Caution Make sure the chassis is completely powered off. SCXI modules are not
hot-swappable. Adding or removing modules while the chassis is powered on can result in
blown chassis fuses or damage to the chassis and modules.
PXI/SCXI Combination Chassis
To install the PXI E Series or M Series DAQ communicating device in the
right-most slot of the PXI chassis, complete the following steps:
1. Touch any metal part of the chassis to discharge static electricity.
2. Place the module edges into the top and bottom PXI module guides,
as shown in Figure 4.
1 Front
2Back
3 Voltage Selection Tumbler
4 Power Cord Connector
5 Address Switch
6 SCXI Power Switch
7 PXI Power Switch
8 System Controller
SCXI
120Vac
~
RESET
ADDRESS
ON
5
4
3
2
1
21
8
5
3
4
6
7
 Loading...