80 E2600 Controller-Drive Tray Installation Guide
5. Lower the drive straight down, and then rotate the drive handle down until the drive snaps into place under the
drive release lever.
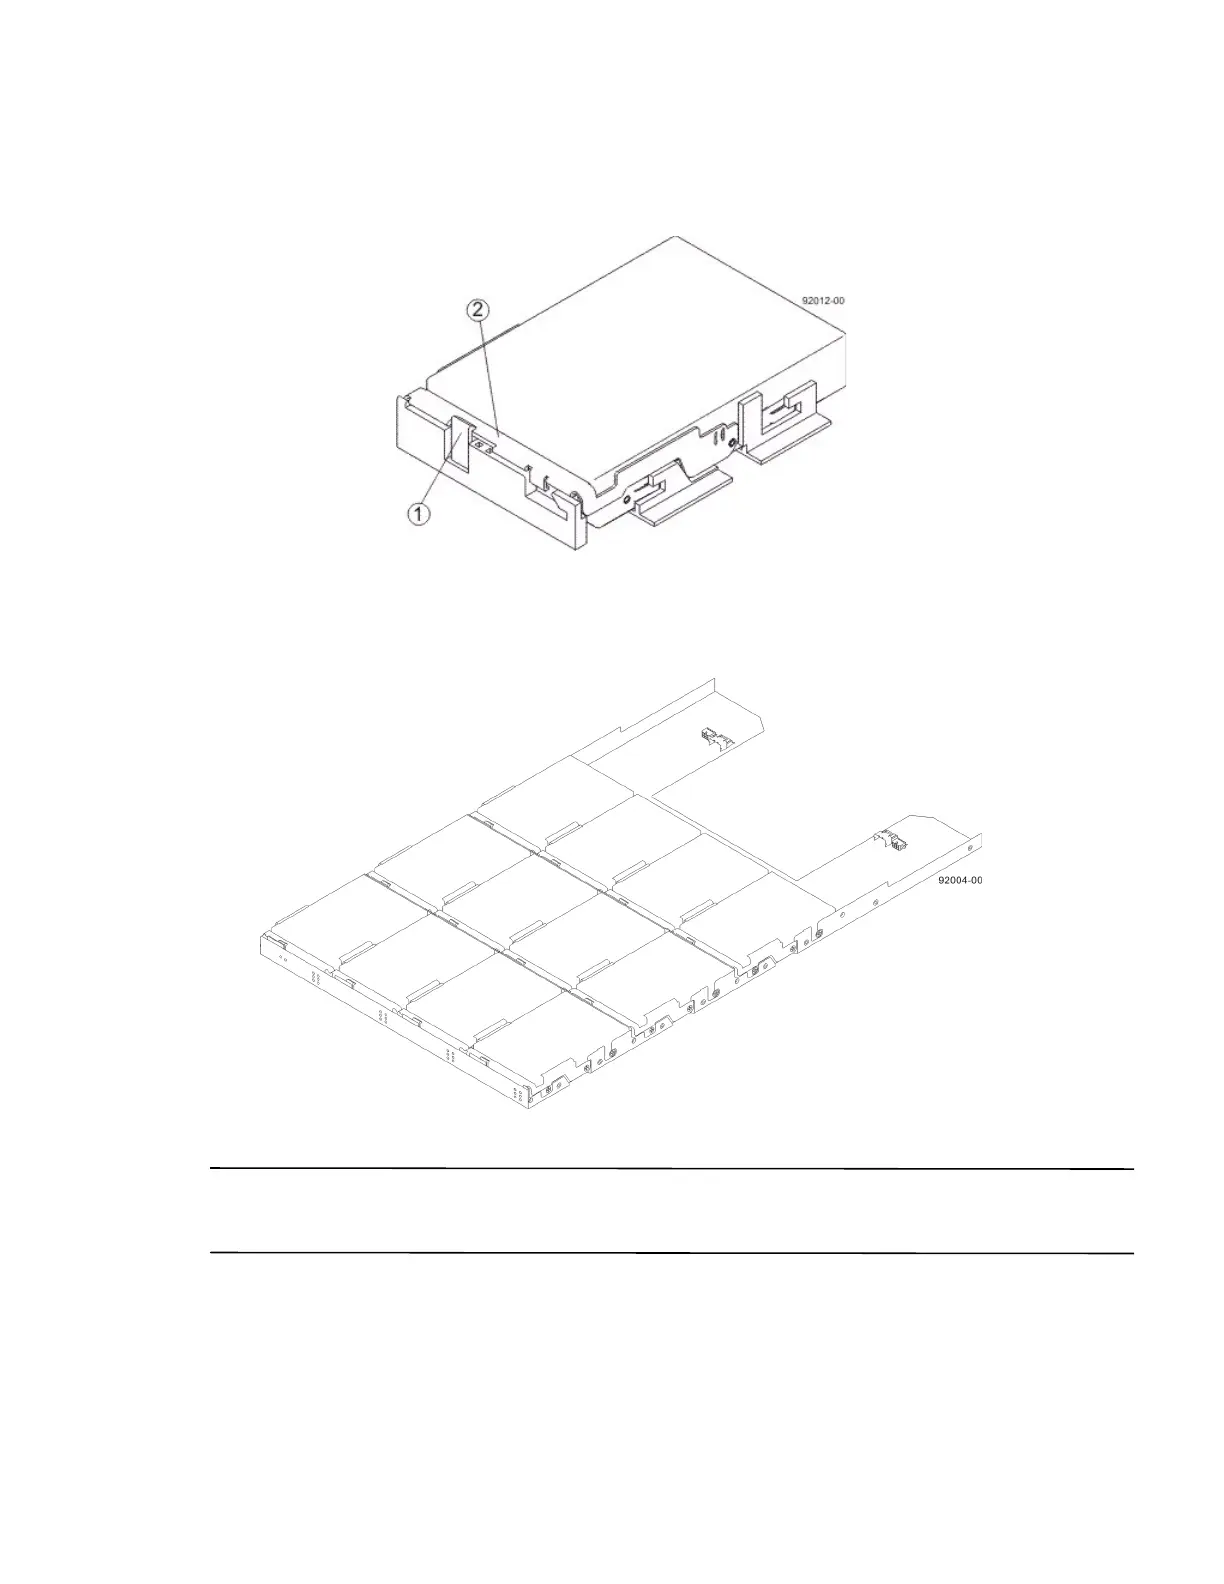
Figure 74 Drive Release Lever Locked by the Drive Handle
1. Drive Release Lever
2. Drive Handle
6. Install the other drives in rows from left to right until the drive drawer is fully populated.
Figure 75 Fully-Populated Drive Drawer
7. Push the drive drawer all the way back into the drive tray, closing the levers on each side of the drive drawer.
ATTENTION Risk of equipment malfunction – Make sure you push both levers to each side so that the drive
drawer is completely closed. The drive drawer must be completely closed to prevent excess airflow, which has the
potential to damage the drives.
8. Continue onto the next drive drawer, repeating step 1 through step 7 for each drive drawer in the configuration.