B
Wall-Mount the Switch
The switch provides two mount holes on the bottom panel so that you can attach the switch to a wall.The switch
package provides two screws and anchors for that purpose.
To attach the switch to a wall:
1. Locate the two mount holes on the bottom panel of the switch.
2. Locate the M3.5 x 16 mm screws and anchors in the switch package.
3. Mark and drill two mounting holes in the wall where you want to mount the switch.
The two mounting holes must be at a precise distance of 147.5 mm (5.8 in.) from each other.
4. Insert the anchors into the wall and tighten the screws with a No. 2 Phillips screwdriver.
Leave about 4 mm (about 0.125 in.) of each screw protruding from the wall so that you can insert the screws
into the holes on the bottom panel.
5. Line up the holes on the bottom panel with the screws in the wall and mount the switch to the wall.
Factory Default Settings and Technical Specifications
78
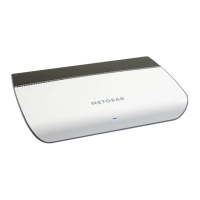
8-Port Gigabit Ethernet Smart Managed Plus Switch Model GS908E
 Loading...
