LBP2 User Guide Document No: 50306-001 Rev G 3/12/2020 Page 33
Note: Adding a comment to all frames will overwrite any existing comments in
the buffer.
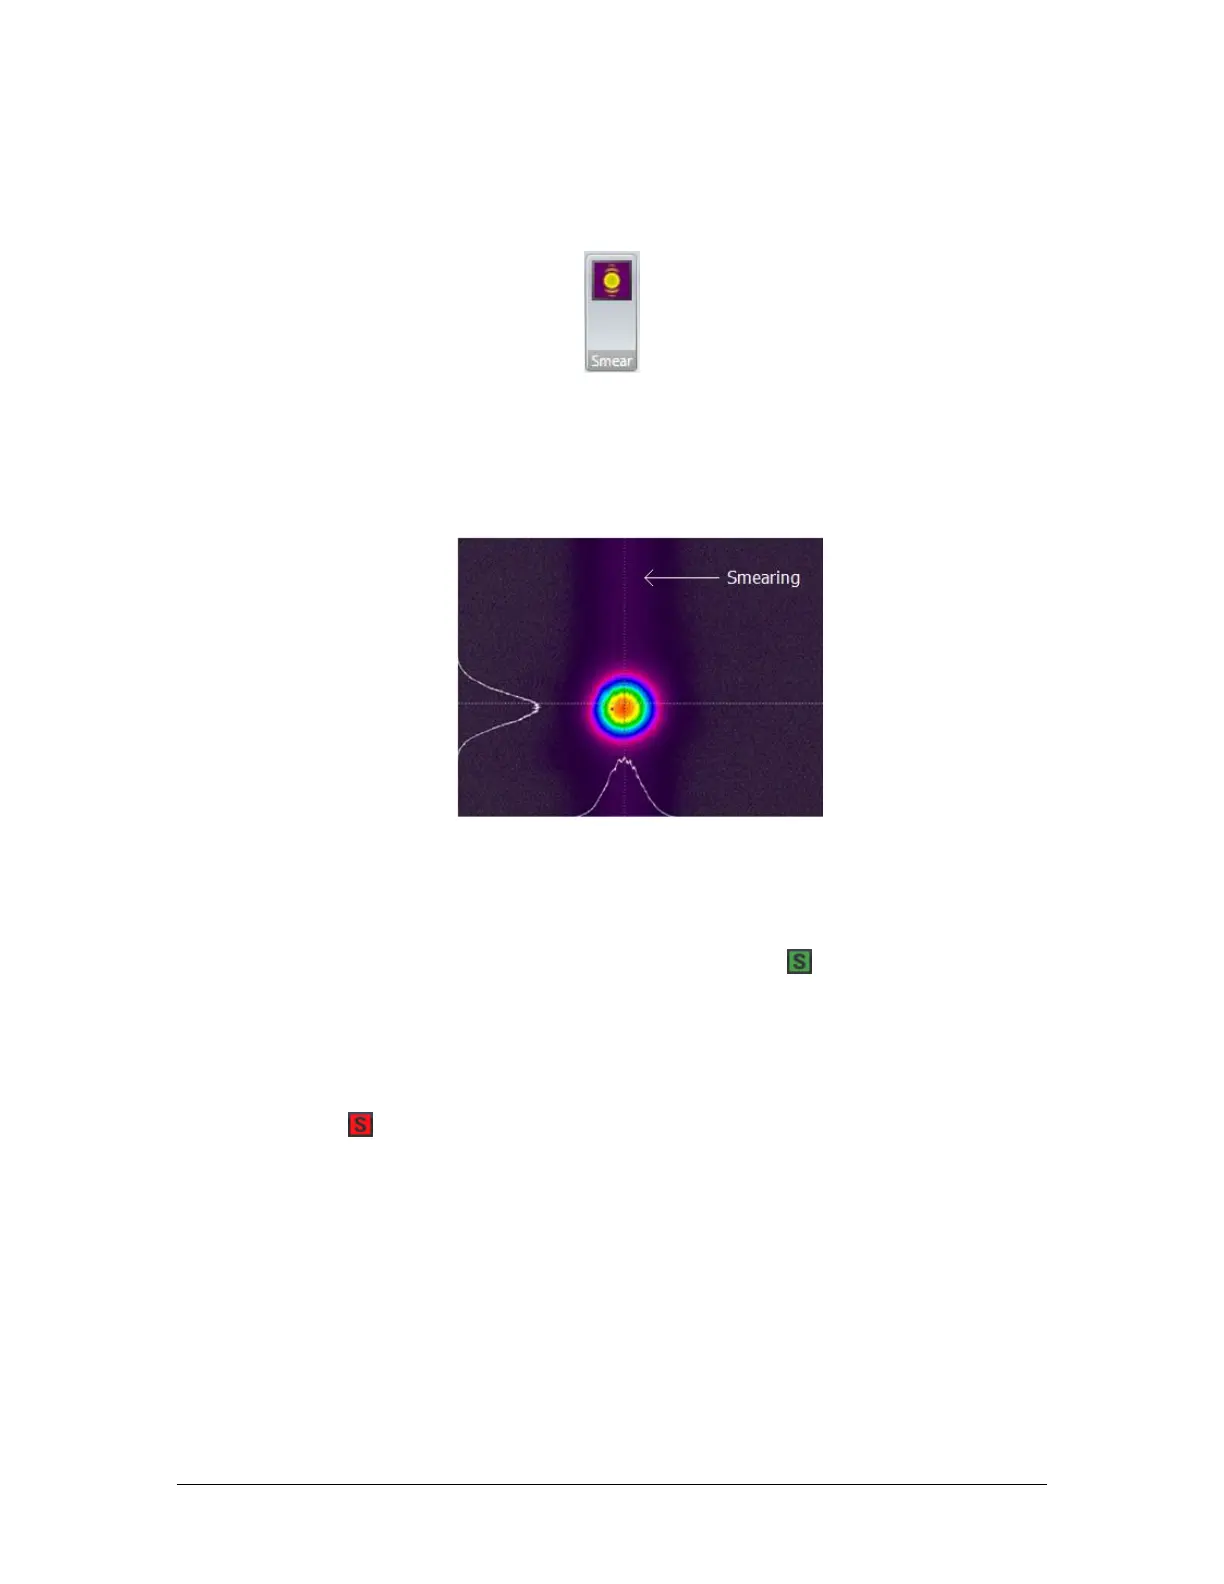
2.4.3 Smear Correction
Smearing manifests as a vertical streak in the camera image. It is caused by an
excessive amount of incident power on the sensor, typically as a result of a poor
match between the laser wavelength and the camera sensor’s quantum efficiency.
Silicon-based sensors have high quantum efficiency at visible wavelengths and
tend to experience smearing in the NIR and IR ranges (>1000nm).
The best way to avoid smearing is to increase the camera exposure above 10ms
and add attenuation until the beam is not saturated. If this is not feasible, Smear
Correction can be enabled to correct for the smearing mathematically.
If Smear Correction is applied successfully, a green indicator illuminates in
the status bar.
Important: Smear Correction makes the background look similar to having performed an
Ultracal. For accurate measurements, Ultracal must still be enabled.
Note: The indicator turns red and Smear Correction is suspended if the
beam is saturated. Hover over the indicator for an explanation of what caused
the suspension.
2.5 Computations Ribbon and Controls
The Computations Ribbon provides many of the basic setup controls for the computed
values that can be enabled in the Results Window as well as other display windows
that depict numerical values either directly or in graphical form. The Results window
display and panels are enabled in the Tools panel:
 Loading...