40
C
3
1
2
Illustration 28 C: NIB610/NIB620 - Sample placement.
D
1
3
4
5
2
Illustration 28 D: NIB610/NIB620 - Settings on the observationtubus.
1
3
2
70-80%
100%
CT
Open (O) Closed (C)
Illustration 28 E: NIB610/NIB620 - Aperture diaphragm adjustment.
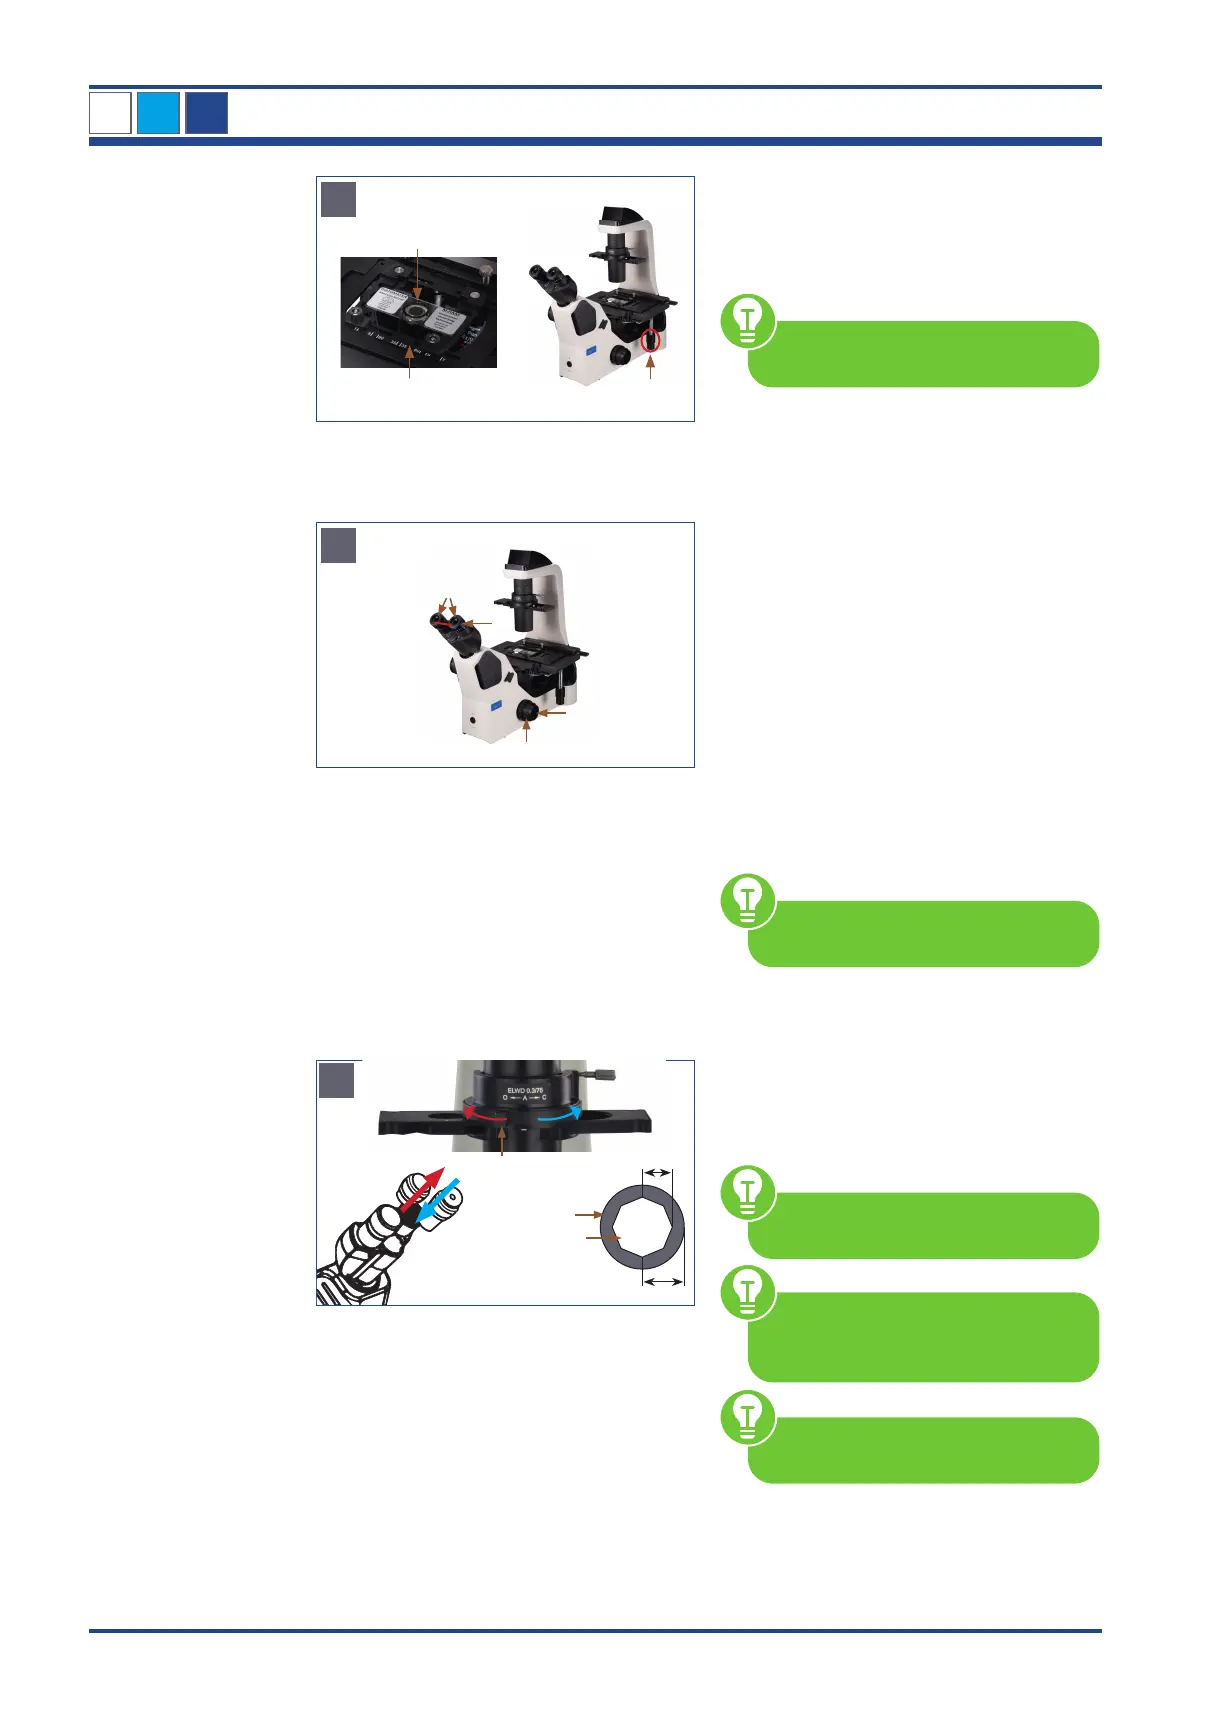
Place the sample (1) to be analyzed
in the universal holder (2).
Rotate the X-/Y-axis knobs (3) to place the
observed portion of the sample into the
optical path.
For further explanations see chapter
3.4.3. and 3.4.5.
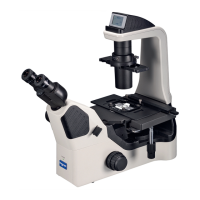
Focus on the sample: Look into the eye-
pieces (1) and turn the coarse focusing knob
(2) towards you until the image of the sam-
ple is in focus. Then turn the fine focusing
knob (3) to adjust the focus precisely.
Diopter adjustment: Look through one of
the eyepiece (1) and focus the image (eye-
piece freely selectable). Then look through
the other eyepiece with the other eye and
turn only the diopter adjustment ring (4) on
this eyepiece to focus the sample.
Adjust interpupillary distance: Look
through the eyepieces (1) and adjust the in-
terpupillary distance (5) so that the left and
right fields of view are completely aligned.
For further explanations see chapter
3.4.4. and 3.4.5.
Aperture diaphragm adjustment:
Rotate the aperture diaphragm (condenser
diaphragm) lever so that the size of the aper-
ture diaphragm image (2) is 70% to 80% of
the exit pupil of the objective (3) to be used.
Adjust the aperture diaphragm
every time you change the objective.
With the help of the centering
telescope (CT) you can visualize the
aperture diaphragm.
For further explanations see chapter
3.4.7.
NIB610/NIB620
3
E