62
NIB630
4
4.5. How do I set up my microscope correctly?
4.5.1. Bright field settings according to Koehler
(NIB630)
A
10x
100
1
2
5
4
77
66
33
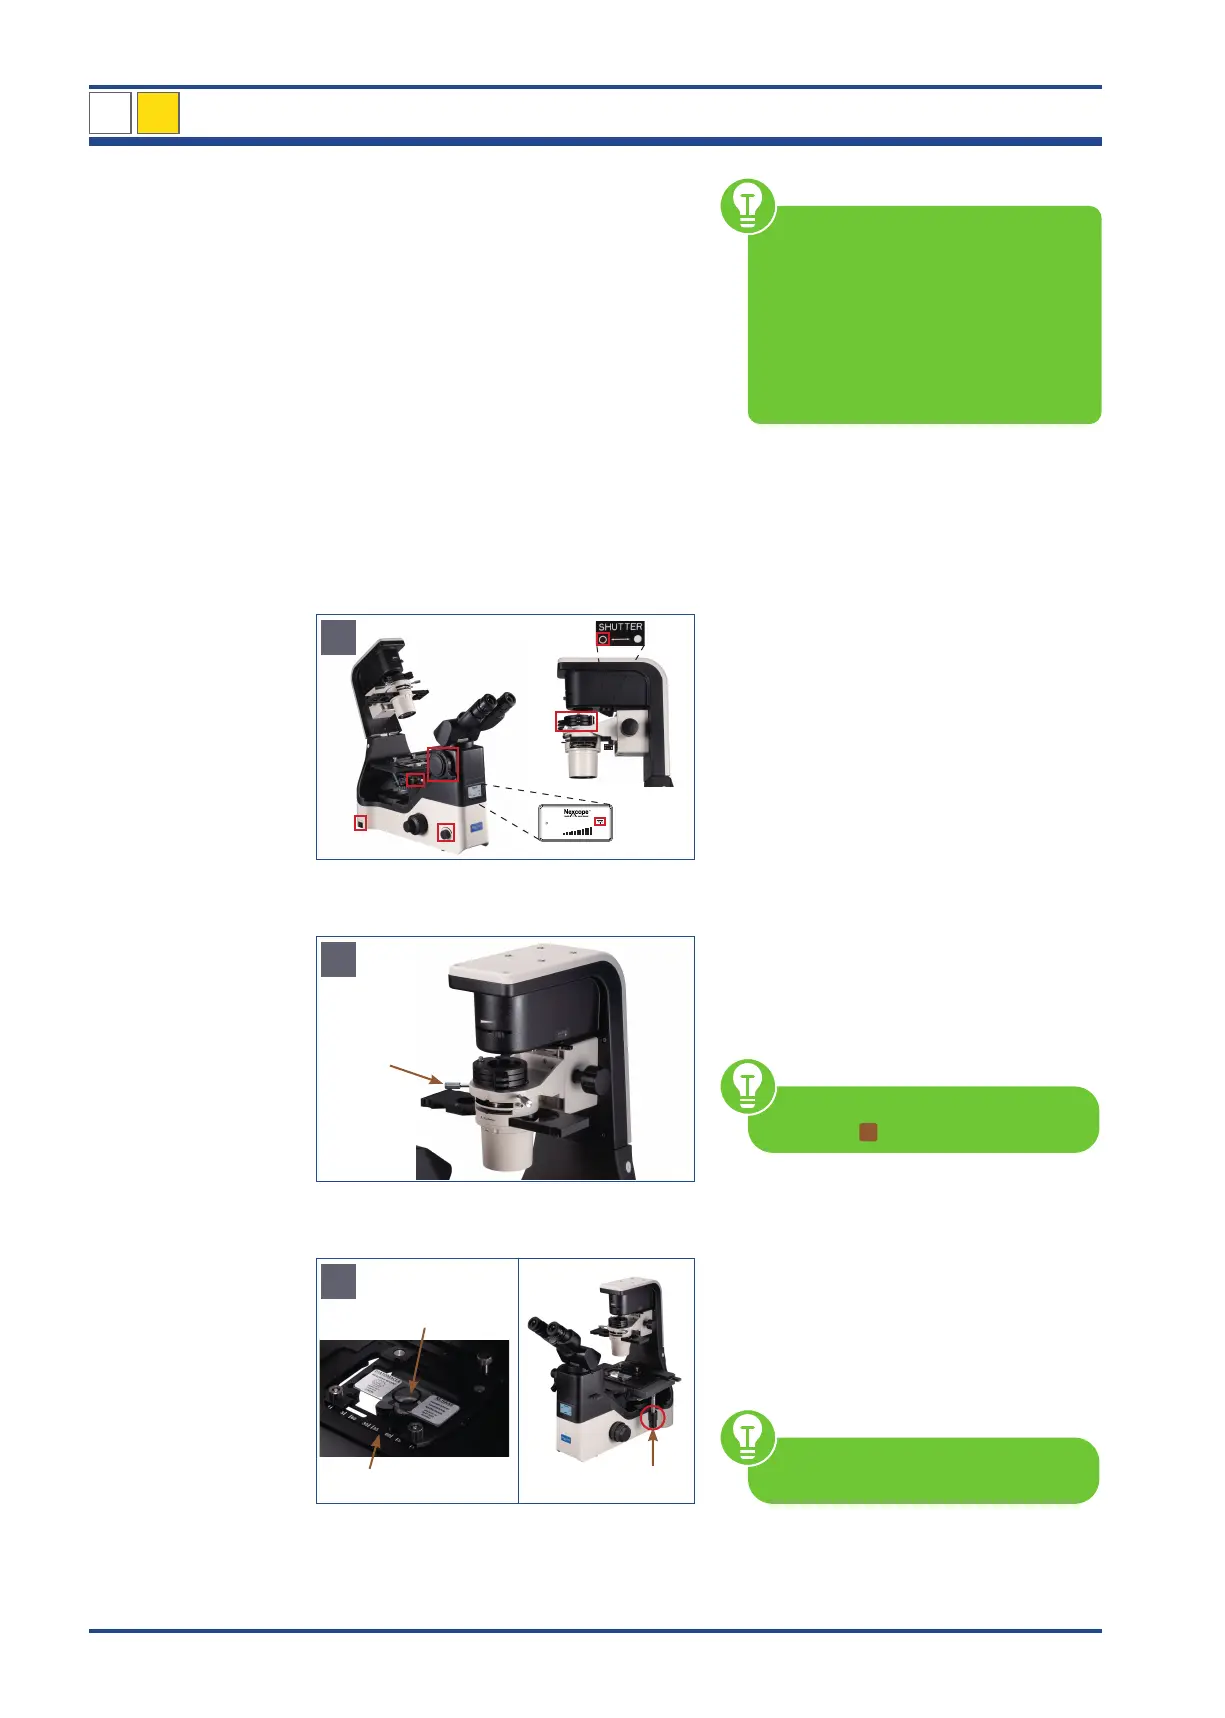
Illustration 55 A: NIB630 - Bright field settings before you start.
B
1
Illustration 55 B: NIB630 - Adjustment of the phase contrast slider.
C
1
2
3
Illustration 55 C: NIB630 - Place sample on the mechanical stage.
Before you start...
1. Microscope is switched on
2. Transmitted light ON (press and turn the
brightness control knob)
3. Changing lever for visual observation/
photo is set to 100% to binocular part
4. Transmitted light path shutter is open
5. No additional filters are swivelled into
the beam path
6. 10x objective is swivelled in
7. Turn on the illumination (Regulation via
the brightness control knob)
Set the universal phase contrast slider
(1) to bright field position
Select a hollow position position without
ring diaphragm bright field observation
For further explanations see chapter
4.2.1./
2
Place the sample (1) to be analyzed
in the universal holder (2).
Rotate the X-/Y-axis knobs (3) to place the
observed portion of the sample into the
optical path
For further explanations see chapter
4.3.3.
Move the aperture diaphragm lever (1) to
the left so that the size of the diaphragm im-
age is 70-80% of the size of the objective
pupil plane. This setting gives a reasonable
contrast and a favourable image. After ad-
justment, remove the CT and reinsert the eye-
piece. Tighten the set screw again.
The centering telescope (CT) is in-
cluded in the scope of delivery.
Each time the objective is changed, the
object field size and objective aperture
and possibly the centering will change
slightly, so that for optimal results, the
light field and aperture diaphragm set-
tings should be adjusted again.