66
5
OBSERVATION METHODS
5.2.3. Settings for phase contrast observation
NIB610/NIB620
A
2
4
6
55
11
3
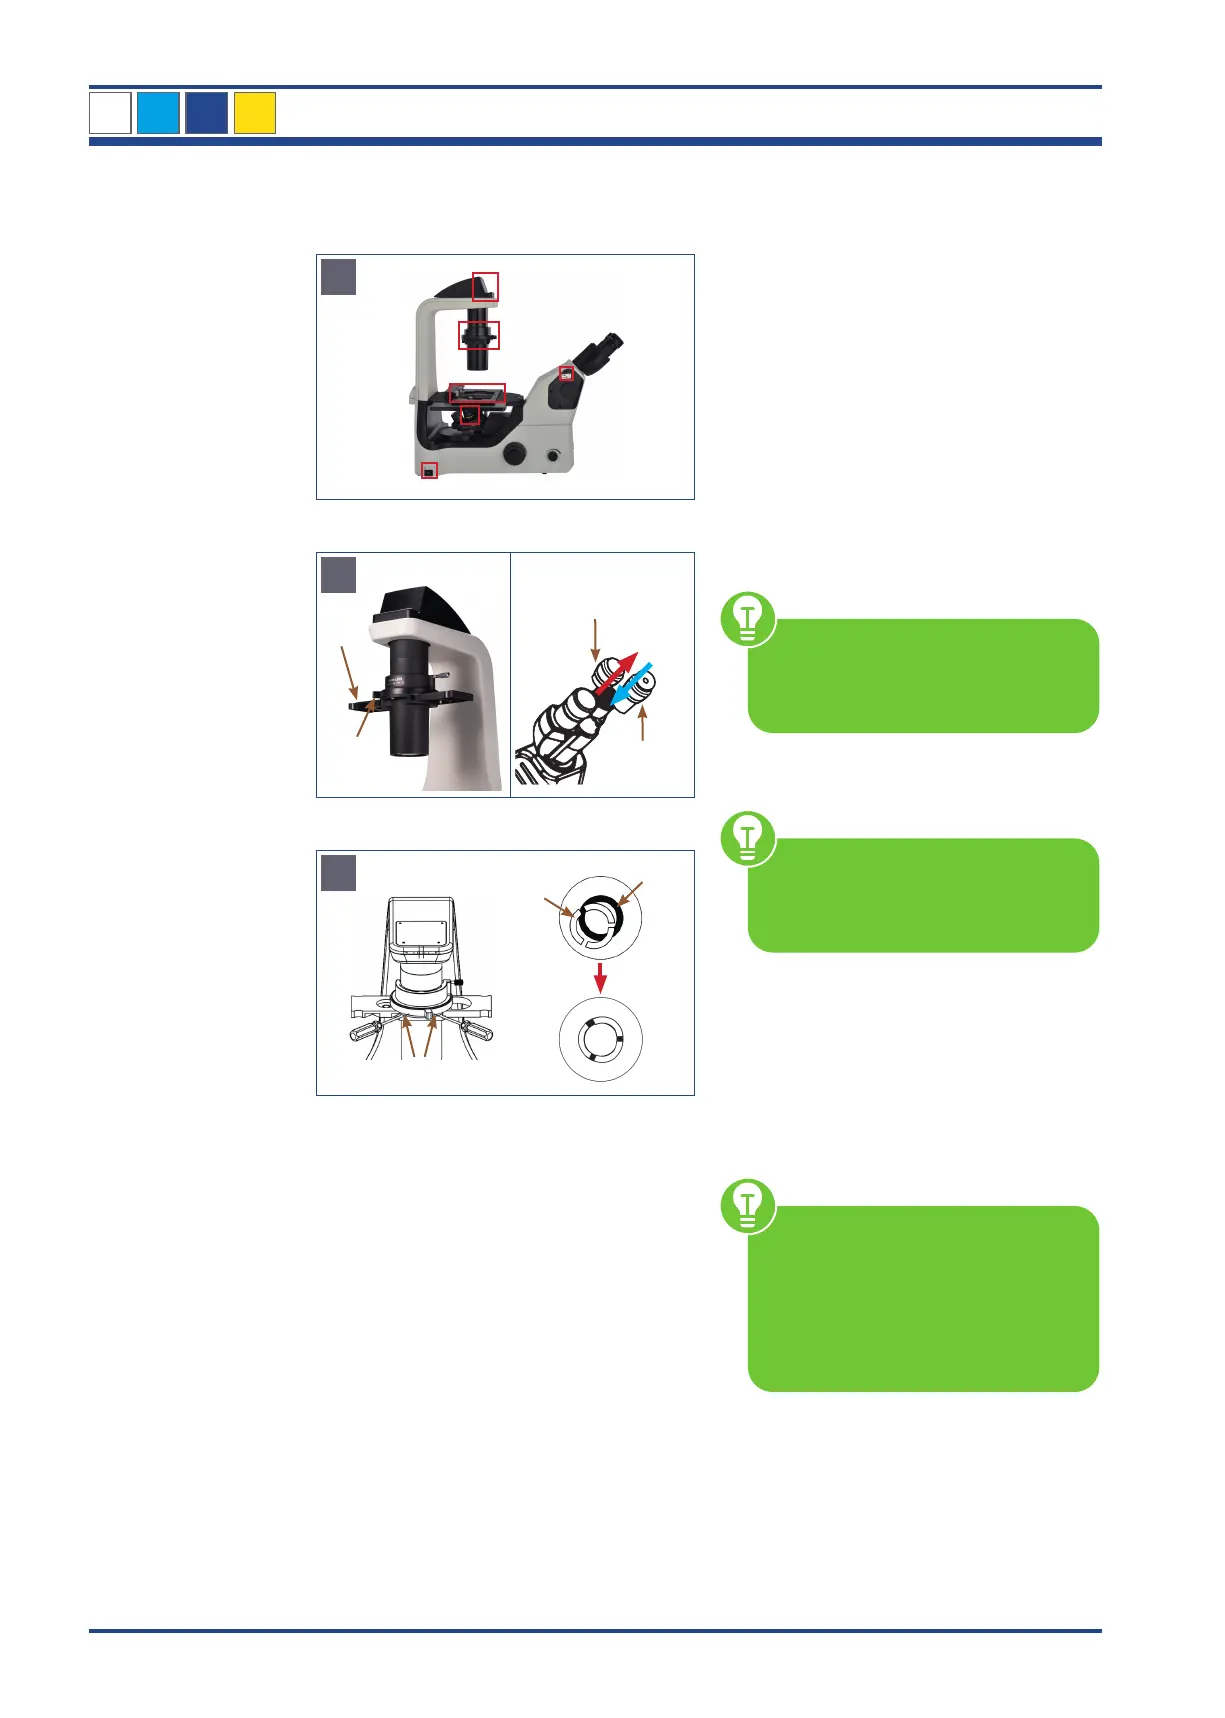
Illustration 57 A: NIB610/NIB620 - Settings before you start.
CT
B
1
3
4
2
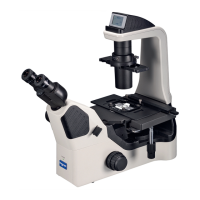
Illustration 57 B: NIB610/NIB620 - Settings for phase contrast.
5
6
7
C
Overlap
Illustration 57 C: NIB610/NIB620 - Settings for phase contrast.
Before you start...
1. Microscope is switched on
2. Only NIB620: Transmitted light ON
3. Switching rod for visual observation/
photo is set to the binocular part
4. Phase contrast slider is set to bright fild
5. 10x objective is swivelled in
6. Object is in focus
Set the phase contrast slider (1) to ring
diaphragm 10/20/40.
Set the aperture diaphragm lever (2) to
position O (open).
If the aperture diaphragm is
closed, it hinders the ring diaphragm
and phase contrast effects cannot be
obtained.
Replace an eyepiece (3) with the centering
telescope (CT) (4).
The CT enlarges the phase rings
and makes centering easier. An
approximate centering of the phase
rings is also possible without CT.
Turn the CT until two sharp rings become
visible.
Check the centering and overlap of the bright
ring diaphragm (in the condenser) (5) with
the dark phase ring (in the objective) (6).
Adjust the centering screws (7) on the phase
contrast slider until the bright ring diaphragm
and the dark phase ring completely overlap.
Use a suitable hexagonal
screwdriver.
Perfect phase contrast can only
be achieved when the bright ring
diaphragm and the dark phase ring
exactly covers the beam path.
Then switch to the next objective, check the
phase rings for all objectives and adjust if
necessary. After centering, remove the CT,
insert the eyepiece and observe your sample
in phase contrast.
When observing and replacing the speci-
men, check the focus and the brightness
adjust them as necessary.