HOME
TitleShort-Hidden -67
©
National Instruments Corporation
NEC-GPIB/TNT (PnP) Installation
67
NEC-GPIB/TNT (PnP) Installation
PRINT THIS TOPIC!
Your computer needs to be off while you install your interface. To print this topic, select File»Print,
select the Pages radio button, and print page 67.
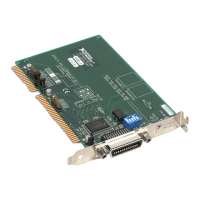
Complete the following steps to install the NEC-GPIB/TNT (PnP):
Caution
Electrostatic discharge can damage several components on these GPIB boards. To avoid such
damage in handling your board, touch the antistatic plastic package to a metal part of your
computer chassis before removing the board from the package.
1. Make sure that your computer is turned off. Keep the computer plugged in so that it remains
grounded while you install the GPIB hardware.
2. Find an unused expansion slot in your computer.
3. Remove the corresponding slot cover on the back panel of the computer.
4. Insert the NEC-GPIB/TNT (PnP) into the slot. It might be a tight fit, but do not force the board
into place.
5. Screw the mounting bracket of the NEC-GPIB/TNT (PnP) to the back panel of the computer.
6. Power on your computer and start Windows.
The NEC-GPIB/TNT (PnP) hardware installation is now complete.
!
 Loading...