HOME
TitleShort-Hidden -65
©
National Instruments Corporation
GPIB-1394 Installation
65
GPIB-1394 Installation
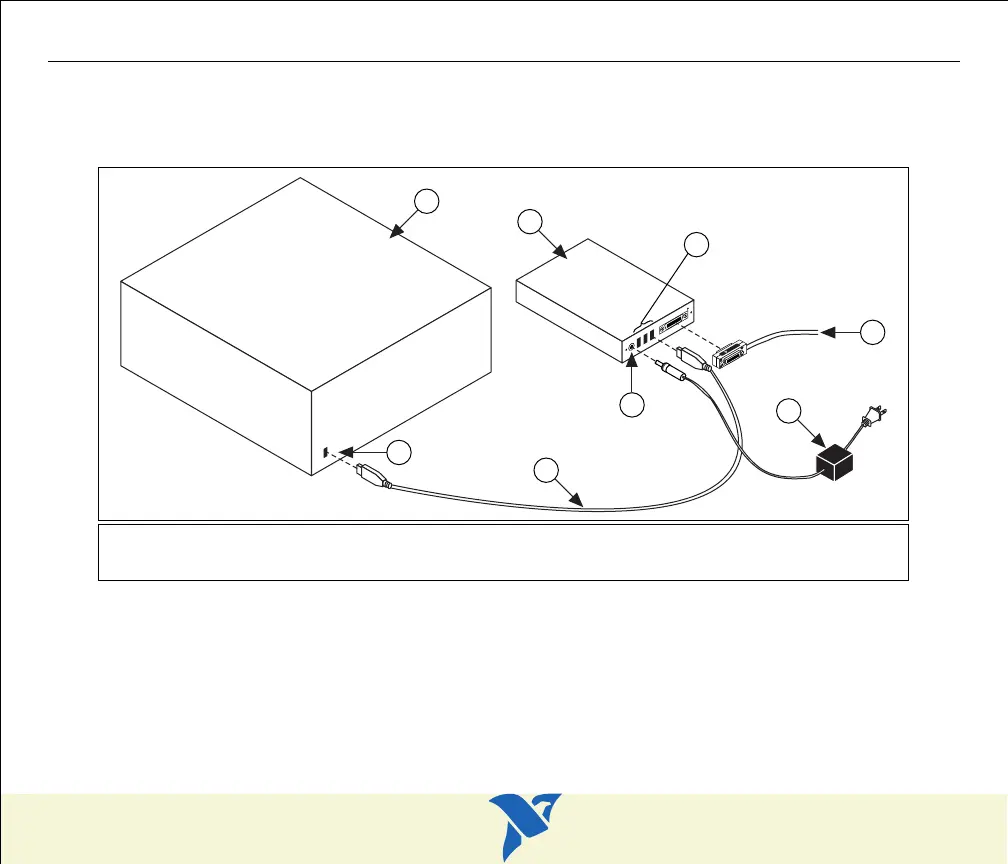
1. Screw the DC power connector of the DC power supply into the DC power connector on the
back panel of the GPIB-1394.
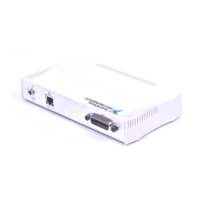
2. Plug the DC power supply into an AC outlet. Figure 14 shows how to connect the GPIB-1394.
Figure 14. Installing the GPIB-1394
3. Connect 1394 cable to any available 1394 connector on your PC.
4. Connect 1394 cable to any available 1394 connector on your GPIB-1394.
5. Turn on the GPIB-1394 with the power switch on its front panel. The GPIB-1394 is now
powered by the DC power supply.
The GPIB-1394 installation is now complete.
1 1394 Connector
2 1394 Cable
3 DC Power Supply
4 To GPIB Devices
5 1394 Connectors
6 GPIB-1394
7 DC Power Connector
8PC
NATIONAL
INSTRUMENTS
1
2
3
4
5
7
6
8
 Loading...