HOME
TitleShort-Hidden -11
©
National Instruments Corporation
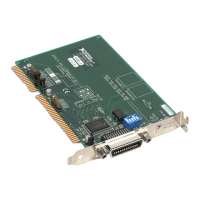
Configure and Install Your AT-GPIB/TNT
Next
Step
Previous
Step
11
Install the AT-GPIB/TNT
PRINT THIS TOPIC!
Your computer needs to be off while you install your AT-GPIB/TNT. To print this topic, select
File»Print, select the Pages radio button, and print pages 11-12.
Caution
Electrostatic discharge can damage several components on these GPIB boards. To avoid such
damage in handling your board, touch the antistatic plastic package to a metal part of your
computer chassis before removing the board from the package.
Complete the following steps to install your AT-GPIB/TNT:
1. Make sure that your board is configured to match the assigned resources. (If you are not sure,
view instructions to Configure and Install Your AT-GPIB/TNT.)
2. Shut down Windows and turn off your computer. Keep the computer plugged in so that it
remains grounded while you install the AT-GPIB/TNT.
3. Remove the top cover (or other access panels) to give yourself access to the computer
expansion slots.
4. Find an unused expansion slot in your computer. The AT-GPIB/TNT requires a 16-bit ISA
expansion slot.
5. Remove the corresponding slot cover on the back panel of the computer.
!
 Loading...