Chapter 5. Capturing Multistained Images: Cross Talk Reduction (Standard Detector) A1
19
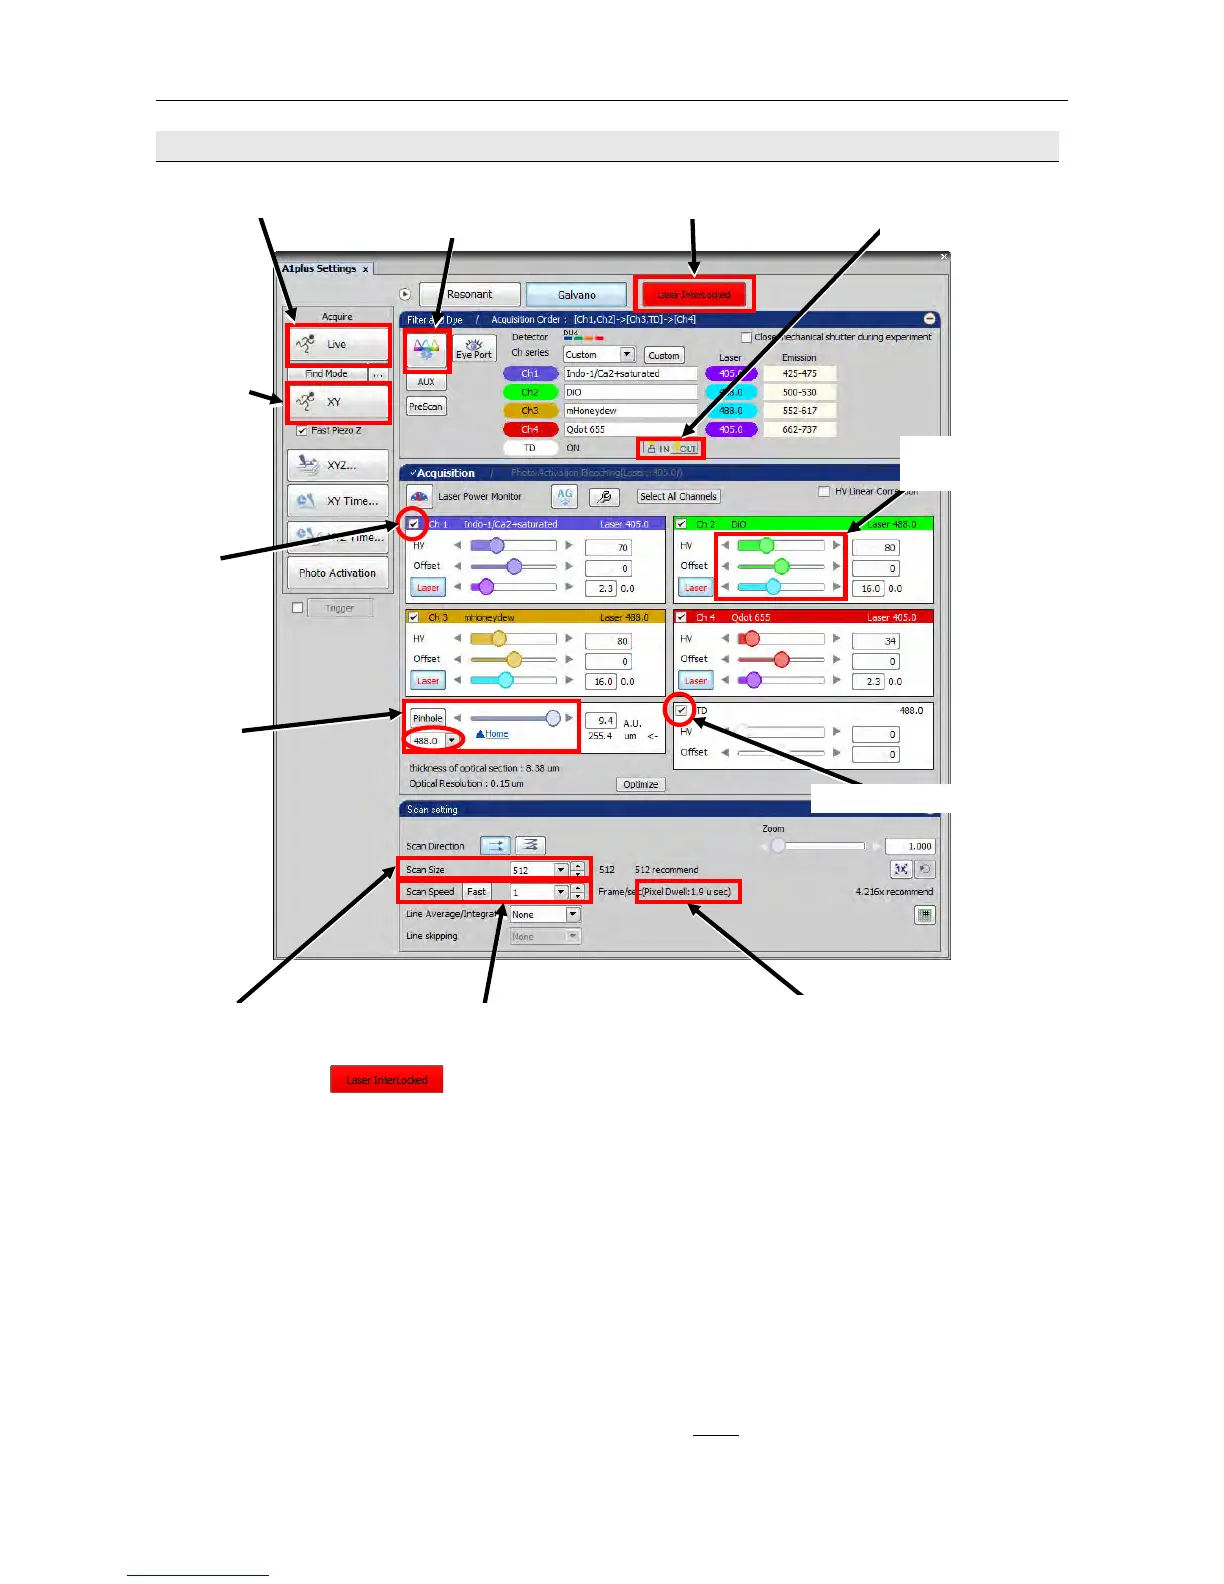
5.3 Determine image acquisition conditions and acquire images.
(1) Click the
[Laser InterLocked] button to reset blinking and to enable laser oscillation with
the software.
Note: If the optical path is not switched to A1, blinking cannot be reset even though the [Laser
InterLocked] button is clicked.
(2) Select the laser and channel to be used.
(3) If you want to acquire a transmitted image together with a confocal image, click the TD [IN] button and
check the TD checkbox.
Note: Before acquiring a transmitted image, turn off the light above the microscope.
(4) Select the laser wavelength to be used from [Pinhole].
Select a pinhole size best suited for the objective with [▲Home
].
(9)
cquisition
(2)
Selecting a
laser
(4)
Selecting a
pinhole
(5)-2 Adjusting laser
power and HV
(3)-2 Selecting a transmitted image
(7)-1 Selecting resolution (7)-3 Selecting scan speed
(7)-2 Laser application time per pixel
Checking the
settings
(3)-1 Selecting a
transmitted image
(5)-1 Live (Starting scanning)
(1) Resetting interlock