40
Capturing Photo Activation Imaging
(Galvano Scanner / Time-Series Activation)
14
Chapter 14. Capturing Photo Activation Imaging (Galvano Scanner / Time-Series Activation)
14.1 Perform Steps 4.1 to 4.7 in Chapter 4, “Capturing Color Images” to determine image
acquisition conditions.
Note: When using Ch series, photo activation cannot be set. Select [None] in Ch series.
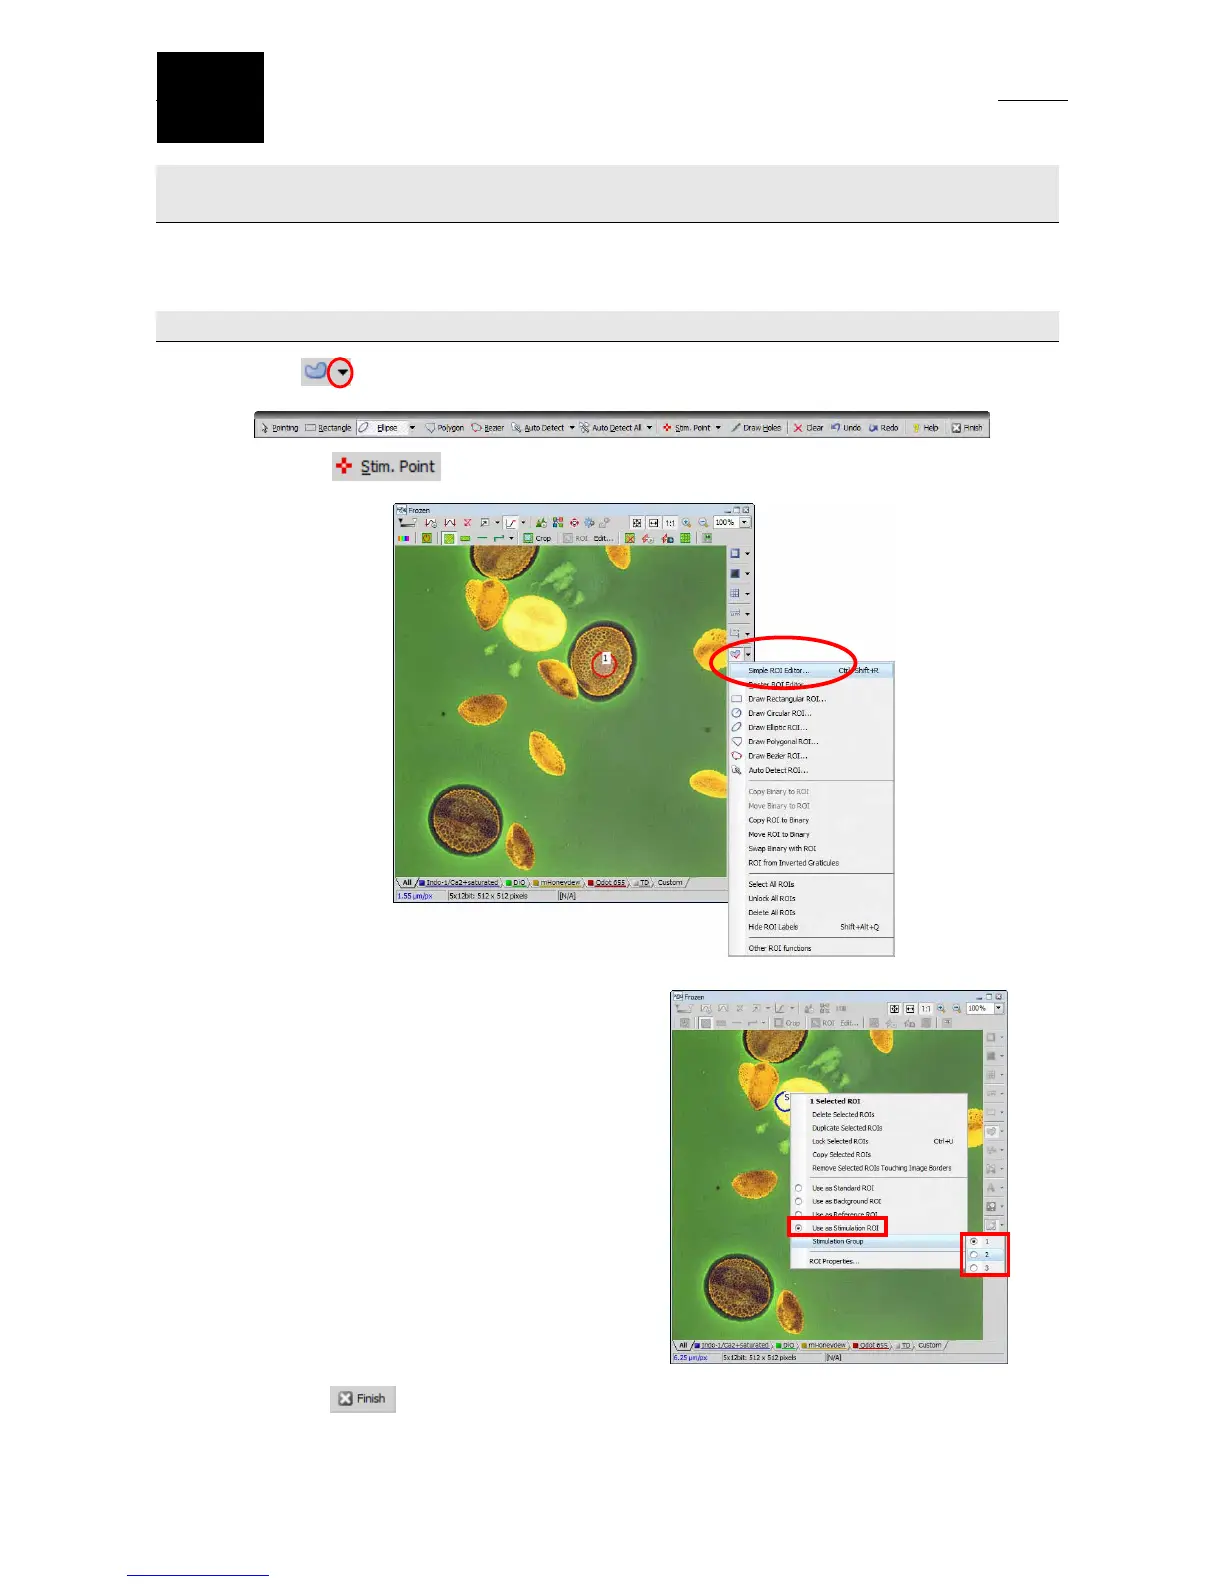
14.2 Set the area where photo activation is to be performed.
(1) Click
at the side of the image frame and select “Simple ROI Editor”. Draw a ROI on the image
using tools on the
tool bar.
Note: Using allows point activation.
(2) Right-click on the ROI and select [Use as
Stimulation ROI] from the displayed menu,
and then select [Stimulation Group].
Note: ROIs can be divided into up to three
groups. A group can contain two or
more ROIs.
Different activation conditions can be
set by grouping ROIs.
(3) Click the
[Finish] button of “Simple ROI Editor” to finish the setting.