Chapter 14. Capturing Photo Activation Imaging (Galvano Scanner / Time-Series Activation) A1
41
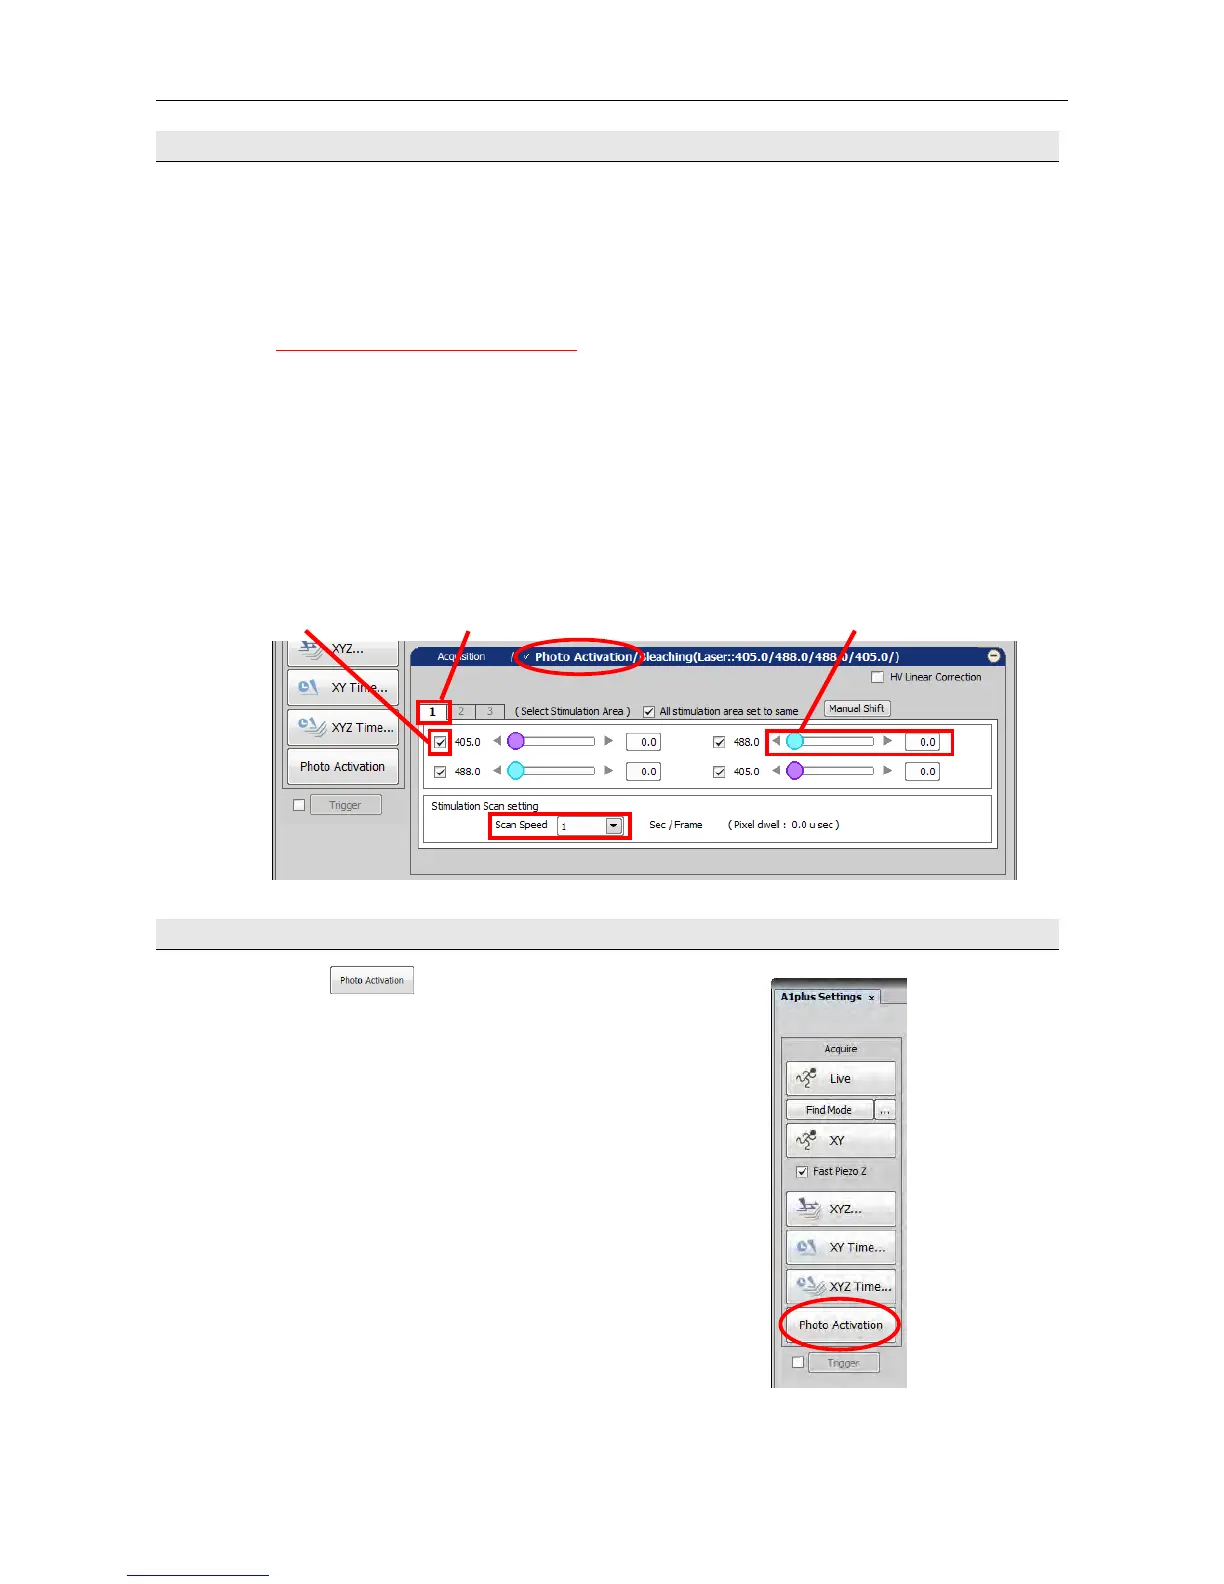
14.3 Set the laser light for activation.
(1) Click [Photo Activation] to switch the setting window.
(2) Click Tab 1 (Stimulation Group 1 setting).
(3) Select lasers used for activation.
Note: All lasers can be used for activation.
(4) Move the laser bar to select the laser power for activation.
(5) Select [Scan Speed] for activation.
Note: Consider that Scan Speed is the time required for a single activation.
When “1 Sec/Frame” is selected, the time for a single activation is one second.
(6) When there are Stimulation Groups 2 and 3, repeat Steps (2) to (5).
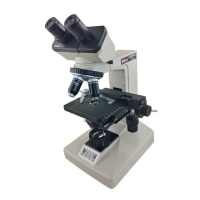
14.4 Set time series for photo activation imaging.
(1) Click the
[Photo Activation] button
to open the ND Stimulation window.
(5)
(3) (2) (1) (4)