Chapter 2. Startup A1
6
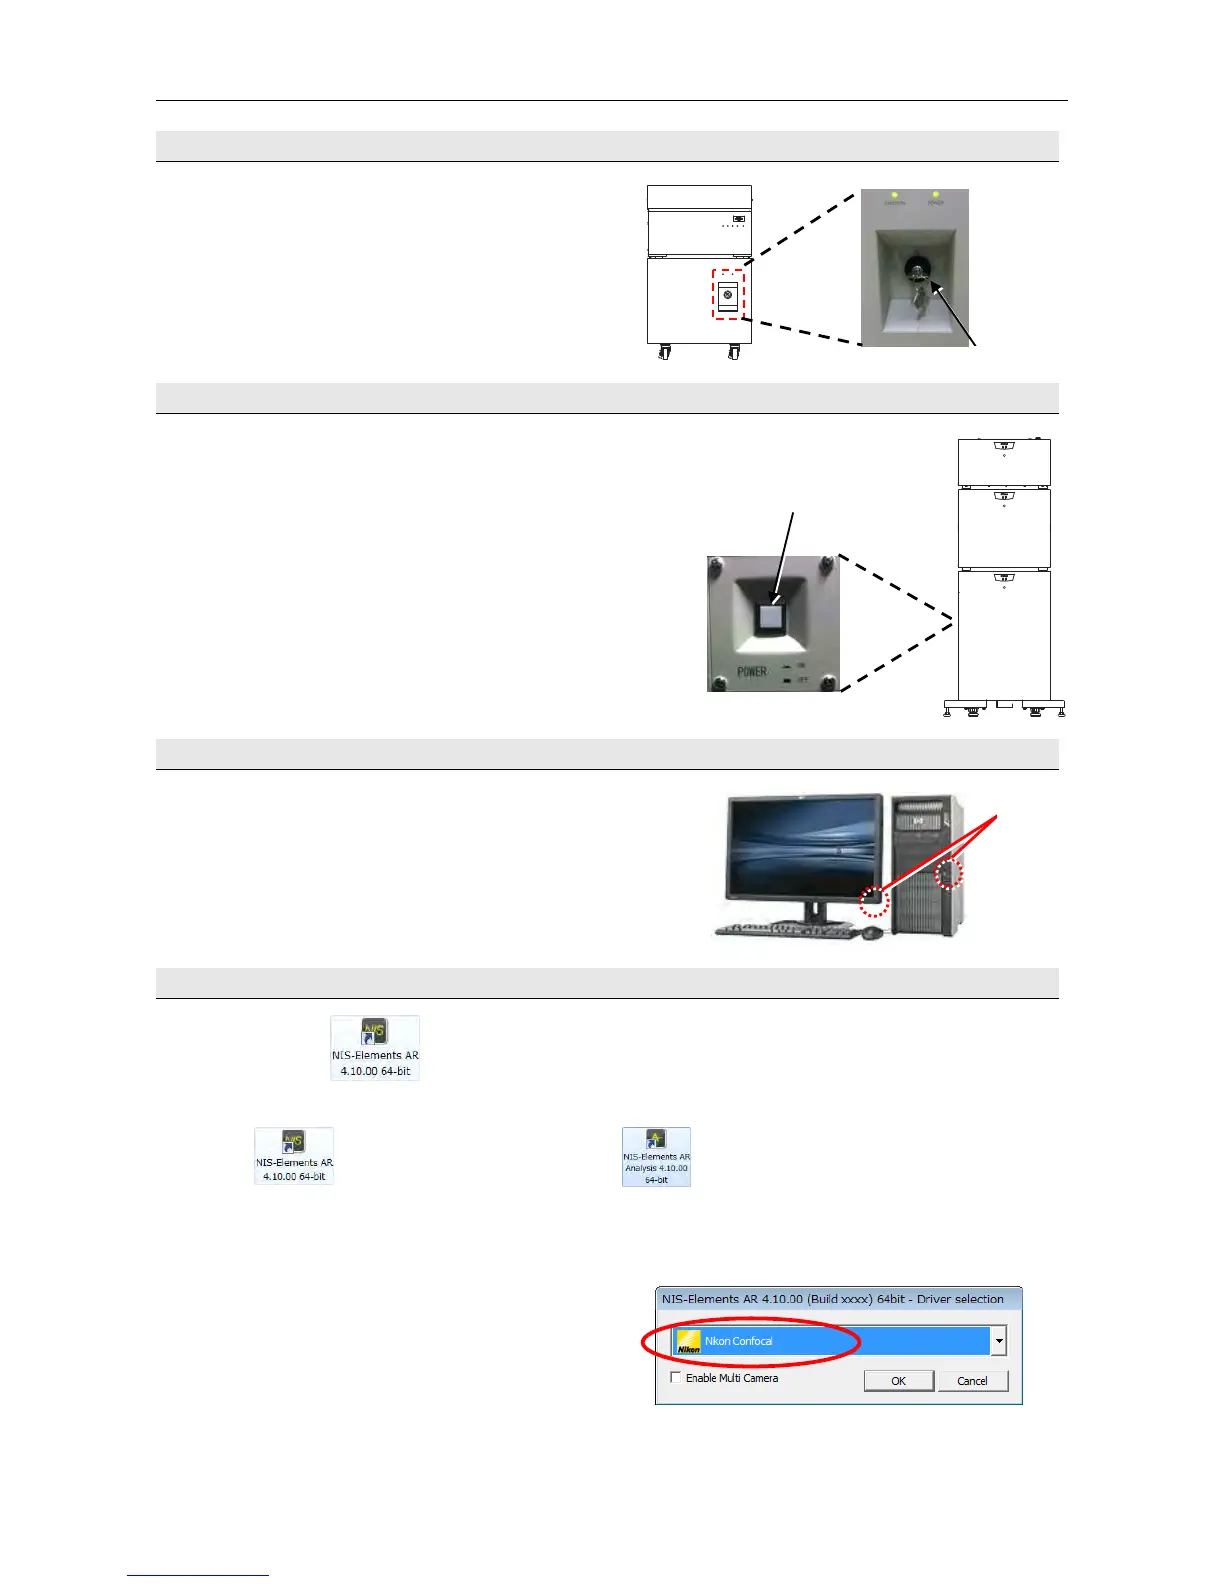
2.2 Turn on the power to the laser.
Turn the key 90 degrees clockwise from the
vertical position (off).
2.3 Turn on the power to the controller.
Press the switch on the side of the controller.
Note: The depressed state of the switch is
power-on state.
2.4 Start the PC.
2.5 Run the NIS-Elements software.
(1) Click the
icon to run the NIS-Elements software.
[Icons for acquisition and analysis]
"For acquisition"
Use this icon for image acquisition.
This icon consists of the acquisition
function and analysis function.
"For analysis"
Use this icon for brightness analysis or others.
This icon consists of only the analysis function.
Note: When not only a confocal microscope is
connected but also a camera, the Driver
selection dialog box opens to select a
driver.
Select “Nikon Confocal” in the Driver
selection dialog box and click the [OK]
button.
POWER
switches
Press the switch.
Turn the ke