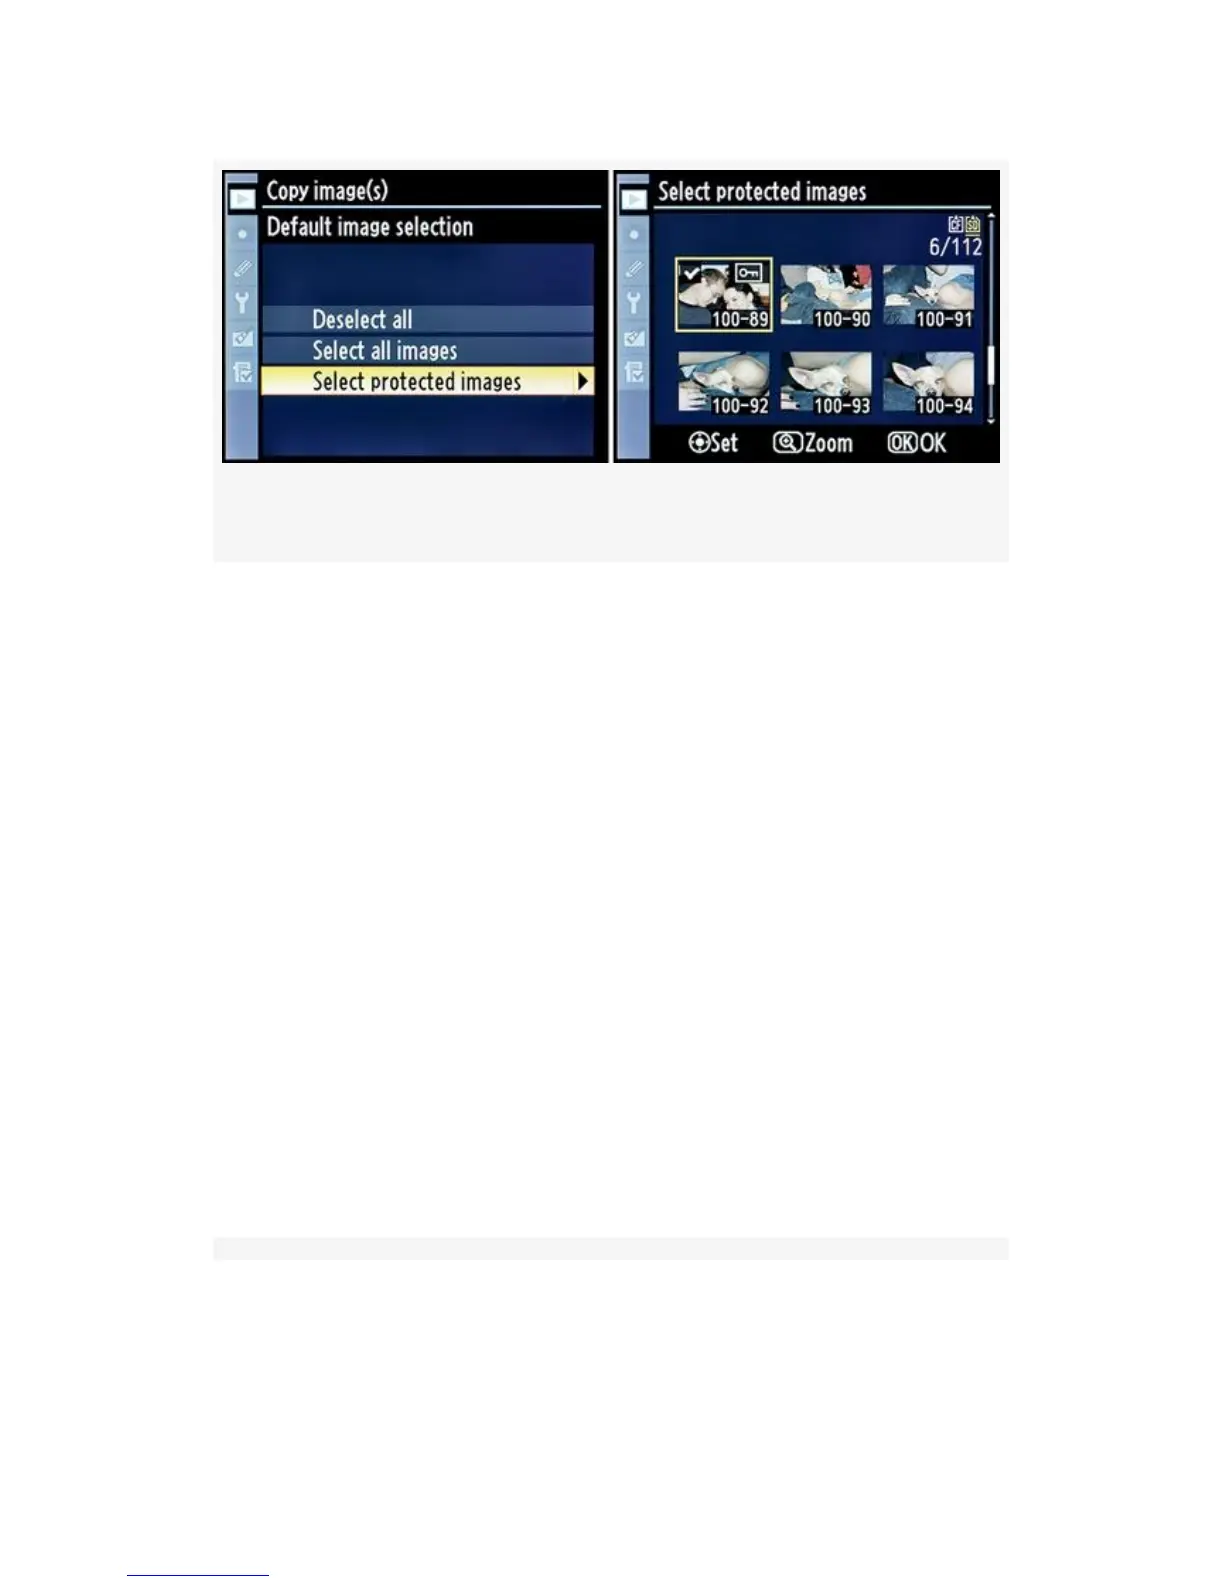
Figure 2-19. Select protected images function
If you’ve previously used the Protect button to mark images
as protected, they’ll show up with a little key symbol in the
list of images and will already be checked for copying.
Figure 2-19, image 2 shows the only image selected (number
100-89). Now, move on to step 5. (Note: The Protect button is
at the left top of the Monitor with a key symbol on it and a
question mark above it.)
1. Once you’ve selected all the images you want to copy,
press the OK button and the camera will switch back to
the Copy images(s) menu. Now it’s time to select a
destination folder into which you’ll copy the images.
2. Choose Select destination folder from the Copy image(s)
screen and scroll to the right (see Figure 2-20). You’ll be
presented with two choices, Select folder by number or
Select folder from list (see Figure 2-21 and Figure 2-22).
66