Total Station NPL-322 Instruction Manual 143
Checking and Adjustment 6
Checking and Adjusting the Optical Plummet
The optical axis of the plummet must be aligned with the vertical axis of the
instrument.
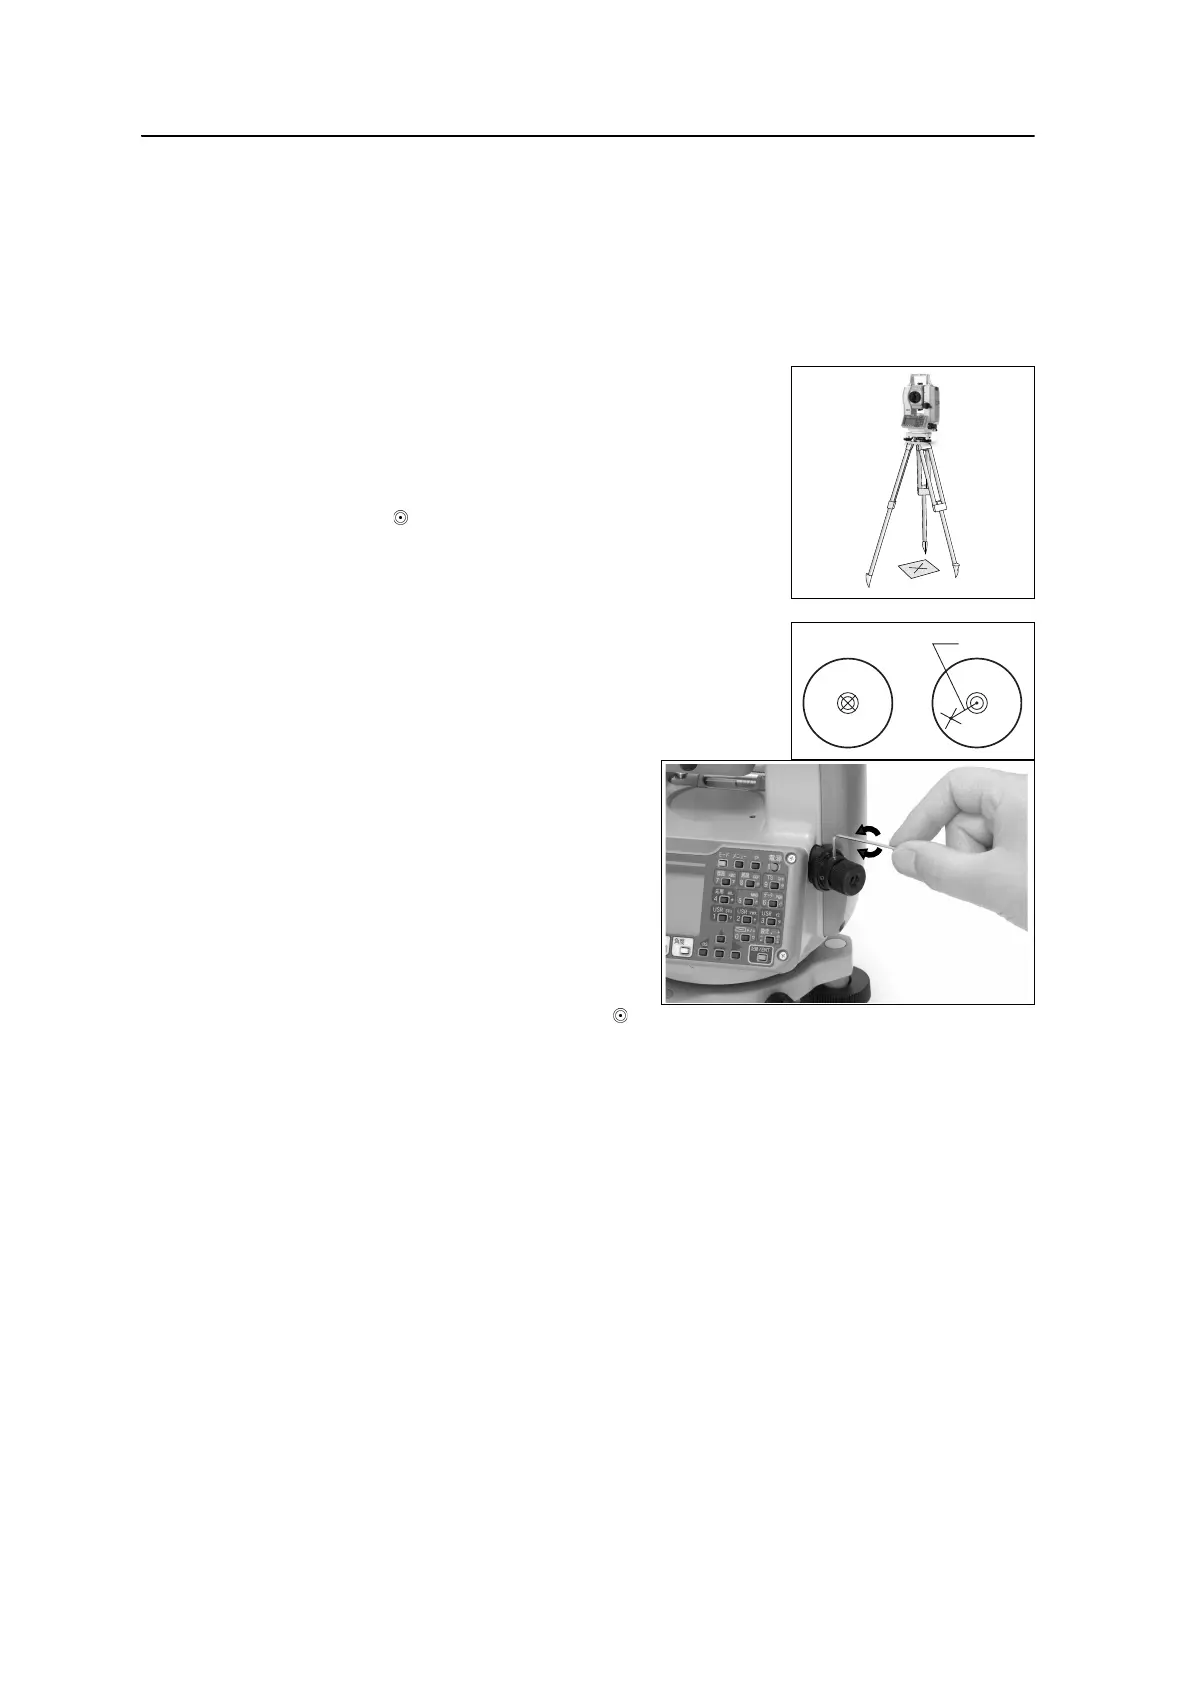
To check and adjust the optical plummet:
1. Place the instrument on the tripod. You do not have to level the instrument.
2. Place a thick sheet of paper marked with an X on
the ground below the instrument.
While you are looking through the optical
plummet, adjust the leveling screws until the
image of the X is in the center of the reticle
mark .
3. Rotate the alidade 180°.
If the marked image is in the same position in the
center of the reticle mark, no adjustment is
required
4. If the image is not in the same
position, adjust the optical
plummet:
a. Use the supplied hexagonal
wrench to turn the adjustment
screws until the image of the
X is in Position P. Position P
is the center point of the line
connecting the X and the
center of the reticle mark .
b. Repeat from Step 2.
Zero Point Errors of Vertical Scale and Horizontal Angle Corrections
Checking
1. Set up the instrument on the tripod.
2. Follow the leveling procedures described in Leveling, page 16.
3. Flip the telescope to the Face-1 position.
4. Sight a target that is within 45° of the horizontal plane.


 To Next Page