3 – 10
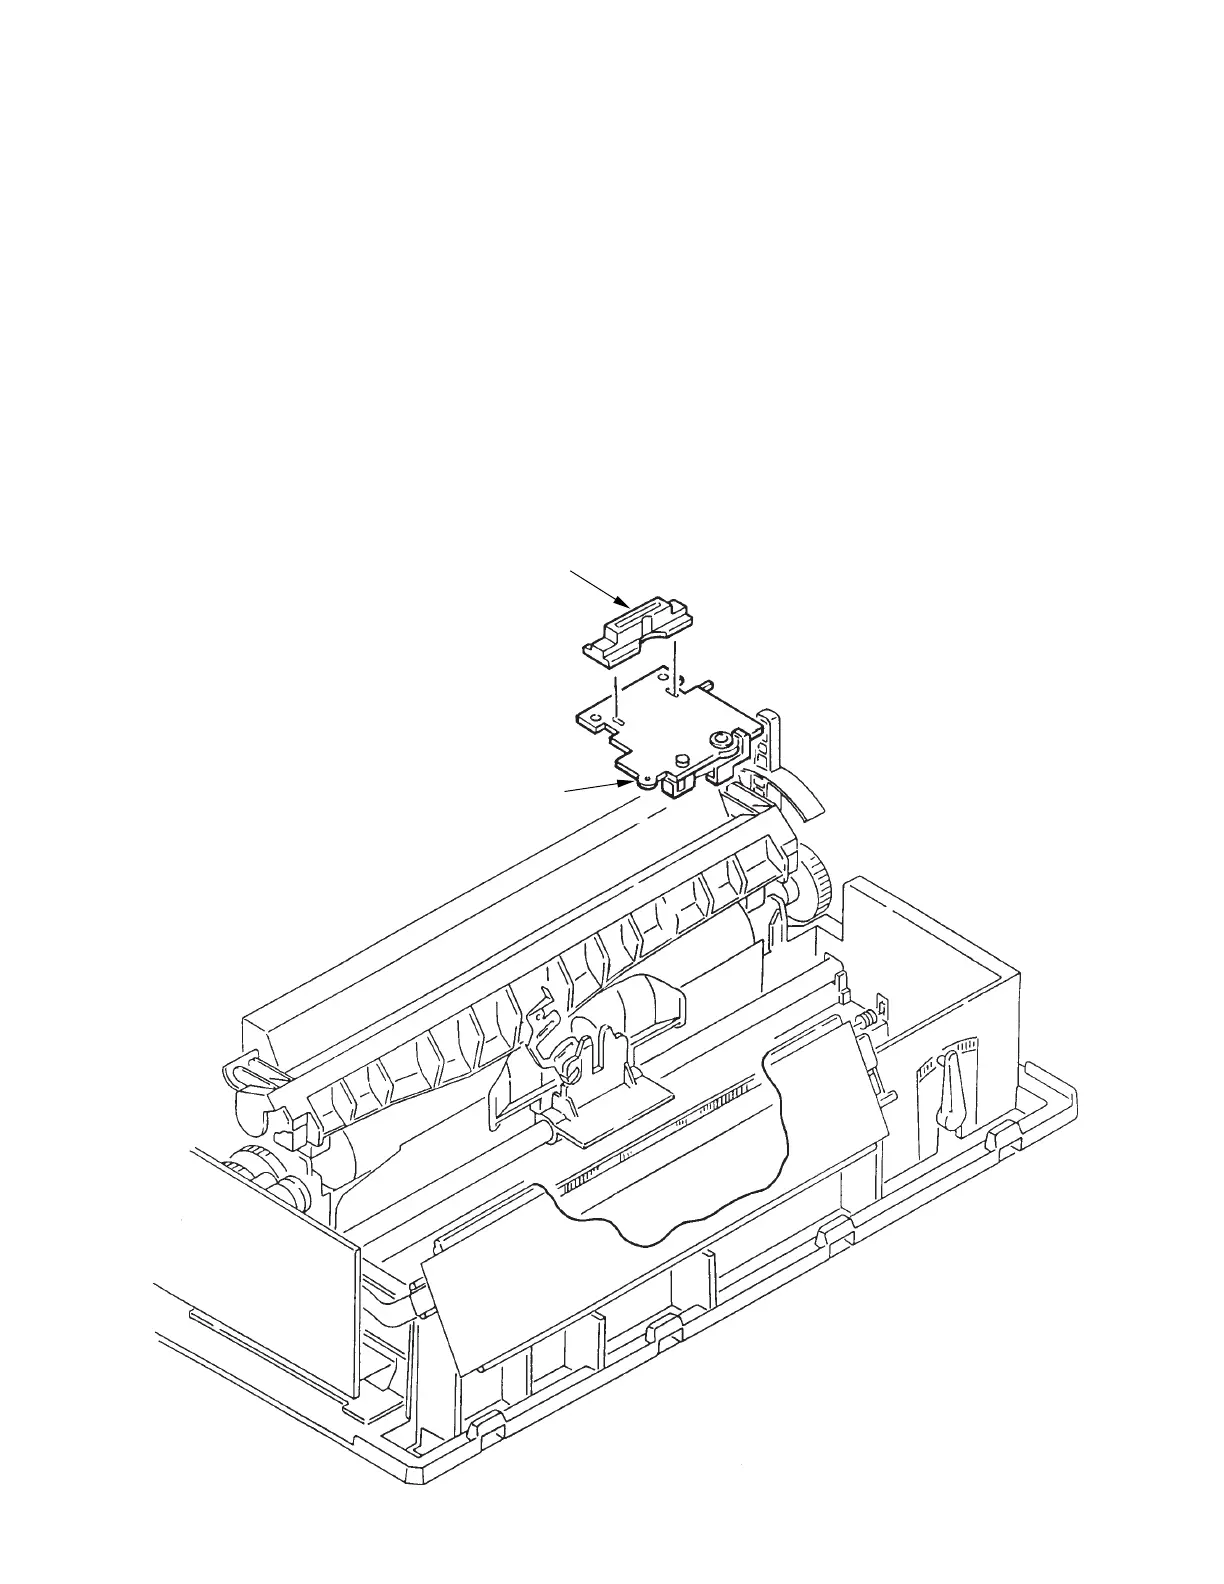
3.3.6 PC Connector
(1) Remove the upper cover (see 3.3.4).
(2) Remove the printhead (see 3.3.1).
(3) Remove the shim from the carriage frame.
(4) Remove the gear case Assy (see 3.3.5).
(5) Remove the PC connector 1 from the space motor Assy 2.
(5) To install, follow the removal steps in reverse order. Be sure to replace the shim on the
carraige frame in exactly the same position as it was before disassembly
Notes on installation:
(1) Do not touch the space motor 2 or terminals of PC connector 1. Also, take care to avoid
dust or foreign matter.
(2) After installation, check and adjust the gap between platen and printhead (see 4-1).
1
2