7 Digital I/O Slave Unit
7 - 20
GX-series EtherCAT Slave Unit User’s Manual
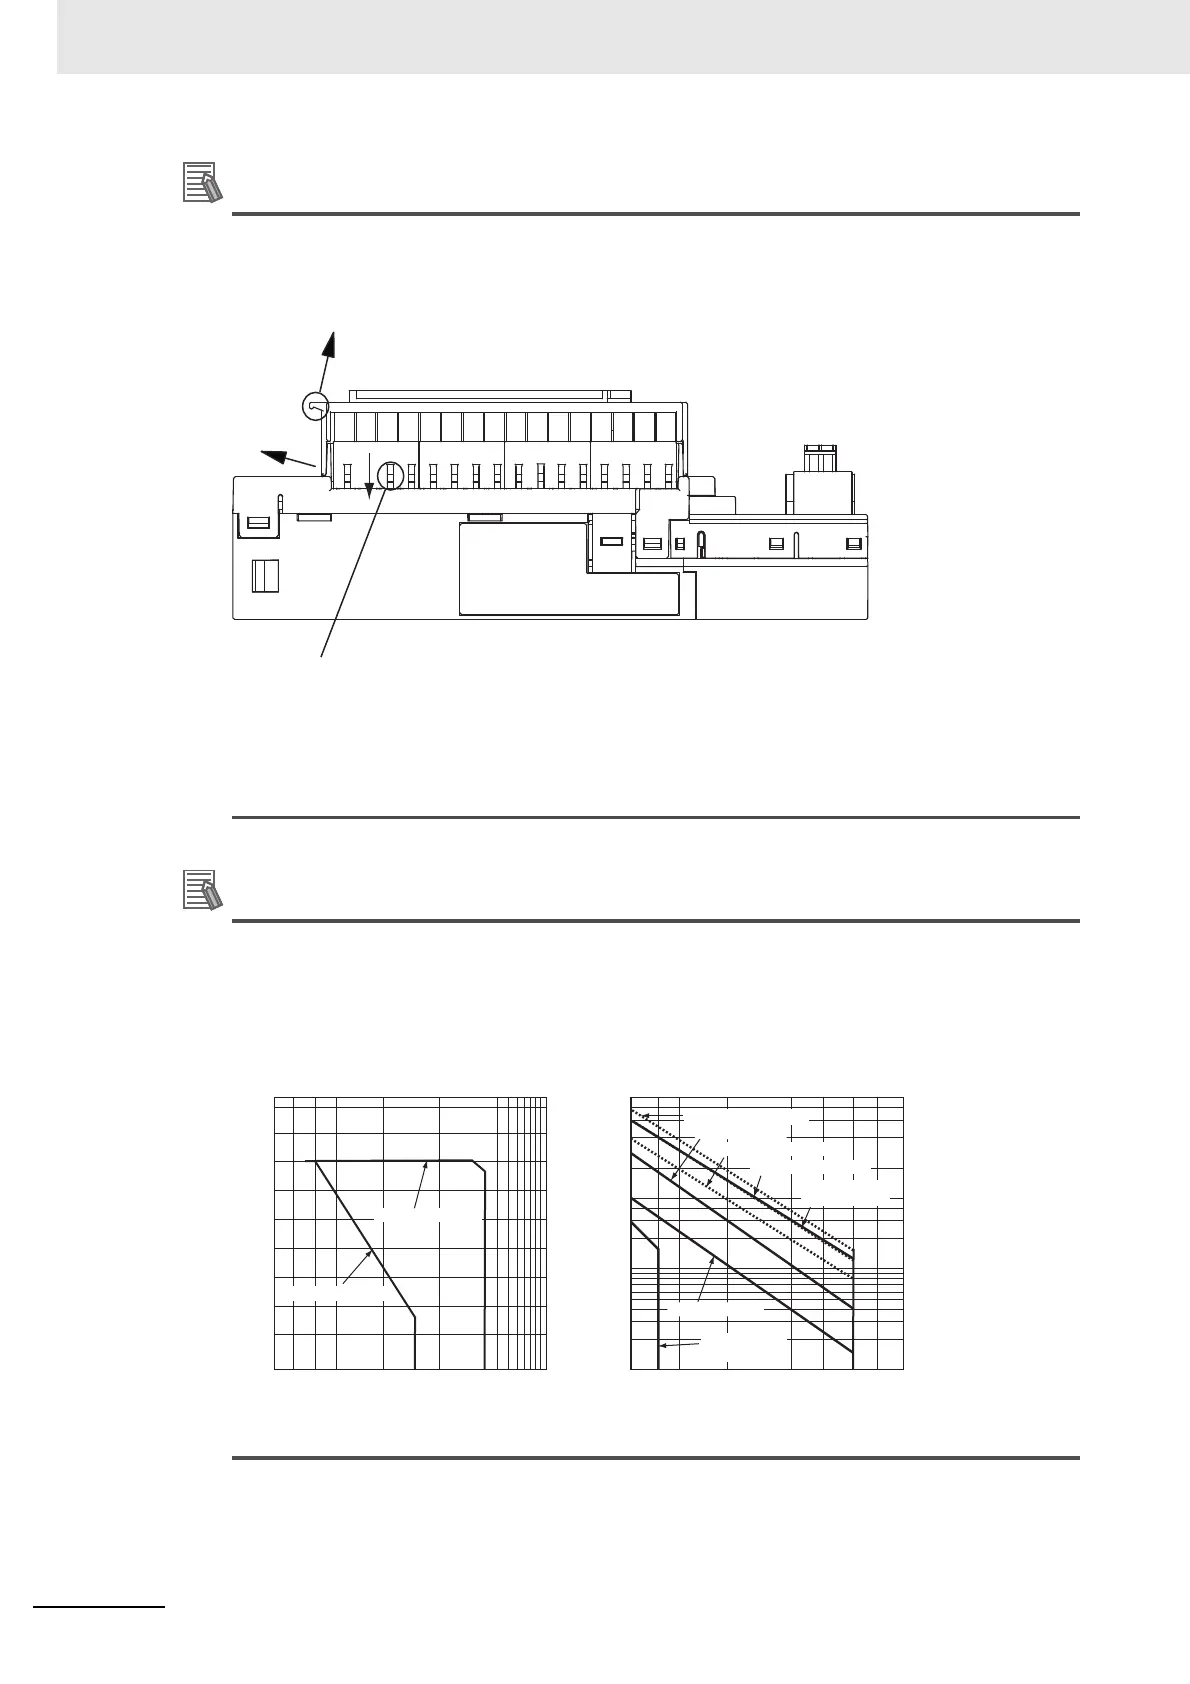
Replacing relays
To replace output section relays, first remove the cover using the following procedure.
(1) Grab the handle with a finger and bend it upward.
(2) The side deflects in the direction of the arrow and the hook is removed.
(3) Press down the relay socket lever in the arrow direction using a driver and so on.
The relay pops up from the socket and can be removed.
Relay actual measurement data
The graphs below show the actual measurement values of relay characteristics sampled from
the production lines. There is some variation in relay characteristics, so use this data for
reference only.
30 VDC, t = 40ms
30 VDC/240 VAC
Resistance load
240 VAC, COSφ = 0.4
0.1 0.3 0.5 1 3 5
2
3
5
10
20
30
50
100
200
300
500
Contact current (A)
● Durability curve
Number of operations (× 10
4
times)
DC resistance load
AC resistance load
Contact current (A)
0.1
0.3
0.5
1
3
5
Contact voltage (V)
10
20
200 500 1000
● Maximum switching capacity
30 30050 100
0.2
2
0.2 4
100 to 200 VDC
t = 7 to 40ms
120-VAC resistance load
120 VAC, COSφ = 0.4
30 VDC, t = 7ms
0.4
4
 Loading...