34
Connection to a PC by the Host Link
Section 2-4
2-4-2 Connecting the NT20S
Refer to the illustrations below to select the appropriate cable for the unit connec-
tors and connect the NT20S to the PC/Host.
To make a connector cable, refer to Appendix G Method for Making the Cable for
Connection to the Host (page 256).
Caution: S After connecting the communication cable, always secure it with the screws.
Otherwise the cable may disconnect, causing operation to fail.
S The cable’s tensile load is 30 N. Do not subject it to loads greater than this.
Otherwise a discontinuity may occur, causing operation to fail.
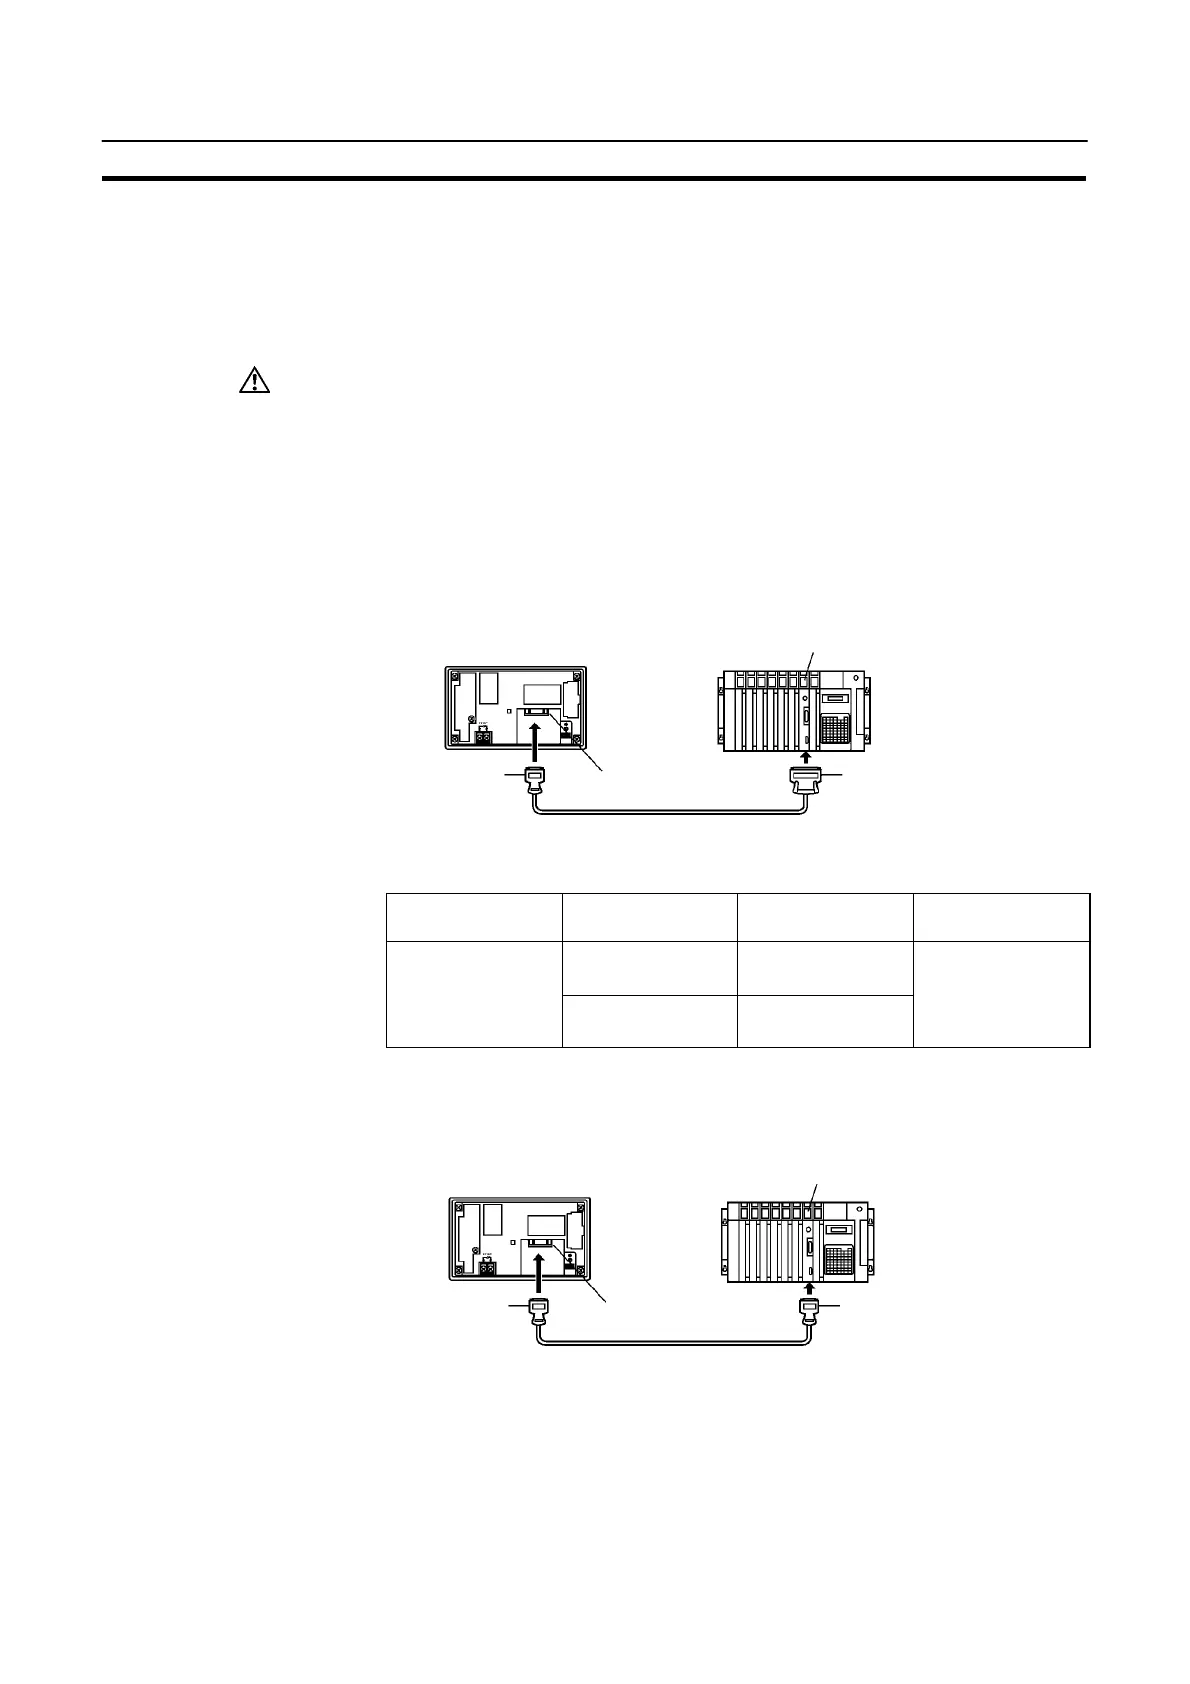
Connecting to a PC with a 25-pin Connector
Use a connector cable with a 25-pin connector on one end and a 9-pin connector
on the other end (NT20S side) to connect the NT20S to a PC with a 25-pin connec-
tor.
Host I/F connector
(RS-232C 9-pin type)
SYSMAC C series
PC, CVM1/CV
series PC
Host link unit/CPU unit
9-pin connector 25-pin connector
RS-232C connector cable
NT20S
Use the following recommended cables (OMRON);
Connector
Specification
Type Cable Length
Applicable
Host Link Unit
XW2Z-200S 2m
C500-LK203
C500-LK201-V1
25-pin to 9-pin
XW2Z-500S 5m
C120-LK201-V1
C200H-LK201
CV500-LK201
Connecting to a PC with a 9-pin Connector
Use a connector cable with a 9-pin connector on both ends to connect the NT20S
to a PC with a 9-pin connector.
Host I/F connector
(RS-232C 9-pin type)
SYSMAC C series
PC, CVM1/CV
series PC
Host link unit/CPU unit
9-pin connector
RS-232C connector cable
NT20S
9-pin connector
Note: The connector cable wiring for the C series CPU unit (CjjH) is different from that
for the other PCs. For details, refer to Appendix G Method for Making the Cable for
Connection to the Host (page 256).