supply is ON. When adjusting for sensors that are not presently in use,
the flowchart.
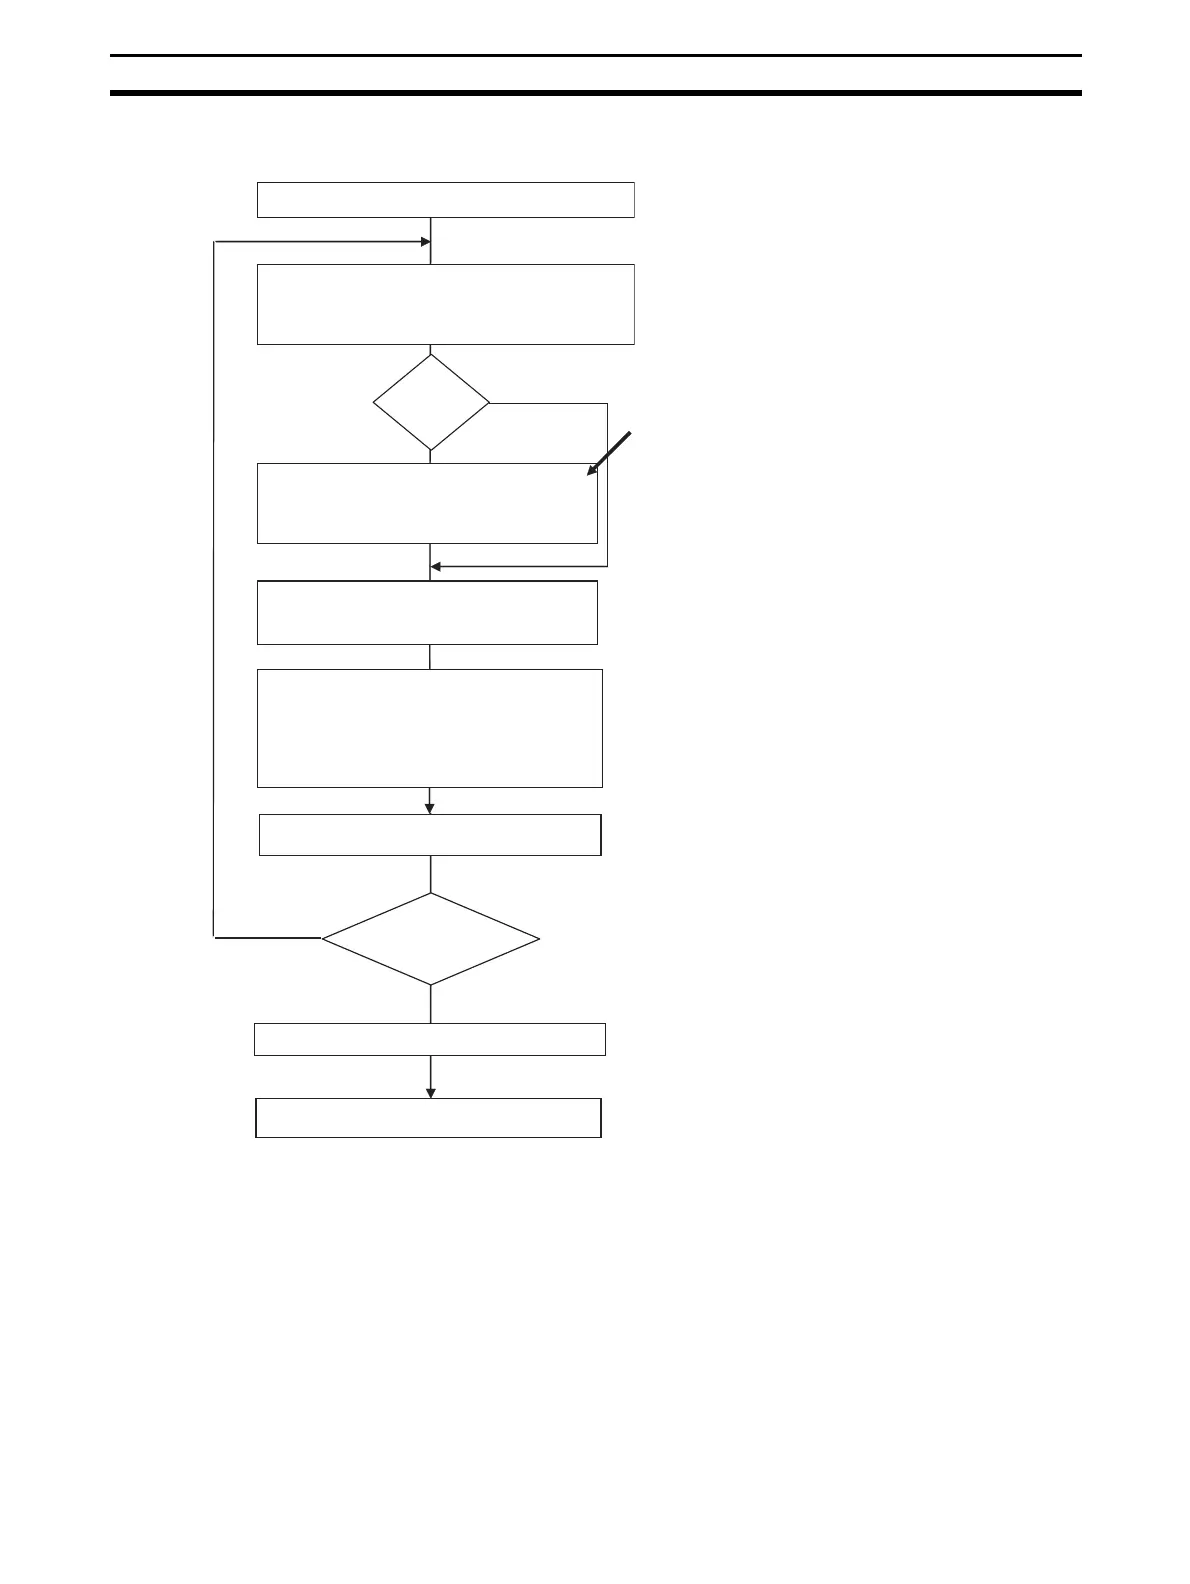
Prepare the devices required for adjustment.
Connect the devices required for adjustment (i.e.,
upper/lower limit adjustment).
First
adjustment?
Turn ON the power to the related system
devices. Wait at least 30 minutes for the
GRT1-TS2T’s internal temperature to stabilize.
This stabilization time is the time required
when the power is turned ON for the first time.
This step can be skipped when adjusting the
second and following inputs.
Refer to the Operating Manuals for the other
devices in the system for details on their
required stabilization times, if any.
Set the input's lower limit adjustment value.
Set the input's upper limit adjustment value.
Remove the devices connected for upper/lower
limit adjustment and connect the devices
require for bias compensation. Wait 60 minutes
for the terminal block temperature to stabilize.
A cold junction compensator and compensating
conductor (e.g., zero conductor) are required
for the thermocouple being adjusted.
Set the input's bias compensation.
Adjust other
inputs?
Test indication accuracy after adjustment.
End

 Loading...