Install Processor (CPU)
Chapter5 • Servicing FRUs 101
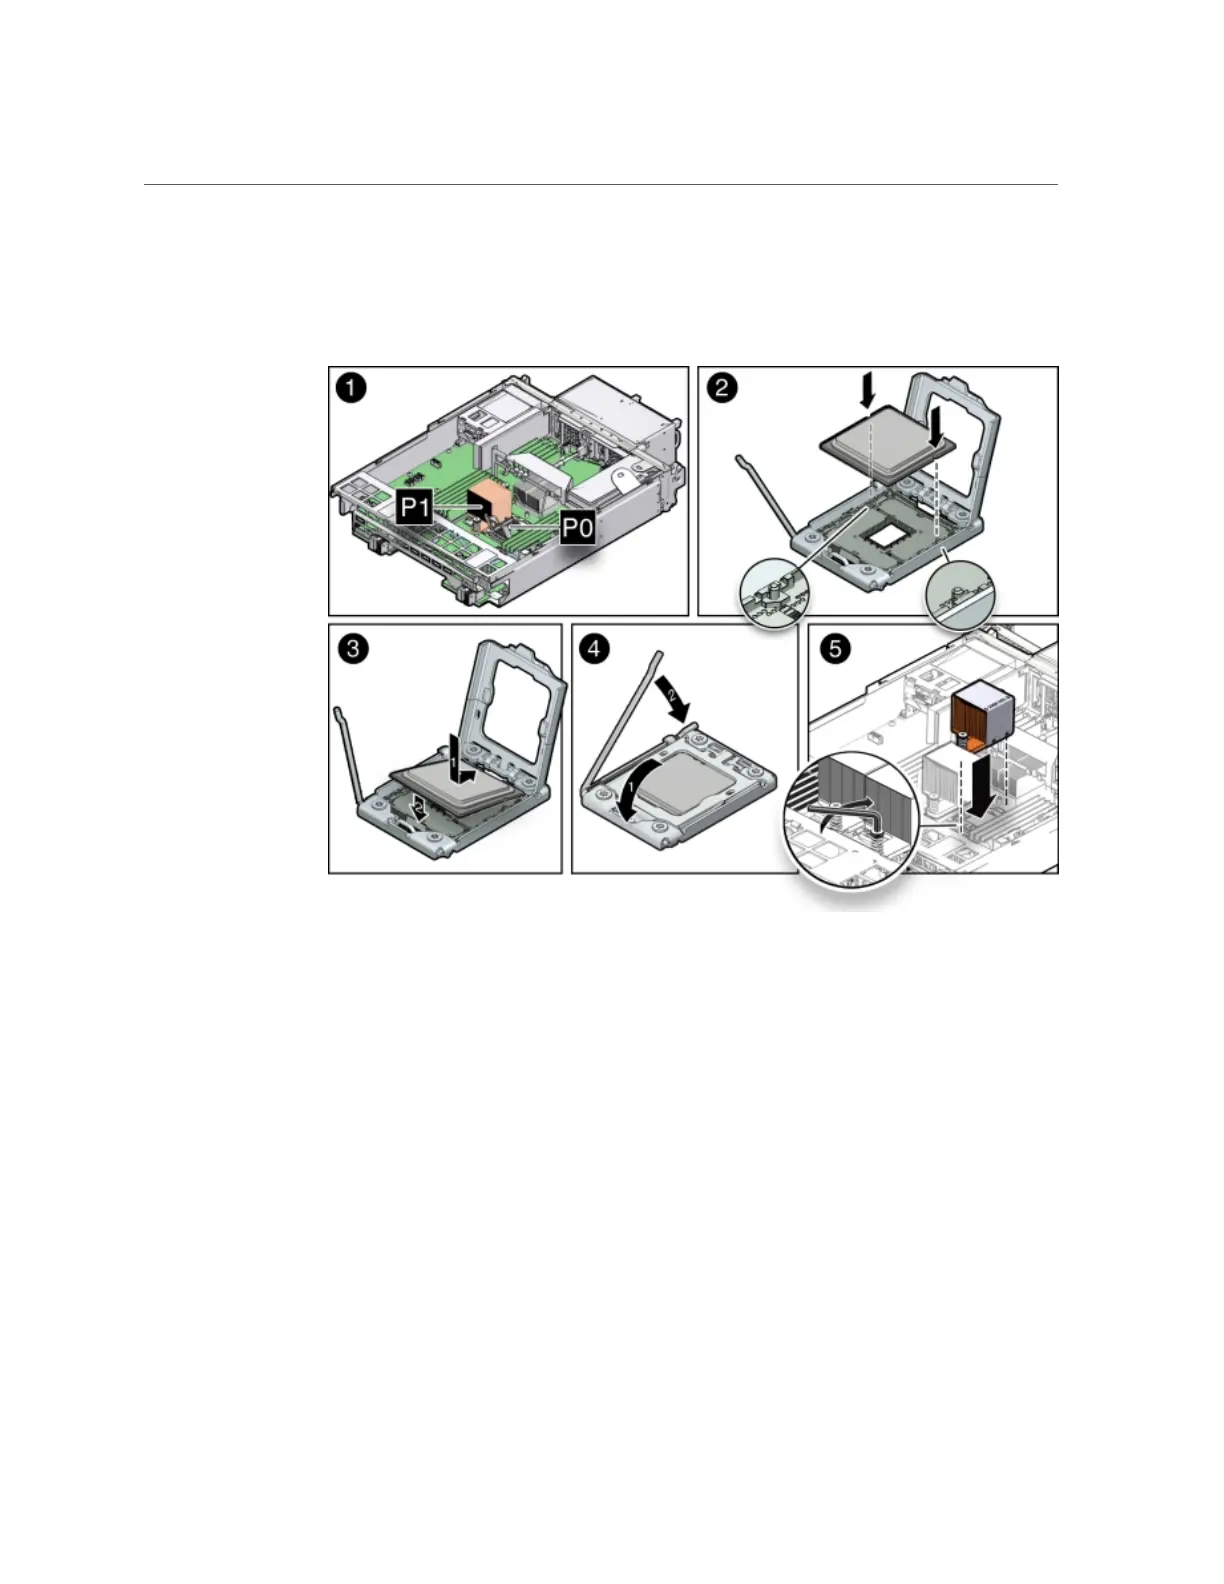
raised end of the CPU with the index finger on your other hand, and lower
the CPU into the socket [3].
b.
Lower the pressure frame to the closed position [4].
Ensure that the pressure frame sits flat around the periphery of the CPU.
c.
Engage the release lever by rotating it downward and slipping it under the
catch [4].
d.
Ensure that there is no debris on the top of the CPU die.
e.
Use the syringe (supplied with the new or replacement CPU) to apply
approximately 0.1 ml of thermal grease to the center of the top of the CPU.
Do not distribute the grease.
f.
Orient the heatsink so that the DIMM SIDE label on the top of the heatsink
is facing the memory modules (DIMMs) and the two captive Phillips screws
align with the mounting studs.