Oracle Database Appliance (Original Version) Hot-Swappable Components
Chapter3 • Servicing CRUs That Do Not Require System Power Off 47
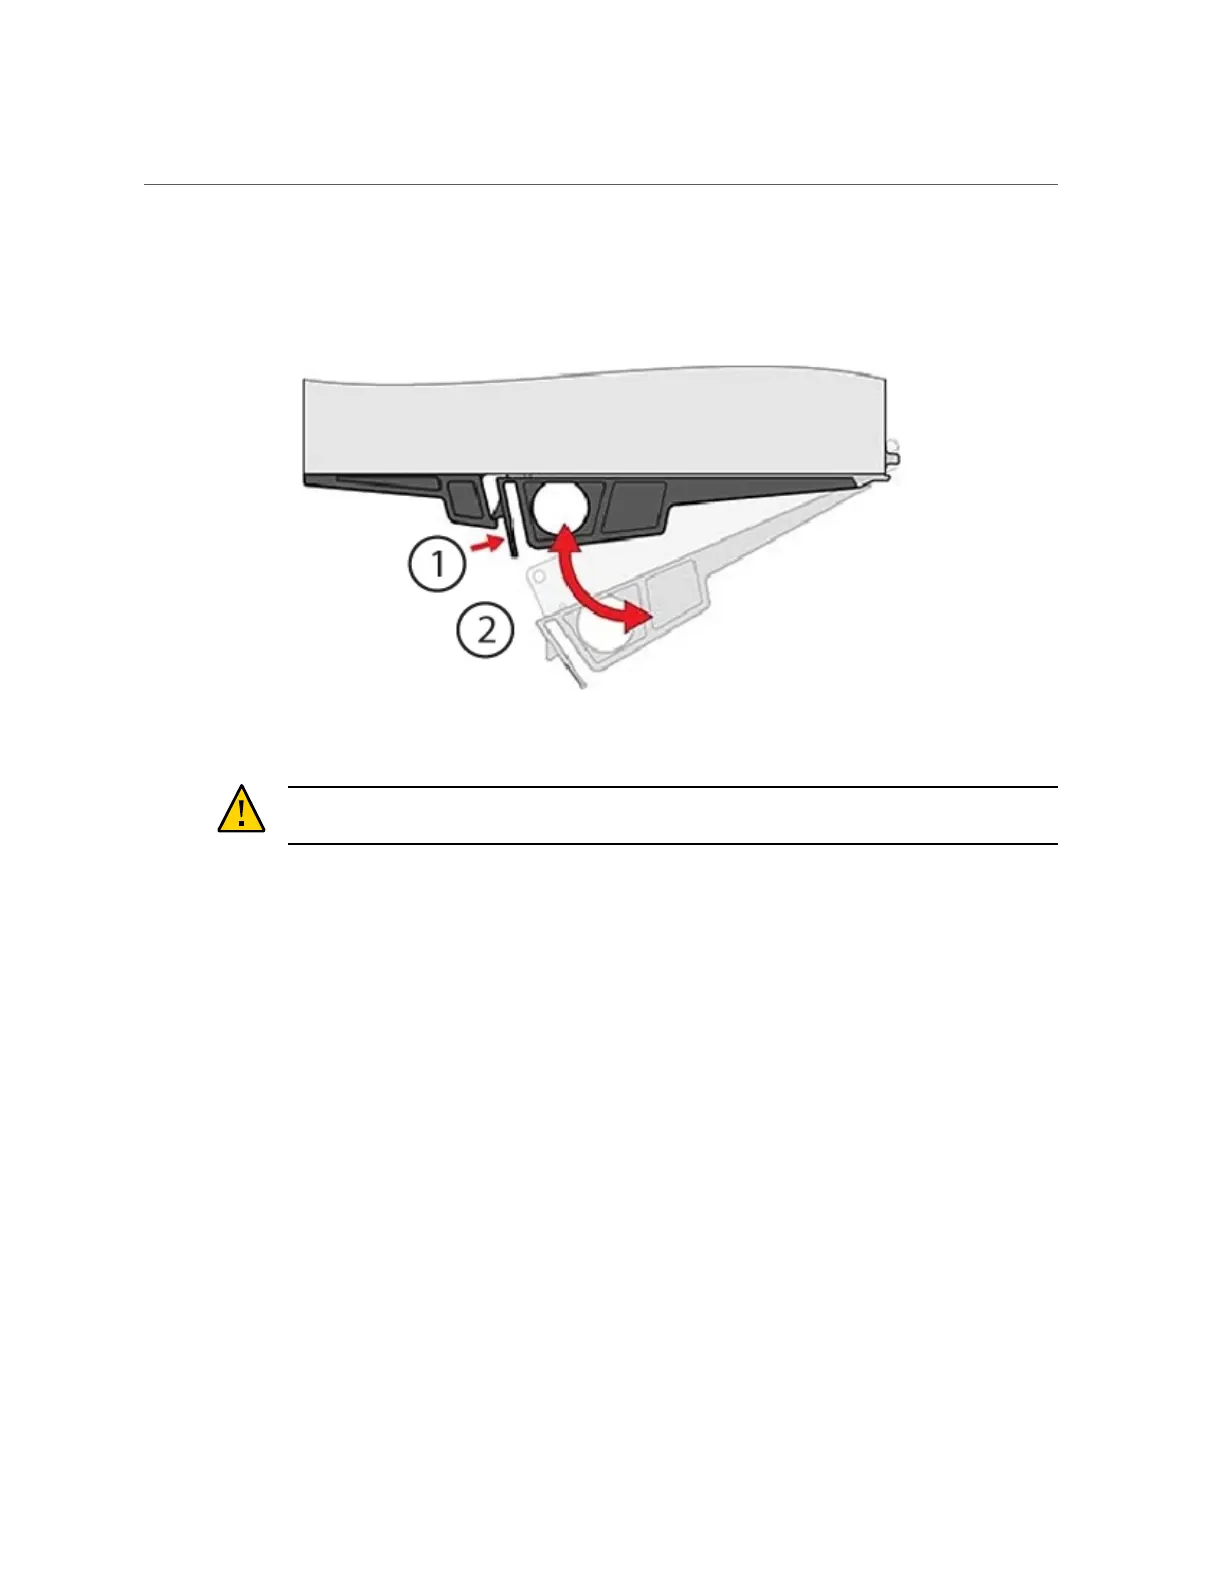
2.
Using your thumb and forefinger, squeeze the release button [1] toward the lever
hole to release the lever [2].
3.
Grasp the lever and remove the I/O module.
Caution - Equipment damage. Be careful not to damage the connector pins at the back of the
I/O module.
4.
Open the lever in the new I/O module if it is not already open.
5.
Slide the new I/O module into the disk shelf.
6.
Reconnect the cables.
7.
Verify that the new I/O module is working correctly.
■
After approximately 60 seconds, the power LED should be solid green and the Fault/Locate
LED should be off.
■
For each port that has a cable connected, all four activity LEDs should be solid green.
Oracle Database Appliance (Original Version) Hot-
Swappable Components
This section describes replacing hot-swappable components for the Oracle Database Appliance
(original version) for service. If you have Oracle Database Appliance X3-2, Oracle Database