57
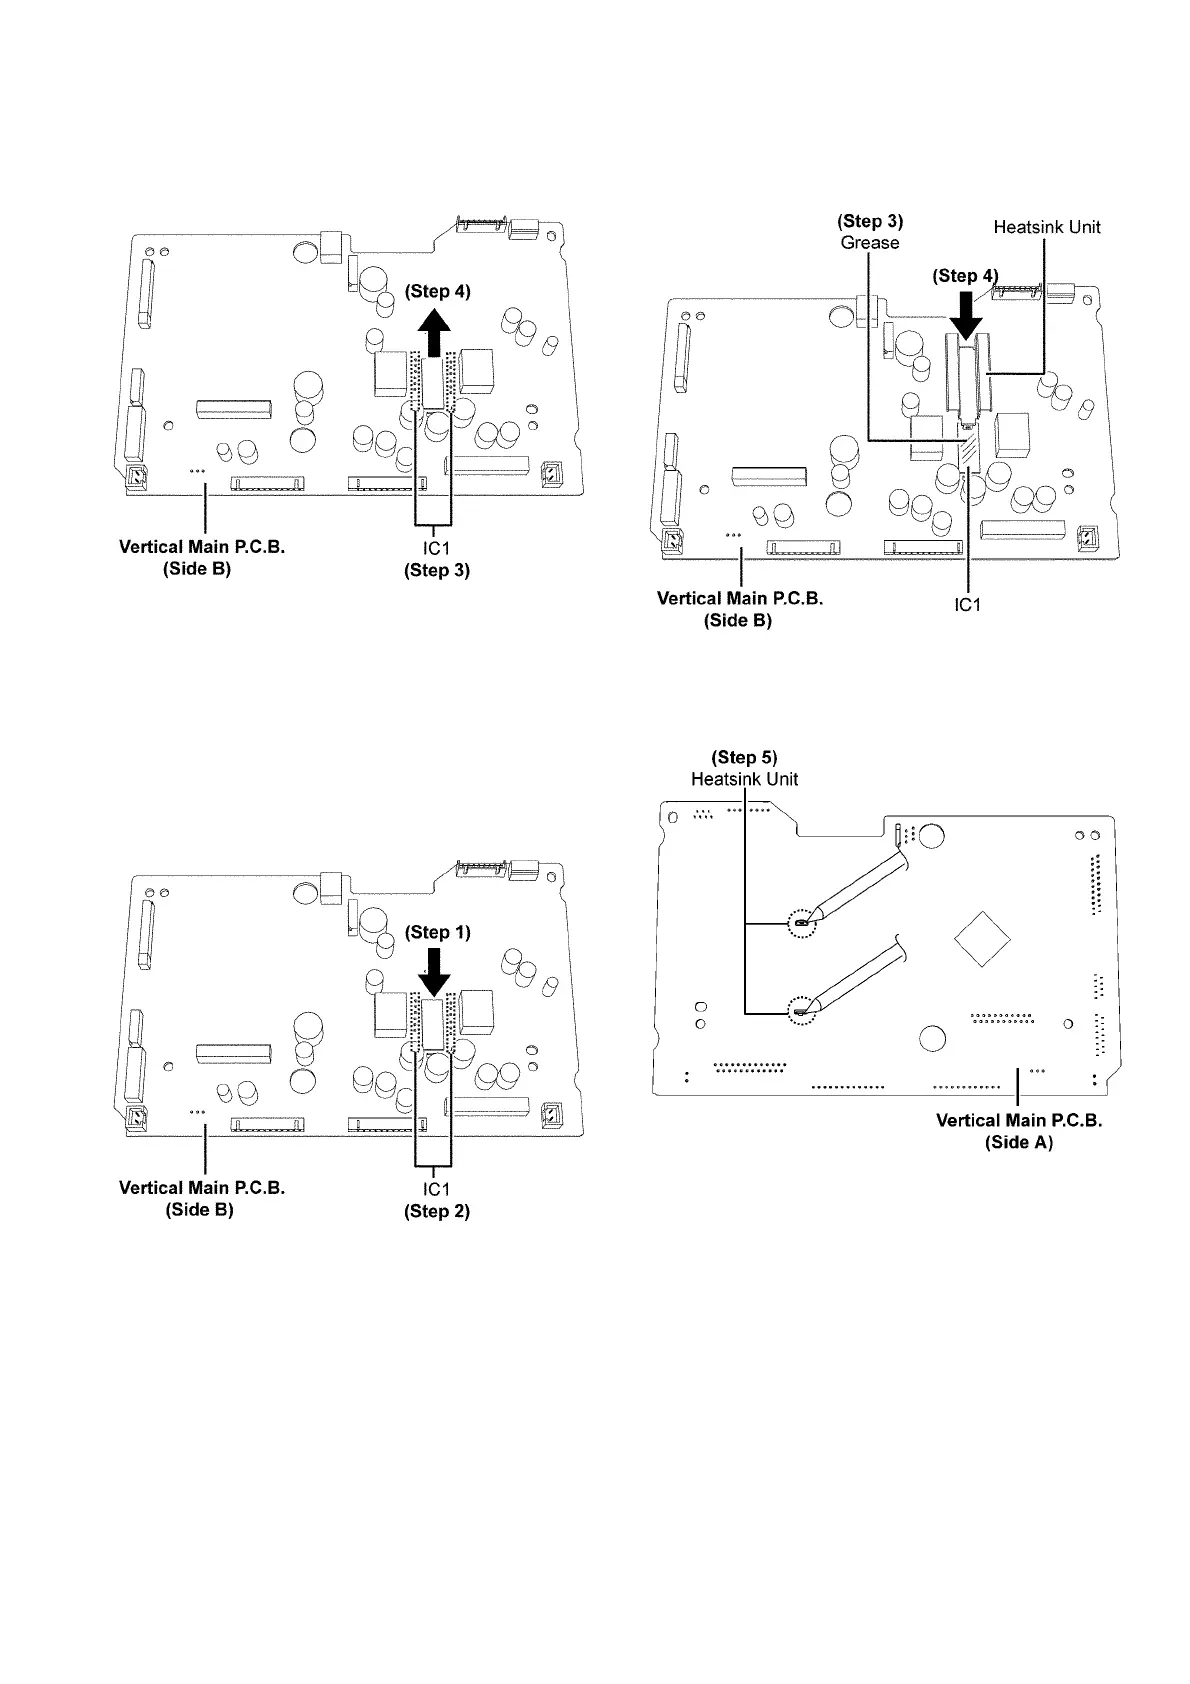
Step 3 : Desolder pins of Power Amplifier IC (IC1) on the Verti-
cal Main P.C.B. (Side B).
Step 4 : Remove the Power Amplifier IC (IC1).
9.28.2. Assembly of Power Amplifier IC
(IC1)
Step 1 : Fix the Power Amplifier IC (IC1) onto Vertical Main
P.C .B .
Step 2 : Solder pins of the Power Amplifier IC (IC1).
Caution : Ensure the Power Amplifier IC (IC1) is seated
properly onto the Vertical Main P.C.B. before soldering.
Step 3 : Apply grease onto the top side of the Power Amplifier
IC (IC1).
Step 4 : Fix the Heatsink Unit onto the Vertical Main P.C.B..
Step 5 : Solder pins of the Heatsink Unit.
 Loading...